background image

23

D-Link DCS-5222L User Manual

Section 4 - Configuration

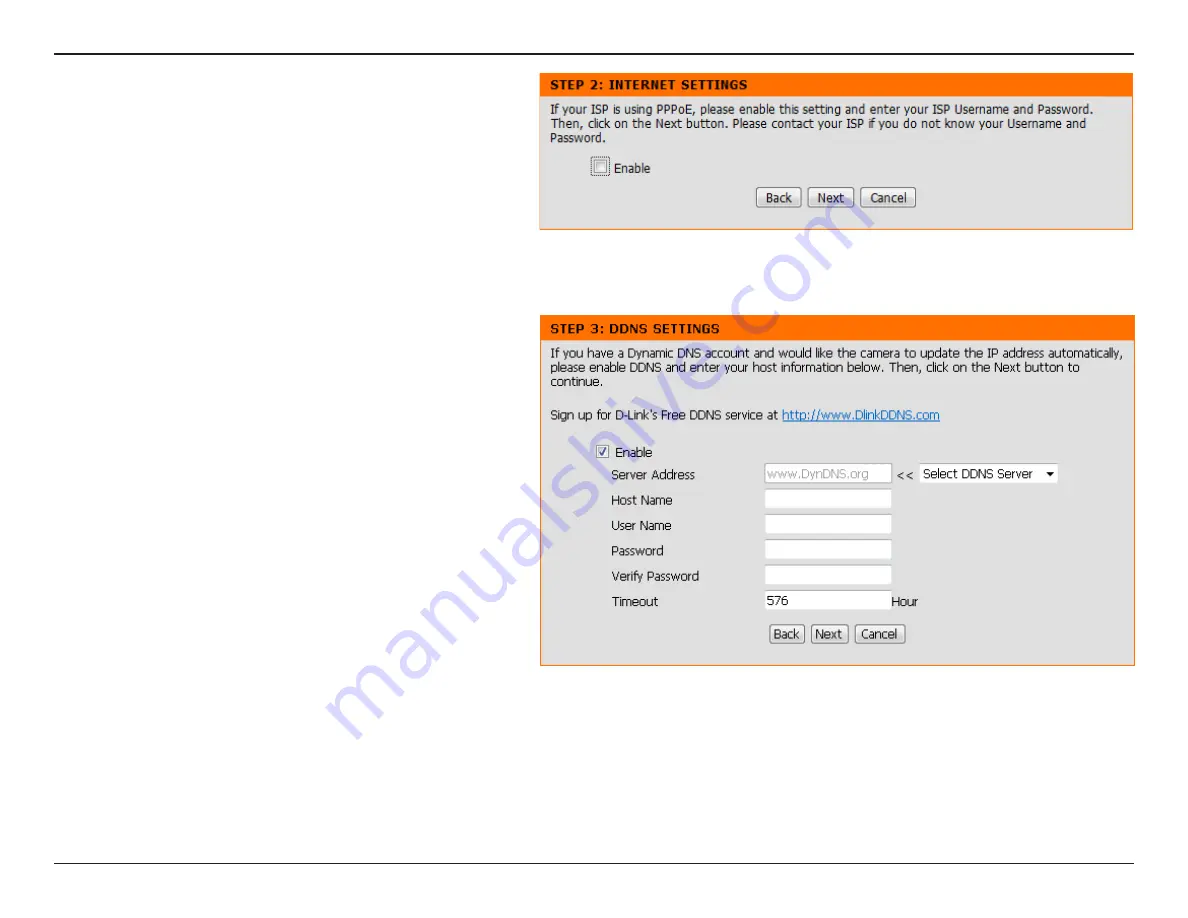
A Dynamic DNS account allows you to access your camera over 

the Internet when you have an IP address that changes each 

time you connect to the Internet. If you have a Dynamic DNS 

account, click 

Enable

 and enter the following details:

If you are required to connect using PPPoE, select 

Enabled

 and 

enter the Username and Password for your PPPoE connection. 

Only select this option if your camera is directly connected to 

your broadband modem. If it is on a network with a router or 

gateway, do not select. 

Click 

Next

 to continue.

Click to enable the DDNS function.

(Dynamic Domain Name Server) will hold a 

DNS host name and synchronize the public 

IP address of the modem when it has been 

modified. The username and password are 

required when using the DDNS service.

Select your Dynamic DNS Server from the drop 

down menu.

Enter the host name of the DDNS server.

Enter your username or email address used to connect to the DDNS.

Enter your password used to connect to the DDNS server.

You can setup how often the camera notifies the DDNS server of its current global IP address by entering a whole number in hours. 

Enable:

DDNS:

Server Address: 

Host Name:

User Name:

Password:

Timeout:

Summary of Contents for DCS-5222L

Page 1: ...User Manual Version 2 0 01 23 2014 DCS 5222L HDPan TiltDay NightNetworkCamera ...

Page 2: ...trademarks or registered trademarks of D Link Corporation or its subsidiaries in the United States or other countries All other company or product names mentioned herein are trademarks or registered trademarks of their respective companies Copyright 2014 by D Link Corporation All rights reserved This publication may not be reproduced in whole or in part without prior expressed written permission f...

Page 3: ...ated on the electrical ratings label If you are not sure of the type of power source required consult your local power company Use only the power adapter with the product Using another adapter not recommended by the manufacturer may damage the product and invalidate the warranty To help prevent an electric shock plug the product into properly grounded electrical outlets Observe power strip ratings...

Page 4: ...cation where it could become wet Ensure the product is fixed securely otherwise it may fall and cause injury This product is NOT intended to replace proper supervision of children You must check your child s activity regularly as this product will not alert parents to activity of children Do not use extension cords Only use the power adapter provided Do not use this product near a heat source THIS...

Page 5: ...ation 9 Camera Installation Wizard 9 mydlink 12 Camera Status 13 Live Video 14 SD Card 15 Settings 16 Configuration 17 Configuration Utility 17 Live Video 18 Setup 21 Setup Wizard 21 Internet Connection Setup Wizard 22 Motion Detection Setup Wizard 26 Network 28 Wireless 31 Dynamic DNS 32 Image Setup 33 Audio and Video 35 PTZ 37 Motion Detection 39 Sound Detection 40 Time and Date 41 Event Setup 4...

Page 6: ...mware Upgrade 58 Status 59 Device Info 59 Log 60 Help 61 Configuring the DCS 5222L with a Router 62 Troubleshooting 68 Networking Basics 71 Check your IP address 71 Statically Assign an IP Address 72 DI DO Specifications 73 Technical Specifications 74 Contacting Technical Support 76 Warranty 77 Registration 83 ...

Page 7: ... than the one included with the DCS 5222L will cause damage and void the warranty for this product If any of the above items are missing from your package please contact your retailer Product Overview DCS 5222L HD Pan Tilt Day Night Network Camera CAT5 Ethernet Cable Power Adapter Audio In Out Cable Mounting Kit Quick Install Guide ...

Page 8: ...to your router Windows 8 7 Vista XP SP3 or Mac OS X 10 5 or above Web based Configuration Utility Requirements Browser Requirements Internet Explorer 7 or higher Firefox 12 or higher Safari 4 or higher Chrome 20 or higher Windows Users Make sure you have the latest version of Java installed Visit www java com to download the latest version mydlink Website Requirements Broadband Internet connection...

Page 9: ... high quality video images for security and surveillance It can be accessed remotely and controlled from any PC Notebook over your local network or across the Internet via a web browser The DCS 5222L features 802 11n wireless connectivity allowing the camera to be placed anywhere within range of your wireless network The DCS 5222L comes with remote monitoring and motion detection features for a co...

Page 10: ... in the world The network cameras have a wide range of applications including industrial and public monitoring of homes offices banks hospitals child care centers and amusement parks 802 11n Wireless or Ethernet Fast Ethernet Support The DCS 5222L offers wireless 802 11n and Ethernet Fast Ethernet connectivity making the DCS 5222L easy to integrate into your existing network environment The DCS 52...

Page 11: ...er Link LED The LED will be solid red while the camera boots performs a self test and searches for a network connection The LED will switch to solid green when a proper connection has been achieved The LED will blink green during data transfer 5 Light Sensor Detects light levels and adjusts IR LEDS accordingly 6 Camera Lens Records video of the surrounding area 7 Microphone Records audio from the ...

Page 12: ...computers switches and routers 2 Audio 3 5 mm jack for audio I O devices such as microphones and speakers 3 Reset Button Press the reset button to return the device back to it s factory conditions 4 DI DO Attach digital I O devices such as alarms or motion sensors 5 Power Receptor Connects to the power adapter 1 2 3 4 5 ...

Page 13: ...nction with the built in microphone to enable the camera to acts as an intercom 2 Antenna The external antenna increases the device s range of connectivity 3 WPS Button Use WPS Wi Fi Protected Setup to easily create a secure connection to your network 4 microSD Slot Insert a microSD card to store recorded images and video 1 2 3 4 ...

Page 14: ...5 degree angle appears to be almost 3 feet 1 meter thick At a 2 degree angle it looks over 42 feet 14 meters thick Position your devices so that the signal will travel straight through a wall or ceiling instead of at an angle for better reception 3 Building Materials make a difference A solid metal door or aluminum studs may weaken the wireless signal Try to position your access points wireless ro...

Page 15: ...k of the version Windows or Mac you want to download Depending on your web browser you may need to right click the link and select Save link as Once downloaded launch the wizard and follow the on screen instructions The wizard will walk you through connecting and configuring your camera Once finished skip to page 12 Note If you experience issues registering this camera with your mydlink account tr...

Page 16: ... press and hold the WPS button on the cameraforfiveseconds TheWPSstatusLEDwillstarttoblink Then presstheWPS button on your Cloud Router within two minutes Step 3 From any computer open a web browser go to http www mydlink com and log into your account Once mydlink detects your camera a New Device Found notice will appear in the bottom left corner Click on the camera from the New Devices list and t...

Page 17: ...router wirelessly you can simply disconnect the Ethernet cable and move the camera to its intended location your router s wireless settings have been automatically transferred to the camera and no further configuration is required Your camera is now set up and you can skip to mydlink on the next page to learn more about the mydlink features of this camera or to Configuration on page 17 for advance...

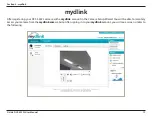
Page 18: ...nk After registering your DCS 5222L camera with a mydlink account in the Camera Setup Wizard You will be able to remotely access your camera from the mydlink com website After signing in to your mydlink account you will see a screen similar to the following ...

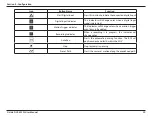
Page 19: ...ra s cable connections and make sure they are secure Check to make sure that the power LED on your camera is lit solid red If you still cannot access your camera reset your camera and run the Camera SetupWizard again from the CD ROM included in your package The online status of each camera will be displayed Your online status may be one of the following A red x indicates that your camera is offlin...

Page 20: ...ion 3 mydlink Live Video If the camera is available a LiveVideo feed will be displayed Video will be shown at full resolution if viewing your camera from a PC on the same local network or viewing your camera from a PC on a remote network ...

Page 21: ...15 D Link DCS 5222L User Manual Section 3 mydlink Select the recording date and click GO to view recorded video from your microSD card Recording Date SD Card ...

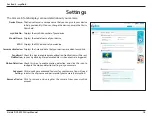
Page 22: ... that your device was added to mydlink Check this box to enable email notification Notifications will be sent to your mydlink registered email address when events are triggered Check this box to enable motion detection and click the icon to configure the motion detection settings on your camera Click to configure advanced features for your camera You will need to enter the username and password of...

Page 23: ...tility is designed to allow you to easily access and configure your DCS 5222L At the end of the wizard click GoTo Camera or enter the IP address of your camera into a web browser To log in enter your user name admin and the password you created in the InstallationWizard If you did not create a password the default password is blank After entering your password click OK Configuration Utility ...

Page 24: ...s original position Click this button to quickly move the camera to the desired patrol setup according to preset positions Please refer to PTZ on page 37 to create preset positions This will stop pan and patrol Select from the preset drop down list to quickly move the camera to the desired preset position Please refer to PTZ on page 37 to create preset positions These setting can change the camera...

Page 25: ... in a folder specified using the Storage Folder button Video Recording Button Triggersthecamera srecordingfunction This will record the video displayed on the screen and will save it to a file on the hard drive in a folder specified using the Storage Folder button Storage Folder Button Sets the location to save snapshots and video recordings Listen Button Sends the audio received from the camera s...

Page 26: ...hen a digital input signal is detected Motion Trigger Indicator This indicator will change color when a motion trigger event occurs if enabled Recording Indicator When a recording is in progress this indicator will change color Auto Pan Starts the automatic panning function The ROI will pan from back and forth within the FOV Stop Stops automatic panning Preset Path Starts the camera s motion along...

Page 27: ...otion Detection Setup Wizard that includes step by step instructions Please refer to page Motion Detection SetupWizard on page 26 for more details Ifyouwouldrathermanuallysetupthecamera s motion detection features you can refer to page Motion Detection on page 39 which provides more details on the information required Internet Connection Setup Wizard Manual Internet Connection Setup Motion Detecti...

Page 28: ...er usually enabled on your router to assign the camera its IP settings If you want to manually assign the IP settings select Static IP Address and enter the following details Enter an IP address for your camera Enter the subnet mask of your network Enter the default gateway address This is usually the IP address of your router Enter the primary DNS server s IP address This is usually the IP addres...

Page 29: ...network with a router or gateway do not select Click Next to continue Click to enable the DDNS function Dynamic Domain Name Server will hold a DNS host name and synchronize the public IP address of the modem when it has been modified The username and password are required when using the DDNS service Select your Dynamic DNS Server from the drop down menu Enter the host name of the DDNS server Enter...

Page 30: ...is in so that scheduled events occur at the correct time If your time zone observes daylight saving check the Enable Daylight Saving box and select Auto Daylight Saving to have DST set automatically or select Set date and time manually to enable drop down menus so that you can set the start and end time of daylight saving yourself Click Next to continue ...

Page 31: ...k DCS 5222L User Manual Section 4 Configuration Asummaryoftheoptionsyouselectedisdisplayedforconfirmation If youarehappywiththeselectedconfiguration click Apply otherwise click Back to make the required changes ...

Page 32: ...cify the detection sensitivity and adjust the camera s ability to detect movement You may specify whether the camera should capture a snapshot or a video clip when motion is detected Please see Motion Detection on page 4239 for information about how to configure motion detection Step 2 This step allows you to enable motion detection based on a customized schedule Specify the day and hours You may ...

Page 33: ...choose not to receive notifications or to receive noti fications via e mail or FTP Please enter the relevant information for your e mail or FTP account Click Next to continue Step 4 You have completed the Motion Detection Wizard Please verify your settings and click Apply to save them Please wait a few moments while the camera saves your settings and re starts ...

Page 34: ...tically If you choose DHCP you do not need to fill out the IP address settings You may obtain a static or fixed IP address and other network information from your network administrator for your camera A static IP address may simplify access to your camera in the future Enter the fixed IP address in this field Thisnumberisusedtodetermineifthedestination is in the same subnet The default value is 25...

Page 35: ...wsthecameratoaddport forwarding entries into the router automatically on a UPnP capable network Enable this setting if your network uses PPPoE Enter the username and password for your PPPoE account Re enter your password in the Confirm Password field You may obtain this information from your ISP The default port number is 80 The default name is video mjpg where is the number of the stream You may ...

Page 36: ... making any bandwidth reservations Enabling QoS allows you to specify a traffic priority policy to ensure a consistent Quality of Service during busy periods If the network camera is connected to a router that itself implements QoS the router s settings will override the QoS settings of the camera Enable the IPV6 setting to use the IPV6 protocol Enabling the option allows you to manually set up th...

Page 37: ...nother computer If you are using Ad Hoc mode select the channel of the wireless network you wish to connect to or select Auto Select the type of authentication you are using on your wireless network Open Shared WEP WPA PSK or WPA PSK2 If you are using WPA PSK or WPA PSK2 authentication you will need to specify whether your wireless network uses TKIP or AES encryption If you use Open or Shared auth...

Page 38: ...onnect to the DDNS server Enter your password again for verification You can setup how often the camera notifies the DDNS server of its current global IP address by entering a whole number in hours Displays the connection status of your DDNS account DDNS Server Address Host Name User Name Password Confirm Password Timeout Status This section allows you to configure the DDNS setting for your camera...

Page 39: ...e to bring up the following menu options Disable All Disables all mask areas Enable All Enables all mask areas Reset All Clears all mask areas If the video flickers try enabling this setting This will flip the image horizontally This will flip the image vertically Select the frequency used by your power lines to avoid interference or distortion Use the drop down menu to change the white balance se...

Page 40: ...of gain to apply to brighten the picture This setting controls the amount of noise reduction that will be applied to the picture This adjusts the brightness of the camera image This adjusts the contrast of the camera image making a washed out image clearer or reducing the brightness in an over exposed image Thisadjuststhecolorsaturation Saturationcontrols the strength of color in the image Specify...

Page 41: ...utput selections VGA XGA and SXGA Do not select SXGA if you want to turn on the motion detection feature Aspect ratio Mode Frame size View window area Maximum frame rate Set the aspect ratio of the video to 4 3 standard or 16 9 widescreen Set the video codec to be used to JPEG or H 264 Frame size determines the total capture resolution 16 9 1280 x 720 800 x 448 640 x 360 480 x 272 320 x 176 4 3 96...

Page 42: ...t off Audio out volume level This limits the maximum frame rate which can be combined with the Fixed quality option to optimize the bandwidth utilization and video quality If fixed bandwidth utilization is desired regardless of the video quality choose Constant bit rate and select the desired bandwidth Thebpswillaffectthebitrateofthevideorecorded by the camera Higher bit rates result in higher vid...

Page 43: ... menu Select a value between 0 and 10 0 being the slowest Enter a name for your camera location and click Add To add a preset to the sequence select it from the drop down box at the bottom of this window then click the Add button The preset name will appear in the list You can rearrange your presets in the sequence by selecting a preset in the sequence then clicking the arrow buttons to move it hi...

Page 44: ...l stay at that preset then click the Add button The preset name will appear in the list followed by the dwell time to view that preset for You can rearrange your presets in the sequence by selecting a preset in the sequence then clicking the arrow buttons to move it higher or lower in the current sequence Clicking the trash can button will remove the currently selected preset from the sequence If ...

Page 45: ...ra from monitoring that area of the picture Clicking this button will clear all motion detection zones This option allows you to set up Motion Detection on your network camera Enable Video Motion Sensitivity Drawing Mode Clear The motion notification will continue to blink as long as motion is detected If no additional motion is detected it will return to its original state after eight seconds Aft...

Page 46: ...ger an event Please enter a value between 50 and 90 The higher the number the less sensitive the camera will be Enabling Sound Detection will allow your camera to use the built in microphone to trigger events with audio which can be used to trigger snapshots or recordings Enable Sound Detection Detection Level After making any changes click the Save Settings button to save your changes or click th...

Page 47: ...gion from the drop down menu Check this if the camera is in a region where daylight saving is observed ThisoptionwilladjustDaylightSavingTime automatically Network Time Protocol will synchronize your camera with an Internet time server You can enter an IP address of a server or select from the drop down menu Select this to set the time manually Click to synchronize the time information from your P...

Page 48: ...an be triggered by many sources such as motion detection or external digital input devices When an event is triggered a specified action will be performed You can configure the network camera to send snapshots or videos to your e mail address or FTP site To start plotting an event it is suggested to configure server and media columns first so that the network camera will know what action shall be ...

Page 49: ...ions Server Media Event Recording 1 To add a new item event server or media click Add A screen will appear and allow you to update the fields accord ingly 2 To delete the selected item from the drop down menu of event server or media click Delete 3 Click on the item name to pop up a window for modifying ...

Page 50: ...guration for the target e mail server account Enter the configuration for the target FTP server account Specify a network storage device Only one network storage device is supported Use the camera s onboard SD card storage You can configure up to 5 servers to save snapshots and or video to After making any changes click the Save Settings button to save your changes ...

Page 51: ...create Select this option to set the media type to snap shots Set the video profile to use as the media source Refer to Audio and Video on Audio and Video on page 35 for more information on video pro files Set the number of pre event images to take Pre event images are images taken before the main event snapshot is taken Set the number of post event images to take Post event images are images take...

Page 52: ...formation on video profiles This sets how many seconds to record before the main event video clip starts You can record up to three seconds of pre event video Set the maximum length of video to record for your video clips Set the maximum file size to record for your video clips This is the prefix that will be added to the filename of saved video clips Select this option to set the media type to sy...

Page 53: ... this box to activate this event Set the priority for this event The event with higher priority will be executed first Select the delay time before checking the next event It is being used for both events of motion detection and digital input trigger Specify the input type that triggers the event Triggers an event when motion is detected The event is triggered in specified intervals The trigger in...

Page 54: ...on Time Trigger D O Triggers an event when the PIR sensor is activated by moving infrared objects even in dark environment Triggers an event when sound is detected Select Always or enter the time interval Select to trigger the digital output for a specific number of seconds when an event occurs ...

Page 55: ...s to enable the recording function Set the priority for this entry The entry with a higher priority value will be executed first The source of the stream Scheduling the recording entry Configuring the setting for the recording Select the folder where the recording file will be stored Here you can configure and schedule the recording settings After making any changes click the Save Settings button ...

Page 56: ...0MB then the camera will record 100 files in the specified location folder and then will delete the oldest file and create new file for cyclical recording Please note that if the free HDD space is not enough the recording will stop Before you set up this option please make sure your HDD has enough space and it is better to not save other files in the same folder as recording files If this is selec...

Page 57: ...s and once triggered images will be taken and e mailed After making any changes click the Save Settings button to save your changes Digital Input Output Select D I or D O Mode The camera will send a signal when an event is triggered depending upon the type of device connected to the DI circuit N C stands for Normally Closed This means that the normal state of the circuit is closed There fore event...

Page 58: ... Night mode when needed Day mode enables the IR Cut Filter Night mode disables the IR Cut Filter Set up the Day Night mode using a schedule The camera will enter Day mode at the starting time and return to Night mode at the ending time SelectfromtheoptionstoenableordisabletheIR infrared lightaccordingtoyourpreferences This setting provides additional controls depending on your specific application...

Page 59: ...ection Create Certificate Method Status Note Enable the HTTPS service Choose the way the certificate should be cre ated Three options are available Create a self signed certificate automatically Create a self signed certificate manually Create a certificate request and install Displays the status of the certificate The certificate cannot be removed while the HTTPS is still enabled To remove the ce...

Page 60: ...e changes made Note A total of seven lists can be configured for both columns The ending IP Address of the devices such as a computer that have permission to access the video of the camera Remove the customized setting from the Allow List The list of IP addresses that have no access rights to the camera Remove the customized setting from the Delete List For example When the range of the Allowed Li...

Page 61: ...unt and then create a password for that account Click Add to save your account Select a user from the drop down menu and click Delete to remove the user account from having access to the camera images Check to enable RTSP streaming Check to enable HTTP streaming Select Enable to allow access to the current camera snapshot via the web address indicated Enter the name of your camera This is useful i...

Page 62: ...ll calibrate the camera so that the P T Z apparatus functions correctly The camera is automatically calibrated whenever it is powered on and initialized or reset Should the camera s pan tilt and zoom functions begin to behave incorrectly or if the device has been jarred or handled improperly you may need to recalibrate the camera manually by pressing this button Select on off or schedule the priva...

Page 63: ...Configuration button to load the new configuration Click this button to reset all settings to their factory defaults If you reset your settings you will need to set up your camera again Clicking the Reboot button will reboot your device This screen allows you to save and restore the camera s current configuration You can also reset all settings to factory default or reboot the device Save to Local...

Page 64: ...rn off your computer or camera and do not disconnect your network connection from your computer or camera Upgrading the firmware will not change any of your system settings but it is recommended that you save your system configuration before doing a firmware upgrade Note It is recommended that you use a wired connection for your computer and camera when upgrading the firmware Your current firmware...

Page 65: ...59 D Link DCS 5222L User Manual Section 4 Configuration Status This screen displays various information about your camera and its current settings Device Info ...

Page 66: ...22L User Manual Section 4 Configuration The log shows you a list of events that have happened recently You can download the log by clicking the Download button or you can empty the log by clicking the Clear button Log ...

Page 67: ...61 D Link DCS 5222L User Manual Section 4 Configuration Help ...

Page 68: ...etwork camera using your Internet Explorer web browser 3 Access the router with your web browser 4 Open virtual server ports to enable remote image viewing Note These are manual steps however if you decide to use the wizard it will perform every step automatically This section is designed to walk you through the setup process for installing your camera behind a router and enable remote video viewi...

Page 69: ...nized by the router Write down this IP Address for future reference Open a Web browser In the address bar type in the IP Address that was assigned to the Network Camera The DCS 5222L Live Video Page appears with a window displaying live video from the camera Click on the Setup button on the left side Scroll to the bottom of the Network Setup page to display the ports used by HTTP and Streaming aud...

Page 70: ...p Network page displays the port settings for your camera If necessary these ports can be changed if they are already in use by other devices e g in a multiple camera environment Note Both the HTTP port and RTSP port are required to be opened for the DCS 5222L ...

Page 71: ...gned WAN IP Address Dynamic means that your router s WAN IP address can change from time to time depending on yourISP AdynamicWANIPAddressidentifiesyourrouteronthepublic network and allows it to access the Internet To find out your router s WAN IP Address go to the Status page on your router and locate the WANinformationforyourrouter asshownonthenextpage TheWAN IP Address will be listed This will ...

Page 72: ...The ports normally used by the DCS 5222L are blocked from access over the Internet Therefore these ports need to be made accessible over the Internet This is accomplished using the Virtual Server function on the DIR 655 router The Virtual Server ports used by the camera must be opened through the router for remote access to your camera Virtual Server is accessed by clicking on the Advanced tab of ...

Page 73: ...ts to conserve bandwidth Check with your ISP so that you can open the appropriate ports accordingly If your ISP does not pass traffic on port 80 you will need to change the port the camera uses from 80 to something else such as 800 Not all routers are the same so refer to your user manual for specific instructions on how to open ports Enter valid ports in the Virtual Server section of your router ...

Page 74: ...the summary page If you see Remote Status Disabled make sure that the front LED on your camera is lit solid green your Internet connection is working your router s LAN WAN connections are working properly your router has UPnP enabled if your router does not support UPnP please refer to Appendix A your router can get a public IP your router is upgraded to the latest firmware you have tried rebootin...

Page 75: ...wall with your system administrator The firewall may need to have some settings changed in order for the Network Camera to be accessible outside your local network For more information please refer to the section about installing your camera behind a router on page 45 Make sure that the Network Camera isn t conflicting with any Web server you may have running on your network The default router set...

Page 76: ...has many obstacles or the line of site is obstructed by glass the PIR will not function properly When the environment temperature is too high the PIR detection will slow down and should not be mistaken for a faulty PIR This Network Camera can only be installed indoors Do not install this camera in a place where IR interference can be a problem IR interference can be found close to glass doors or w...

Page 77: ...type cmd and click OK Windows 8 7 and Vista users type cmd in the Start Search box At the prompt type ipconfig and press Enter This will display the IP address subnet mask and the default gateway of your camera If the address is 0 0 0 0 check your camera installation security settings and the settings on your router Some firewall software programsmayblockaDHCPrequestonnewlyinstalledcameras If you ...

Page 78: ...ion which represents your network adapter and select Properties Step 3 Highlight Internet Protocol TCP IP and click Properties Step 4 Click Use the following IP address and enter an IP address that is on the same subnet as your network or the LAN IP address on your router Example If the router s LAN IP address is 192 168 0 1 make your IP address 192 168 0 X where X is a number between 2 and 99 Mak...

Page 79: ... GPIO PTC 1 PTC 2 DC3 V 12V PIN FUNCTION NOTE 1 Digital Out DO Uses an open drain NFET transistor with the source connected to GND in camera If used with an external relay a diode must be connected in parallel with the load for protec tion against voltage transients Max loading is 100 mA 2 DC5V OUTPUT DC 5 V Output Max 100 mA 3 Digital In DI A switch from DI to GND activated by setting NO or NC 4 ...

Page 80: ...EG format simultaneous compression H 264 multicast streaming JPEG for still images Video Resolution 16 9 supports frame rates up to 30 fps 1280 x 720 800 x 448 640 x 360 480 x 272 320 x 176 Others supports frame rates up to 30 fps 960 x 720 800 x 592 640 x 480 480 x 352 320 x 240 Pan Tilt Zoom Pan Range 170 to 170 Tilt Range 20 to 100 Digital Zoom 10x Manual Pan Speed 5 80 per second ManualTilt Sp...

Page 81: ... e mail Upload snapshots video clips via FTP Mobile App Support mydlink Lite app for iOS and Android devices System Requirements Operating System MicrosoftWindows 8 7 Vista XP SP3 Compatible Browsers Microsoft Internet Explorer 8 Firefox 12 Chrome 20 Safari 4 Other Java enabled browser Supported Mobile Devices mydlink Lite mydlink mobile app for iPhone iPad and Android mobile devices Physical Dime...

Page 82: ...ardware Revision located on the label on the bottom of the Network Camera e g rev B1 Serial Number s n number located on the label on the bottom of the Network Camera You can find software updates and user documentation on the D Link website as well as frequently asked questions and answers to technical issues For customers within the United States Phone Support 877 453 5465 Internet Support http ...

Page 83: ...der this Limited Warranty will be at D Link s option to repair or replace the defective Hardware during the Warranty Period at no charge to the original owner or to refund the actual purchase price paid Any repair or replacement will be rendered by D Link at an Authorized D Link Service Office The replacement hardware need not be new or have an identical make model or part D Link may at its option...

Page 84: ...ing Software will be refunded by D Link provided that the non conforming Software and all copies thereof is first returned to D Link The license granted respecting any Software for which a refund is given automatically terminates Non Applicability of Warranty The Limited Warranty provided hereunder for Hardware and Software portions of D Link s products will not be applied to and does not cover an...

Page 85: ...5N 5S2 Canada D Link will not be held responsible for any packages that are lost in transit to D Link The repaired or replaced packages will be shipped to the customer via Purolator Canada or any common carrier selected by D Link Return shipping charges shall be prepaid by D Link if you use an address in Canada otherwise we will ship the product to you freight collect Expedited shipping is availab...

Page 86: ...LOSS OF GOODWILL LOSS OF REVENUE OR PROFIT WORK STOPPAGE COMPUTER FAILURE OR MALFUNCTION FAILURE OF OTHER EQUIPMENT OR COMPUTER PROGRAMS TO WHICH D LINK S PRODUCT IS CONNECTED WITH LOSS OF INFORMATION OR DATA CONTAINED IN STORED ON OR INTEGRATED WITH ANY PRODUCT RETURNED TO D LINK FOR WARRANTY SERVICE RESULTING FROM THE USE OF THE PRODUCT RELATING TO WARRANTY SERVICE OR ARISING OUT OF ANY BREACH O...

Page 87: ...installed and used in accordance with the instructions may cause harmful interference to radio communication However there is no guarantee that interference will not occur in a particular installation If this equipment does cause harmful interference to radio or television reception which can be determined by turning the equipment off and on the user is encouraged to try to correct the interferenc...

Page 88: ...icable to products purchased outside the United States please contact the corresponding local D Link office Industry Canada Statement This device complies with RSS 210 of the Industry Canada Rules Operation is subject to the following two conditions 1 This device may not cause harmful interference and 2 this device must accept any interference received including interference that may cause undesir...

Page 89: ... Registration 83 D Link DCS 5222L User Manual Version 2 0 January 23 2014 Product registration is entirely voluntary and failure to complete or return this form will not diminish your warranty rights Registration ...

Reviews: