background image

38

Networking Basics (continued)

Naming your Computer

 


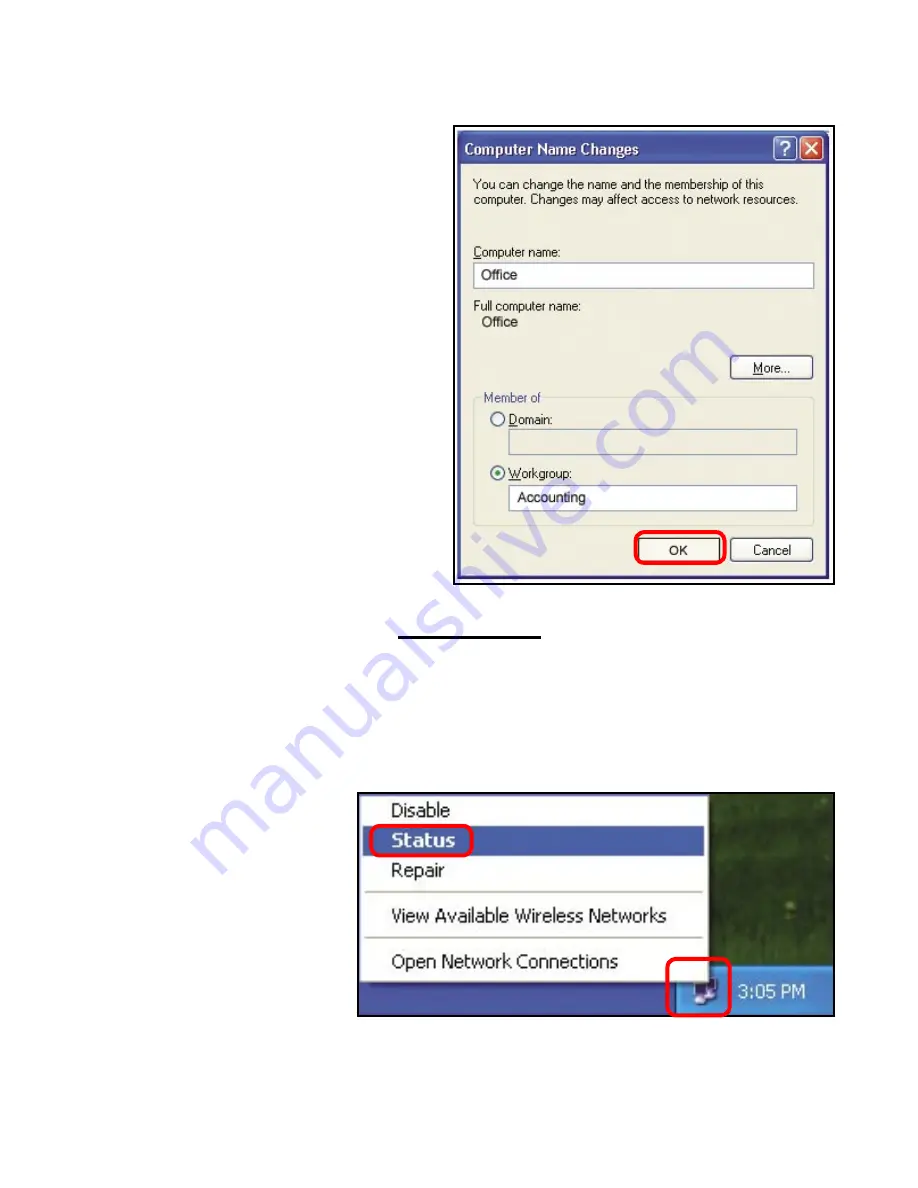
I

n this window, enter the 

Computer name

Select 

Workgroup

 and enter 

the name of the 

Workgroup

All computers on your 

network must have the same 

Workgroup

 name.

Click 

OK

 


Checking the IP Address in Windows XP

The adapter-equipped computers in your network must be in the same IP Address 

range (see 

Getting Started

 in this manual for a definition of IP Address Range.)  

To check on the IP Address of the adapter, please do the following:

Right-click


on the 

Local 

Area Connection


icon


in the task bar

Click


on

 Status

Summary of Contents for AirPremier DWL-1700AP

Page 1: ...oduct should be installed ONLY by experienced professional installers who are familiar with local building and safety codes and wherever applicable are licensed by the appropriate authorities Failure to do so may void the warranty and may expose the user or the service provider to legal and financial liabilities ...

Page 2: ...Layout 8 Using the Configuration Utility 10 Networking Basics 30 Frequently Asked Questions 45 Troubleshooting 47 Appendix I Telnet Configuration optional 52 Appendix 2 Boot Code Firmware Upgrade 61 Appendix 3 Wireless Basics 71 Technical Specifications 73 Contacting Technical Support 76 Warranty and Registration 77 ...

Page 3: ...MIL C 5015 style RS232 Console Port Cable Grounding Wire Crossover Ethernet Cable 30M MIL C 5015 style Ethernet Cable Two rubber dipole antennas Mast Mounting Kit Wall Mounting Kit Manual on CD Package Contents If any of the above items are missing please contact your reseller 1 2 3 4 5 10 6 7 8 9 1 2 3 4 5 6 7 8 9 10 11 11 ...

Page 4: ...with a RADIUS server MAC address access control and additional security features With a built in firewall the DWL 1700AP can operate as a NAT inbound virtual server and provides IP based access control Denial of Service DoS protection is also included with the DWL 1700AP to prevent the wireless network from being hacked The DWL 1700AP is easily managed via a web based user interface Telnet or RS 23...

Page 5: ...onnection is optional Use this console connection only if you are configuring the DWL 1700AP via the console Or when you fail to configure the unit through the Web based utility Antennas Attach the antennas with the unit powered OFF Do not over tighten Position antennas vertically for best reception Power Port Attach one end of the power cord to the power port attach the other end to the wall outlet...

Page 6: ...ding system must comply with the National Electrical Code and the safety standards that apply in your country Always check with a qualified electrician if you do not know how to properly ground the DWL 1700AP This product should be installed ONLYby experienced professional installers who are familiar with local building and safety codes and wherever applicable are licensed by the appropriate author...

Page 7: ...st Outdoor Housing Designed for harsh outdoor environments with die cast watertight housing and built in lightning protector 802 1x In conjunction with a RADIUS server 802 1x Authentication verifies the identity of would be clients Built in Firewall Operates in the 2 4GHz frequency range Easy Installation with the Setup Wizard Multiple Management options Great for enterprise wireless network manage...

Page 8: ...at is is grounded Network Layout Connect the DWL 1700AP to the Inline Power Injector Connect a Hub Switch or Router to the Inline Power Injector Connect a desktop computer to the router You can use this Ethernet connected computer to configure and manage the DWL 1700AP ...

Page 9: ...d will be able to connect wirelessly to the DWL 1700AP in order to surf the Internet Network Layout continued For more information regarding installation please see the sections on Grounding and Connections in this manual and the Quick Installation Guide that came with your purchase ...

Page 10: ...n To disable this function go to Control Panel Internet Options Connections LAN Settings and uncheck the enable box Start your web browser program Internet Explorer Netscape Navigator Type the IP Address and HTTP port of the DWL 1700AP the default port is 2000 the IP is 192 168 0 50 in the address field http 192 16 8 0 50 2000 and press Enter Make sure that the IP Addresses of the DWL 1700AP and yo...

Page 11: ... Please refer to the Quick Installation Guide for more information regarding the Setup Wizard After the connection is established you will see the user identification window as shown Using the Configuration Utility continued Type admin in the User Name field The default password is root However if you have changed the password please enter the correct password Click OK ...

Page 12: ... The SSID can be easily changed to connect to an existing wireless network or to establish a new wireless network Channel 6 is the default channel All devices on the network must share the same channel WEP Wired Equivalent Privacy WEP is a wireless security protocol for Wireless Local Area Networks WLAN WEP provides security by encrypting the data that is sent over the WLAN Select Enabled or Disab...

Page 13: ...WAN Dynamic IP Address This field is optional but may be required by some ISPs The Host Name is the device name Host Name Most Cable modem users will select Dynamic IPAddress to obtain an IPAddress automatically from their ISP Internet Service Provider ...

Page 14: ... information that you enter into this screen may be different Enter the Subnet Mask for your network All devices must share the same Subnet Mask to communicate Subnet Mask The ISP Gateway Address will be provided by your ISP ISP Gateway Address This will be provided by your ISP DNS Domain Name System or Service is an Internet service that translates domain names into IP Addresses Primary DNS Addre...

Page 15: ...PPoE Enter the maximum Idle time Maximum Idle Time This is optional for Static PPPoE only IP Address This is optional Service Name Retype the password This is optional Retype Password Enter a password This is optional Password Enter a user name This is optional User Name Select Dynamic or Static PPPoE This information will be provided by your ISP Dynamic or Static PPPoE ...

Page 16: ...settings You may change the LAN IPAddress if needed The LAN IP Address is private to your internal network and cannot be seen on the Internet Apply Click Apply to save the changes Local Domain Name This field is optional You may enter the Local Domain Name Subnet Mask The subnet mask of the LAN interface The default subnet mask is 255 255 255 0 IP Address The IP Address of the LAN interface The def...

Page 17: ...the DHCP server for wireless clients Using the Configuration Utility continued Home DHCP Trigger DHCP Service Select Enable to use the DHCP feature of the DWL 1700AP Select Disable to disable this function DHCP Start IP The starting IP Address for the DHCP server s IP Assignment DHCP End IP The ending IP Address for the DHCP server s IP Assignment Lease Time The length of time for the DHCP lease Ap...

Page 18: ...d If you wish you can make some of the LAN computers accessible from the Internet by enabling Virtual Server Each Virtual Service that is created will be listed at the bottom of the screen in the Virtual Servers List The Name referencing the virtual service Name The server computer in the LAN that will be providing virtual services Private IP The protocol used for the virtual service Protocol Type...

Page 19: ...ot be changed Usually you will find this address on a sticker on the device or packaging Disable or Enable Click Enable to enable the MAC filter By enabling the filter you allow access to the Internet to only those computers whose MAC Addresses are not listed in the filter list Computers listed are blocked from the Internet MAC Address Enter the MAC Address of the wireless LAN user that will be denied...

Page 20: ...wall Rule Priority Select the Priority status of the Firewall Rule Select Enabled to enable the Firewall Service feature Netmask Enter the Subnet Mask of both the Source and the Destination of the Firewall Rule IP Enter the IP Address of both the Source and the Destination of the Firewall Rule Firewall Rules is an advanced feature that is used to deny allow or count traffic that passes through the ...

Page 21: ...s deter mines whether packets will be fragmented Packets exceeding the 1600 byte setting will be fragmented before transmission 1600 is the default setting Beacon Interval Beacons are packets sent by an Access Point to synchronize a wireless network Specify a value 100 is the default setting and is recommended RTS Threshold This value should remain at its default setting of 250 If you encounter in...

Page 22: ...hared key It must be the same as the Shared Key on the RADIUS SERVER Authentication Port Enter the Port number that your RADIUS SERVER uses forAuthentication The default setting of 1812 is the port setting for many RADIUS SERVERs Accounting Port Enter the Accounting Port number that your RADIUS SERVER uses for Accounting The default setting is 1813 User Name Enter the User Name Password Enter the ...

Page 23: ... SNMP Simple Network Management Protocol is a widely used network monitoring and control protocol that reports activity on each network device to the administrator of the network SNMP can be used to monitor traffic and statistics of the DWL 1700AP Validity ...

Page 24: ... are used in Anti DoS attacks If you notice performance degradation you may adjust your selection of Anti DoS attacks Select one or more of the options shown here in order to reject DoS Denial of Service attacks Some CPU resources are used in Anti DoS attacks If you notice performance degradation you may wish to adjust your selection of Anti DoS attacks ...

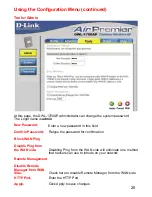
Page 25: ...password in this field Confirm Password The Login name is admin Check here to disable Remote Manager from the WAN side Block WAN Ping Disabling Ping from the WAN side will eliminate one method that hackers can use to intrude on your network Disable Ping from the WAN side Remote Management Disable Remote Manager from WAN Side HTTP Port Enter the HTTP Port Apply Click Apply to save changes ...

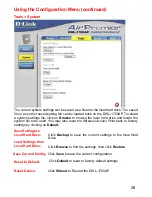
Page 26: ...locate the system file to be used You may also reset the Wireless Access Point back to factory settings by clicking on Default Click Backup to save the current settings to the local Hard Drive Click Browse to find the settings then click Restore Save Settings to Local Hard Drive Load Settings from Local Hard Drive Reset Device Click Reboot to Restart the DWL 1700AP Save Current Config Click Save to s...

Page 27: ...pgrade files Please check the D Link support site for firmware updates at http support dlink com You can download firmware upgrades to your hard drive from the D Link support site There may be new firmware for your DWL 1700AP available on the D Link support website Click here to check for a firmware upgrade on our support site You will need to download and install TFTP software on a computer in your ne...

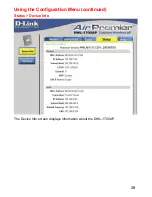
Page 28: ...28 Using the Configuration Menu continued Status Device Info The Device Info screen displays information about the DWL 1700AP ...

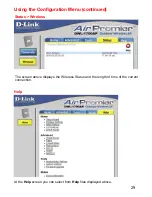
Page 29: ...he Configuration Menu continued Status Wireless The screen above displays the Wireless Status and the length of time of the current connection Help At the Help screen you can select from Help files displayed above ...

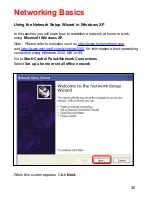
Page 30: ...osoft Windows XP Note Please refer to websites such as http www homenethelp com and http www microsoft com windows2000 for information about networking computers using Windows 2000 ME or 98 Go to Start Control Panel Network Connections Select Set up a home or small office network Networking Basics When this screen appears Click Next ...

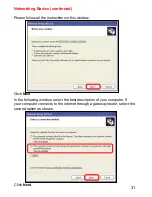
Page 31: ...ns in this window Networking Basics continued Click Next In the following window select the best description of your computer If your computer connects to the internet through a gateway router select the second option as shown Click Next ...

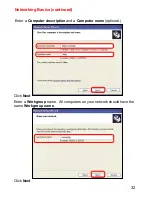
Page 32: ...32 Enter a Computer description and a Computer name optional Networking Basics continued Click Next Enter a Workgroup name All computers on your network should have the same Workgroup name Click Next ...

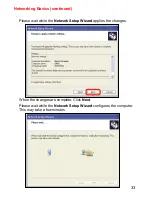
Page 33: ...t while the Network Setup Wizard applies the changes Networking Basics continued When the changes are complete Click Next Please wait while the Network Setup Wizard configures the computer This may take a few minutes ...

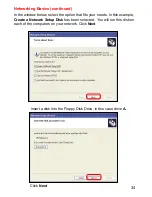
Page 34: ...ow select the option that fits your needs In this example Create a Network Setup Disk has been selected You will run this disk on each of the computers on your network Click Next Insert a disk into the Floppy Disk Drive in this case drive A Click Next ...

Page 35: ...Please read the information under Here s how in the screen below After you complete the Network Setup Wizard you will use the Network Setup Disk to run the Network Setup Wizard once on each of the computers on your network Click Next ...

Page 36: ...new settings will take effect when you restart the computer Click Yes to restart the computer You have completed configuring this computer Next you will need to run the Network Setup Disk on all the other computers on your network After running the Network Setup Disk on all your computers your new wireless network will be ready to use ...

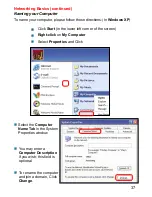
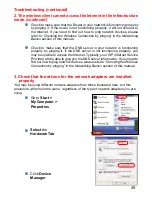
Page 37: ... In Windows XP Click Start in the lower left corner of the screen Right click on My Computer Select Properties and Click Select the Computer Name Tab in the System Properties window You may enter a Computer Description if you wish this field is optional To rename the computer and join a domain Click Change ...

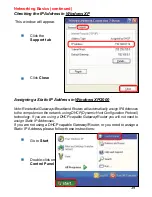
Page 38: ...ust have the same Workgroup name Click OK Checking the IP Address in Windows XP The adapter equipped computers in your network must be in the same IPAddress range see Getting Started in this manual for a definition of IP Address Range To check on the IP Address of the adapter please do the following Right click on the Local Area Connection icon in the task bar Click on Status ...

Page 39: ...oadband Routers will automatically assign IPAddresses to the computers on the network using DHCP Dynamic Host Configuration Protocol technology If you are using a DHCP capable Gateway Router you will not need to assign Static IP Addresses If you are not using a DHCP capable Gateway Router or you need to assign a Static IP Address please follow these instructions Go to Start Double click on Control ...

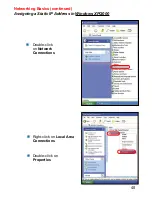
Page 40: ...40 Networking Basics continued Assigning a Static IP Address in Windows XP 2000 Double click on Network Connections Double click on Properties Right click on Local Area Connections ...

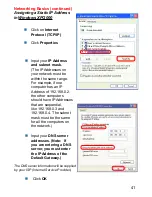
Page 41: ...92 168 0 3 and 192 168 0 4 The subnet mask must be the same for all the computers on the network Networking Basics continued Assigning a Static IP Address in Windows XP 2000 Input your DNS server addresses Note If you are entering a DNS server you must enter the IP Address of the Default Gateway The DNS server information will be supplied by your ISP Internet Service Provider Click OK Click on Int...

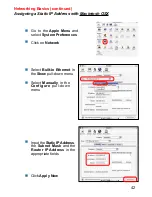
Page 42: ...X Go to the Apple Menu and select System Preferences cClick on Network Select Built in Ethernet in the Show pull down menu Select Manually in the Configure pull down menu Input the Static IPAddress the Subnet Mask and the Router IP Address in the appropriate fields Click Apply Now ...

Page 43: ...sh OSX Go to the Apple Menu and select System Preferences Click on Network Select Built in Ethernet in the Show pull down menu Select Using DHCP in the Configure pull down menu Click Apply Now The IP Address Subnet mask and the Router s IP Address will appear in a few seconds ...

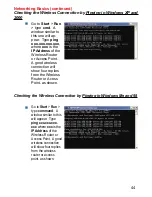
Page 44: ... xxx xxx xxx xxx where xxx is the IP Address of the Wireless Router or Access Point A good wireless connection will show four replies from the Wireless Router or Acess Point as shown Go to Start Run type command A window similar to this will appear Type ping xxx xxx xxx xxx where xxx is the IP Address of the Wireless Router or Access Point A good wireless connection will show four replies from the...

Page 45: ... theory and in practice for the DWL 1700AP A Estimated Transmission Range Clear Space Pairs Station 50mW 17dBm Maximum Range 3280ft 1 0Km Station 100mW 20dBm Maximum Range 4921ft 1 5 Km Station 200mW 23dBm Maximum Range 6561ft 2 0 Km Q4 How many users can the DWL 1700AP support at the same time A The maximum associated stations for the DWL 1700AP are 256 users but for performance consideration the...

Page 46: ...ow press the D button from the keyboard and choose the Y to reset the DWL 1700AP to its factory default settings Q7 Does the DWL 1700AP support a change to output power manually A This function is not supported in the current version Q8 To which of the DWL 1700AP s two jacks should I connect when I want to use a high gain antenna to reach the farthest possible distance A Since the DWL 1700AP has t...

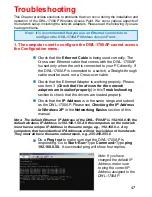
Page 47: ...Address of the DWL 1700AP is 192 168 0 50 the default wireless IP Address is 192 168 1 50 All the computers on the network must have a unique IP Address in the same range e g 192 168 0 x Any computers that have identical IP Addresses will not be visible on the network They must all have the same subnet mask e g 255 255 255 0 Do a Ping test to make sure that the DWL 1700AP is responding Go to Start...

Page 48: ...apters must have an IP Address in the same range e g 192 168 1 x Each device must have a unique IP Address no two devices may have the same IP Address The subnet mask must be the same for all the computers on the network To check the IP Address assigned to the wireless adapter double click on the Local Area Connection icon in the taskbar select the Support tab and the IP Address will be displayed ...

Page 49: ...ioning properly by pinging it If the DNS server is not functioning properly you may be unable to access the Internet Typically your ISP Internet Service Provider will be able to give you the DNS server information If you need to find out how to ping network devices please refer to Checking the Wireless Connection by pinging in the Networking Basics section of this manual 3 Check that the drivers fo...

Page 50: ...DWL G650 you may be using other network adapters but the procedure will remain the same Select Properties to check that the drivers are installed properly Look under Device Status to check that the device is working properly Click OK D Link AirPlus DWL G650 D Link AirPlus DWL G650 Wireless Cardbus Adapter D Link AirPlus DWL G650 Wireless Cardbus Adapter ...

Page 51: ...e DWL 1700AP back on again and then turn on the client Check that the LED indicators are indicating normal activity If not check that the AC power and Ethernet cables are firmly connected Make sure that all devices are set to Infrastructure mode Check that the IPAddress subnet mask and gateway settings are correctly entered for the network 7 I forgot my encryption key or login password Make sure th...

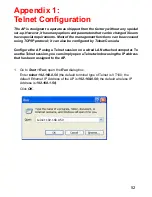
Page 52: ...tocol it can also be configured by Telnet Console Configure the AP using a Telnet session on a wired LAN attached computer To use the Telnet session you can simply open a Telnet window using the IP address that has been assigned to the AP 1 Go to Start Run open the Run dialog box Enter telnet 192 168 0 50 the default terminal type of Telnet is VT100 the default Ethernet IP Address of the AP is 192 1...

Page 53: ...continued Enter the User Name and User Password as shown below The default User Name is admin and the default User Password is root 2 After you have logged in the Telnet user interface screen will appear as shown below admin ...

Page 54: ... item or enter the sub menu Left or j key return to previous menu page Home or Ctrl A move the cursor to the first item of the menu page End or Ctrl E move the cursor to the last item of the menu page Ctrl Q or F1 Show the help page Telnet Configuration continued denotes that the function is displayed after enable configuration mode is enabled In item su type the default password root to enter the su...

Page 55: ...55 Telnet Configuration continued ...

Page 56: ...56 Telnet Configuration continued ...

Page 57: ...57 Telnet Configuration continued ...

Page 58: ...58 Telnet Configuration continued ...

Page 59: ...59 Telnet Configuration continued ...

Page 60: ...60 Telnet Configuration continued ...
Page 61: ...f you failed in any command please DO NOT Power Off or Reboot the machine You must RETRY this command until it succeeds Procedure 1 Connect the power supply to the Inline Power Injector and the power outlet 2 Connect MIL C 5015 style Ethernet cable into the Special Ethernet port of the DWL 1700AP 3 Connect the RJ 45 Ethernet connector another end of MIL C 5015 style Ethernet cable into the Power D...

Page 62: ...62 After the Hyper Terminal window appears Give this new connection a name e g DWL 1700AP Boot Code Firmware Upgrade continued Select correct COM port e g COM1 ...

Page 63: ...pgrade continued Set baud rate as 115200 and flow control as None Then press OK to bring up the HyperTerminal window Press Esc to reboot the DWL 1700AP After reboot and when showing EDORAM Testing press X to enter console mode ...

Page 64: ...Code Firmware Upgrade continued Key in DLX and press Enter When CCC appears select Transfer Send File Set Protocol as 1K Xmodem Key in correct filename X BIN and path then choose Send to start boot code upgrade ...

Page 65: ...65 Boot Code Firmware Upgrade continued When XMODEM End of Transfer ERASE ROOT FW X BIN NOW Y y appears type Y to update Flash Upon completion you will see X BIN Upgrade Complete displayed on the screen ...

Page 66: ...66 Boot Code Firmware Upgrade continued Key in reboot and press Enter to let the new boot code activate After rebooting and when showing EDORAM Testing press X to enter console mode again ...

Page 67: ...will be overwritten Press Y in upper case to proceed Press Y to erase old program image and when CCC appears select Transfer Send File Set Protocol as 1K Xmodem Key in correct filename SOHO BIN and path then choose Send to start program image upgrade Boot Code Firmware Upgrade continued ...

Page 68: ...grade continued Key in DLP and press Enter to erase the old Web image and when CCC appears select Transfer Send File Set Protocol as 1K Xmodem Key in correct filename PFS IMG and path then choose Send to start Web image upgrade ...

Page 69: ...ade continued Key in DLB and press Enter to upgrade the BIOS When CCC appears select Transfer Send File Set Protocol as 1K Xmodem Key in the correct filename STARTUP BIN and path then choose Send to start to upgrade the BIOS code ...

Page 70: ...re Upgrade continued When XMODEM End of Transfer and Erase Root FW X BIN NOW Y y appears type Y to update Flash After a successful upgrade you will see STARTUP BIN Upgrade Complete Type in reboot to restart the DWL 1700AP ...

Page 71: ...d public areas such as airports coffee shops and universities Innovative ways to utilize WLAN technology are helping people to work and communicate more efficiently Increased mobility and the absence of cabling and other fixed infrastructure have proven to be beneficial for many users Wireless users can use the same applications they use on a wired network Wireless adapter cards used on laptop and de...

Page 72: ...rate in locations where installation of wiring may be impractical Installation and Network Expansion Installing a WLAN system can be fast and easy and can eliminate the need to pull cable through walls and ceilings Wireless technology allows the network to go where wires cannot go even outside the home or office Scalability WLANs can be configured in a variety of ways to meet the needs of specific ap...

Page 73: ...C Part15 ETSI 300 328 Operating 4ºF to 158ºF 20ºC to 70ºC 5 to 95 typical Storing 40ºF to 176ºF 40ºC to 80ºC 11 Mbps CCK 5 5 Mbps CCK 2 Mbps DQPSK 1 Mbps DBPSK Data Rates Modulation SNMP MIB I MIB II All weather enclosure 24dBm 250mW Transmit Power including 5dBi antenna Maximum wireless signal rate based on IEEE Standard 802 11b specifications Actual data throughput rate will vary Network conditio...

Page 74: ...3 03 inches 77mm LIghtning Protector Surge Current 20KA 84dBm 11Mbps 90dBm 2Mbps Proprietary N type Reverse Polarity Input 100V AC 50 60Hz Power Supply PoE Output 48V DC 0 7A Receiver Sensitivity RF Connector Interface 1 ports 10base T 100Base TX Ethernet for WAN LAN UART for console Firmware Upgrade TFTP Transparent FTP Xmodem 1K Xmodem ...

Page 75: ...WEP RC4 IEEE 802 1x port based authentication MAC Address based access control 802 11b SSID hidden Denial Wireless 802 11b ANY station PPPoE authentication PAP CHAP Protocol Supported TCP IP NAT NAPT Virtual Server NAT inbound server DHCP client server PPPoE Static Routing Ethernet Bridging ...

Page 76: ...h our web site or by phone Tech Support for customers within the United States D Link Technical Support over the Telephone 877 453 5465 24 hours a day seven days a week D Link Technical Support over the Internet http support dlink com email support dlink com Tech Support for customers within Canada D Link Technical Support over the Telephone 800 361 5265 Monday to Friday 8 30am to 9 00pm EST D Lin...

Page 77: ...ent functional specifications for the Software as set forth in the applicable documentation from the date of original retail purchase of the Software for a period of ninety 90 days Warranty Period provided that the Software is properly installed on approved hardware and operated as contemplated in its documentation D Link further warrants that during the Warranty Period the magnetic media on which ...

Page 78: ...D Link s reasonable handling and return shipping charges for any product that is not packaged and shipped in accordance with the foregoing requirements or that is determined by D Link not to be defective or non conforming What Is Not Covered This limited warranty provided by D Link does not cover Products if in D Link s judgment have been subjected to abuse accident alteration modification tamperin...

Page 79: ...ed trademarks are the property of their respective manufacturers or owners Copyright Statement No part of this publication or documentation accompanying this Product may be reproduced in any form or by any means or used to make any derivative such as translation transformation or adaptation without permission from D Link Corporation D Link Systems Inc as stipulated by the United States Copyright A...

Reviews: