


18
Suprex® Ethernet Series - SPX-7200 Network Settings via Telnet
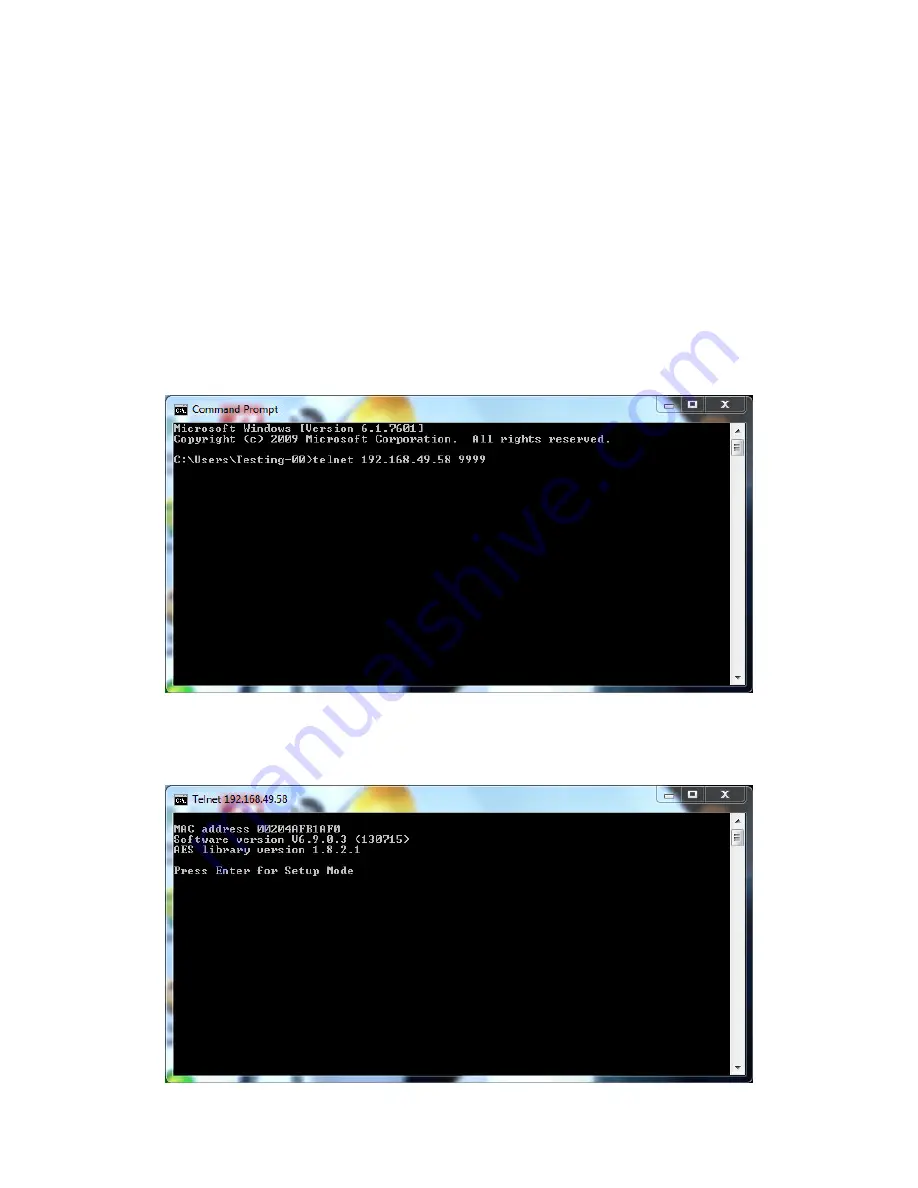
Step 4
The window should change and show some information about the unit, including the MAC address, along with “Press Enter
for Setup Mode”.
Connecting to the SPX-7200 via Telnet:
Step 1
Connect the SPX-7200 Central or Remote unit to a computer with a network cable. Make sure the computer’s network
adaptor settings are set to be compatible with the SPX-7200. If necessary, follow the steps in the
Changing Network
Adaptor Settings in Windows
section (see pgs. 12-14).
Step 2
To open Command Prompt, press the Windows Key + R and enter “cmd”. Command Prompt window should appear.
Step 3
To connect to the SPX-7200 Central, type “telnet 192.168.49.58 9999” and press enter. To connect to the SPX-7200
Remote, type “telnet 192.168.49.59 9999” and press enter. This example uses the default IP addresses, if the Central and
Remote units are not set to the default IP addresses, use the actual IP address in their place. If the message “‘telnet is not
recognized as an internal or external command, operable program or batch file” appears, then the Telnet Client is not
installed. (See Enabling Telnet pgs. 21 - 23)


