


17
Suprex® Ethernet Series - SPX-7200 Network Settings via Web Browser
(cont.)
Step 8
The process of changing the SPX-7200 network settings is now complete. The web browser can be closed and the
SPX-7200 can be disconnected from the computer.
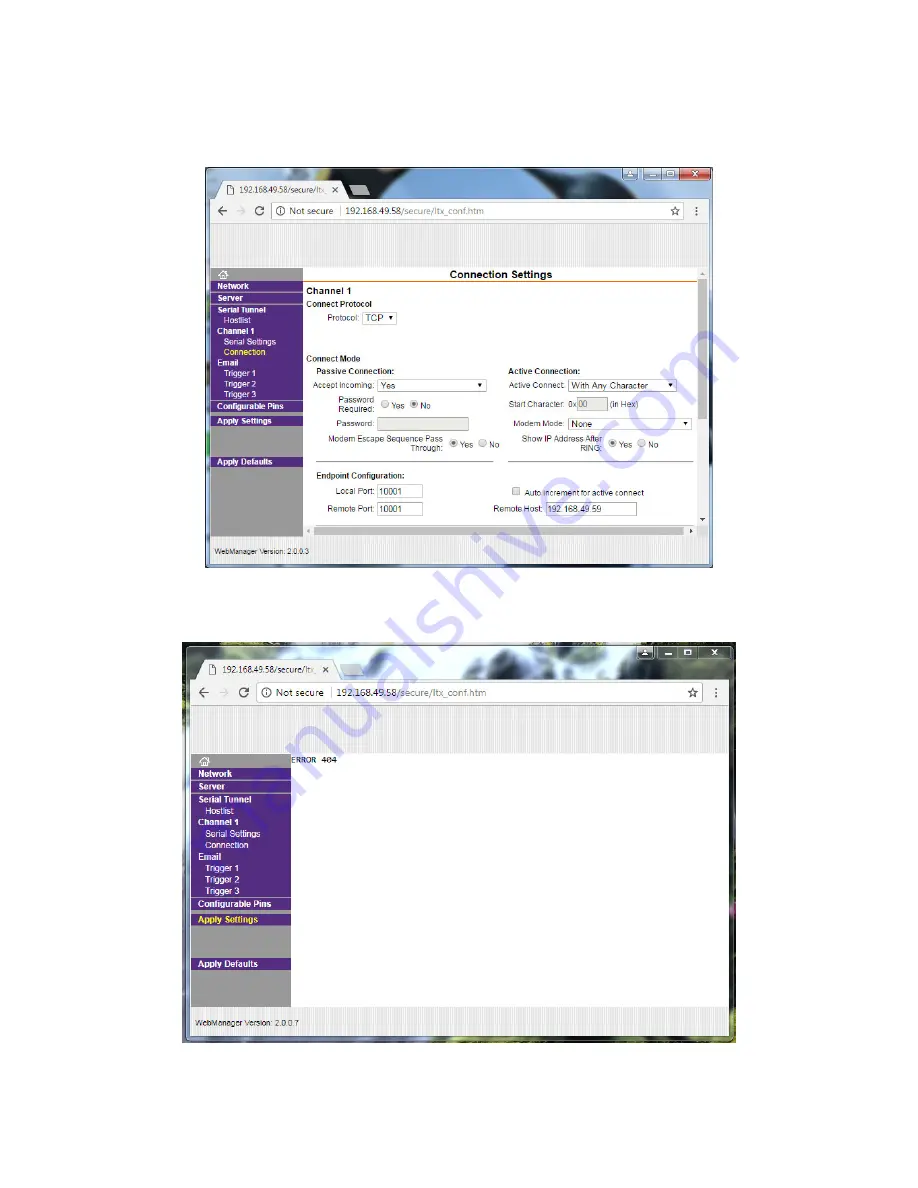
Step 6
On the left, click
Connections
. Locate Remote Host under Endpoint Configuration. Enter the IP address of the partner unit.
If connected to the Central unit, enter the Remote unit’s IP address. If connected to the Remote unit, enter the Central
unit’s IP address. When finished, scroll down to the bottom of the page and click
OK
. "Done!” should appear next to the OK
button.
Step 7
After all the Network Settings have been entered, click
Apply Settings
on the left side of the window. The main body of the
window will disappear and “ERROR 404” will appear at the top.


