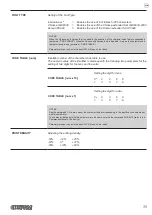
NOTCH DISTANCE
“Notch Distance” is the minimum distance (in mm) between the upper edge of ticket and
the notch.
The numeric value of the distance is made up with the following three parameters for the
setting of three digits (two for the integer part of the number and one for the decimal part):
NOTCH DISTANCE [mm x 10]
Setting the digit for tens:
0
D
2 4
6 8
1 3 5 7 9
NOTCH DISTANCE [mm x 1]
Setting the digit for units:
0
D
2 4
6 8
1 3 5 7 9
NOTCH DISTANCE [mm x .1]
Setting the digit for decimals:
0
D
2 4
6 8
1 3 5 7 9
NOTES:
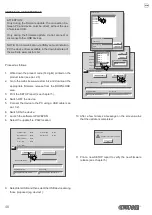
For example, to set the notch distance to 15 mm, modify the parameters as follows:
Notch Distance [mm x 10] = 1
Notch Distance [mm x 1] = 5
Notch Distance [mm x .1] = 0
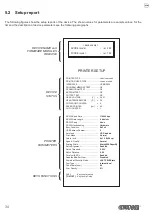
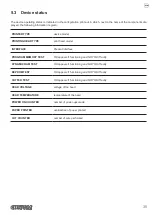
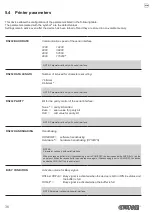
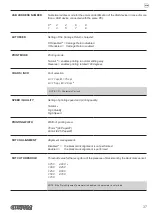
If the “Notch Alignment” parameter is disabled, the parameters for the “Notch Distance” are not printed.
TOTAL CUT
Sets the behavior of the cutter when the total cut command 0x1B 0x69 (ESC i) is sent:
Disabled = The total cut command 0x1B 0x69 (ESC i) will be ignored and the printer
always executes a partial cut command 0x1B 0x6D (ESC m).
Enabled
D
= The total cut command 0x1B 0x69 (ESC i) will be executed.
PAPEREND BUFFER
CLEAR
Cleaning mode of the data in receive buffer, if the printing is stopped due to lack of paper:
Disabled
D
= The data remain in the receive buffer. When the paper runs out, the device
keeps the remaining data in the receive buffer and prints the remaining
portion of the ticket after that the new paper is loaded.
Enabled =
When the paper runs out, all data in the receive buffer are deleted.
POWERFAIL
WAKEUP MODE
This parameter set the printer state (ON or OFF) that will be automatically restored after
a power fail:
LAST PWR State
D
= the printer returns in the previous state (ON or OFF) before the
power fail.
Always ON =
the printer always switches on automatically, after a power fail.
Always OFF =
the printer switches on only by pressing the ON/OFF key after a
power fail.
38
Summary of Contents for Kube II
Page 1: ...CUSTOM S p A USER MANUAL KUBE II ...
Page 2: ......
Page 5: ...MANUAL For details on the commands refer to the manual with code 77200000001000 ...
Page 6: ......
Page 10: ...10 ...
Page 18: ...18 ...
Page 22: ...Fix the device to the wall 9 22 ...
Page 28: ...28 ...
Page 32: ...32 ...
Page 60: ...60 ...
Page 62: ...62 ...
Page 65: ...5 Reassemble the carter sliding it in the direction indicated 65 ...
Page 66: ...66 ...
Page 76: ...76 ...
Page 78: ...78 ...
Page 79: ......

