8"
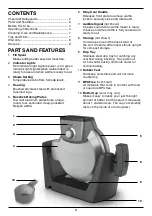
IMAGE 1
BEFORE FIRST USE
Remove all packaging and any promotional
labels or stickers from your waffle maker. Be sure
that all parts of your new waffle maker (listed in
Parts and Features) have been included before
discarding any packing materials. You may want
to keep the box and packing materials for use
at a later date.
Before using your Cuisinart
®
Convertible Belgian
Waffle Maker for the first time, wipe the housing
and baking plates with a damp cloth to remove
any dust from the warehouse or shipping.
NOTE:
The Cuisinart
®
Convertible Belgian Waffle
Maker has been treated with a special nonstick
coating. Should you experience any sticking,
slightly increase temperature setting until the
waffle releases, then continue making waffles
at desired setting.
OPERATING
INSTRUCTIONS
COOKING IN THE VERTICAL
POSITION
NOTE:
Cooking in the vertical position is only
recommended for plain Belgian waffles with no
add-ins (such as nuts, berries, sliced fruit,
chocolate chips).
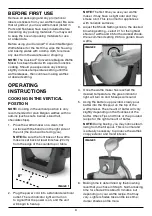
1. Place the waffle maker on a clean, flat
surface with the handle on the right side of
the unit (the knob will be facing you).
NOTE:
Be sure the front base of the waffle
maker is set back at least 8 inches (20 cm)
from the edge of the countertop or table.
2. Plug the power cord into a standard electrical
outlet. The red indicator light will turn on
to signal that the power is on, and the unit
will begin to heat up.
NOTE:
The first time you use your waffle
maker, it may have a slight odor and may
smoke a bit. This is normal for appliances
with nonstick surfaces.
3. Adjust the Shade Setting knob to the desired
browning setting – select #1 for the lightest
shade of waffle and #5 for the darkest shade.
We recommend setting #3 for a golden brown
waffle.
4. Once the waffle maker has reached the
desired temperature, the green indicator
light will turn on and 5 beeps will sound.
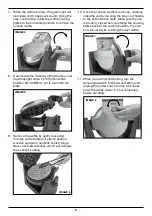
5. Using the batter cup provided, slowly pour
batter into the fill spout on the top of the
waffle maker. The amount of batter will vary
slightly depending on the thickness of the
batter. Check Tips and Hints or the provided
recipe for the right amount of batter.
NOTE:
During baking, you may notice steam
rising from the fill spout. This is normal and
is actually necessary to produce the waffle’s
crispy exterior and moist interior.
6. Baking time is determined by the browning
level that you chose in Step 3. Normal baking
time for shade #3 is about 3 minutes, but
depending on your waffle recipe, that may
vary. Lighter shades take a little less time;
darker shades a little more.
IMAGE 2
IMAGE 3
4


