Crystal Vision
VisionPanel
Default Gateway
– the address of any device that must be addressed in order to
access devices within external networks, usually the router’s IP address.
Netmask address
– this selects the range of network addresses that are checked
when identifying devices within a network. For instance a Netmask of 255.255.255.0
will only test the first 24 bits of IP addresses. So a panel with an IP address of
10.0.0.203 and with the netmask above will consider all devices with an IP address
of 10.0.0.xx as part of the same network.
Broadcast address
– the address that a packet uses to broadcast to the whole
network and is usually the IP address of the panel but with all bits that are zero in
the netmask set to 1. So the broadcast address in the above example would be
10.0.0.255.
DNS Server
– this is the address of a server that translates domain names and IP
addresses.
Note: The Broadcast address and DNS server information is not currently used so
can be left at the default values.
4.
Press ‘Set’ when all the fields have been entered.
5.
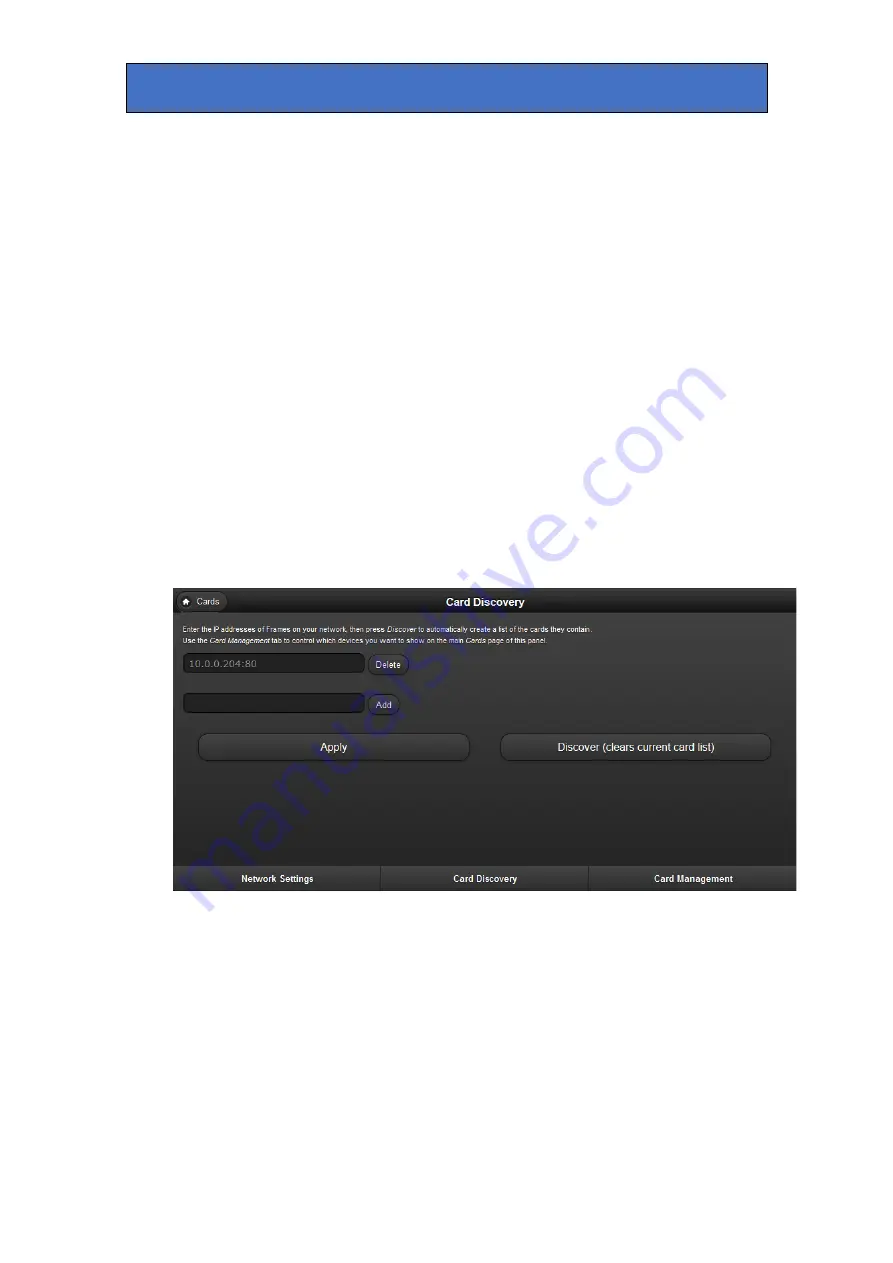
Press the ‘Card Discovery’ tab to enter IP addresses of the frames you want to
scan:
Example of ‘Card Discovery’ display.
6.
Enter the IP addresses and port number 80 (e.g. 10.0.0.201:80) of all the frames you
wish to control, up to a maximum of 16 frames. Press ‘Add’ to include an IP address or
‘Delete’ to remove it.
7.
Press ‘Discover’ to make the panel search the IP addresses in the list and create a new
list of cards (the old card list will be deleted).
8.
Select ‘Card Management’ to assign different cards to the hard Channel Select buttons
on the panel (CH1 to CH8) by using the ‘Move Up’ buttons below. It also allows you to
delete cards you don’t want to show on the VisionPanel. You cannot rename cards on
VisionPanel. However you can rename cards using VisionWeb (V5.1 or later) and this
name will then propagate to the VisionPanel.
Safire 3 User Manual R1.3
19
24 March 2017


