4 - 2
Lower Front Panel Removal & Installation
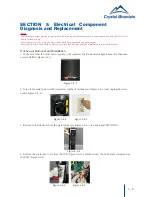
1. Remove Drip Tray by pulling outwards from the body (Figure 4-2-1).
2. Using a Philips screwdriver, remove the screw from the lower front panel (located behind
Drip tray assembly location) (Figure 4-2-2).
3. Pull outwards on the lower front panel to disengage locking tabs from the front of the cooler
(Figure 4-2-3). The front panel and cup dispenser on this model are separate parts. Only the front
panel will be removed.
4. Install in reverse order.
Figure 4-2-1
Figure 4-2-2
Figure 4-2-3
SECTION 4: Cabinet Panel Removal and Installation
Notice:
The information and/or procedures presented in the following demonstration(s) should be performed by a trained Water Cooler
Service Technician only.
Never attempt to service or repair a water cooler while it is plugged into any power supply.
Prior to any service or repair of the water cooler, ensure that the water has been completely drained from the system.


