5 - 12
Compressor Relay / Overload Protector Replacement
Note: Begin with the unit unplugged, the water drained and the left side panel removed.
Tip: Use a small flathead screwdriver to pry wire connectors and relay from compressor.
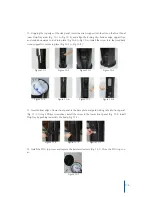
1. Remove the relay/overload cover by prying the metal clip to unhook it from the compressor on
both sides (fig 1-1 and 1-2).
2. Carefully remove and identify the wire connectors from the relay (white wires) and/or overload
(black wire) (fig 2-1 and 2-2). Remove relay and overload from compressor (fig 2-3 and 2-4).
3. Install the new overload onto the top pin of the compressor (fig 3-1) and push the new relay onto
the two bottom pins below the overload (fig 3-2). Reconnect the white wires onto the relay (fig 3-3)
and the black wire onto the overload (fig 3-4).
4. Reinstall the cover and secure with the metal clip (fig 4-1). Note: use caution not to damage wires.
Figure 1-1 Figure 1-2
Figure 2-1 Figure 2-2 Figure 2-3 Figure 2-4
Figure 3-1 Figure 3-2 Figure 3-3 Figure 3-4
Figure 4-1
SECTION 5: Electrical Component
Diagnosis and Replacement
Notice:
The information and/or procedures presented in the following demonstration(s) should be performed by a trained Water Cooler
Service Technician only.
Never attempt to service or repair a water cooler while it is plugged into any power supply.
Prior to any service or repair of the water cooler, ensure that the water has been completely drained from the system.


