PMS 711
2 cyan
85 magenta
76 yellow
10.25.12
CRU Mark
Page 2
1. Pre-Installation Steps
1.1 Box Contents
The following list contains the items that are included
in the complete configuration for this device. Please
contact CRU if any items are missing or damaged:
Accessories
Quantity
RTX800-TR Enclosure
1
Thunderbolt Cable
1
Power Cord
1
Quick Start Guide
1
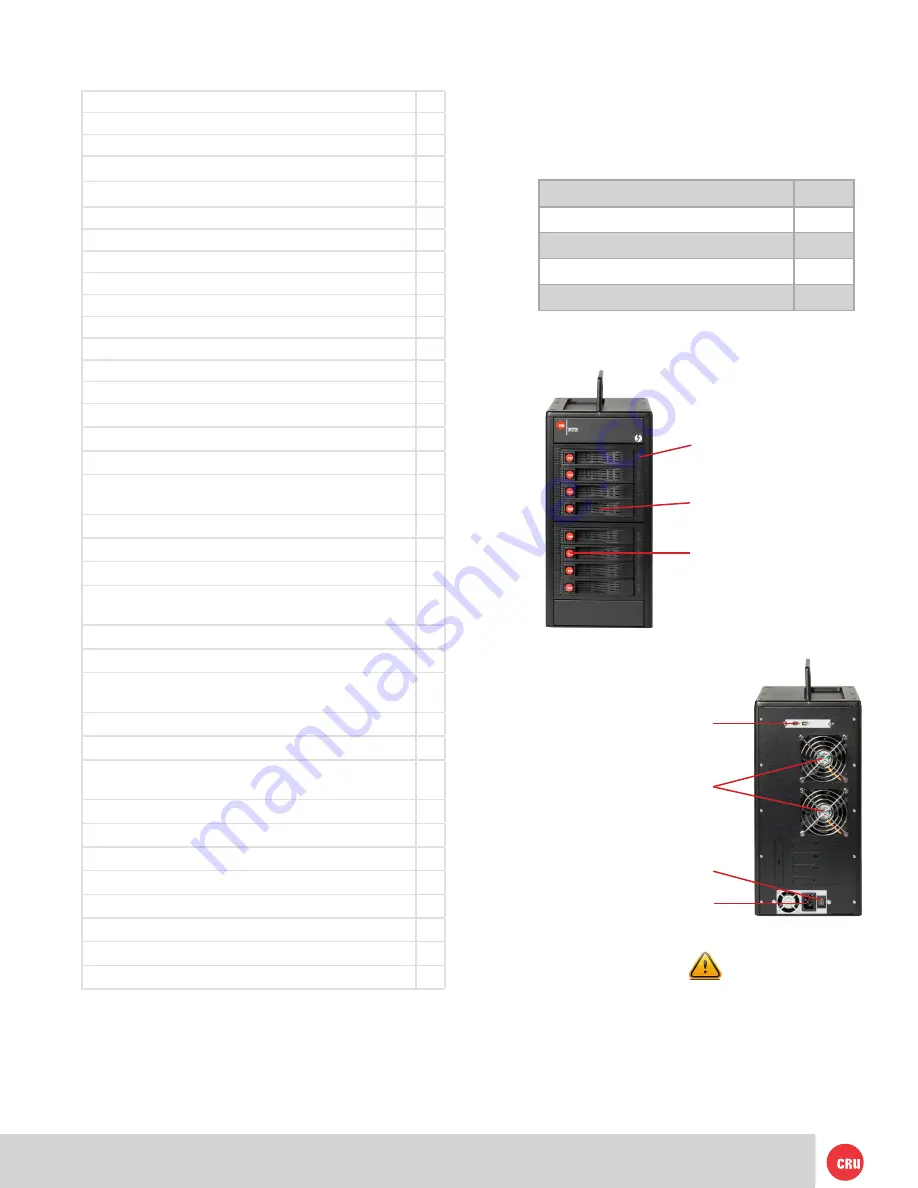
1.2 Identifying Parts of your RTX800-TR
Drive Power
and Activity LEDs
Ejection Handle
TrayFree Bay
Thunderbolt
Ports
Power Port
Power
Switch
Cooling Fans
1.3 Warnings and Notices
Please read the following before beginning installation.
General Care
• Proper grounding is strongly recommended to
prevent electrical damage to the enclosure or
other connected devices, including the computer
Table of Contents
1. Pre-Installation Steps
2
1.1 Box Contents
2
1.2 Identifying Parts of your RTX800-TR
2
1.3 Warnings and Notices
2
2. Introduction to RAID
3
2.1 Summary of RAID Levels
3
3. Installation Steps
3
3.1 Hard Drive Installation
3
3.2 Operating Your RTX Enclosure
3
3.2.1 Installing Thunderbolt Drivers
4
3.2.2 Install ATTO ConfigTool
4
3.2.3 Configuring RAID
4
4. Customizing a RAID Setup
5
5. Configuring Drive Redundancy
5
5.1 Create a Hot Spare Pool
5
5.2 Enable Auto-Rebuild
6
6. Change RAID Group Properties
6
7. Recovering From A Failed Hard Drive or RAID
Group
6
7.1 Rebuilding the RAID Group
7
7.1.1 Automatic Replacement
7
7.1.2 Manual Replacement
7
7.1.3 Recovery from Replacement of a Wrong
Drive
7
7.2 Data Recovery
7
8. RAID Notifications
8
8.1 Configuring Visual, Audible, and System
Log Alerts
8
8.2 Configuring E-Mail Notifications
8
8.3 Retrieving System Logs
9
9. Usage with Mac and Windows Operating
Systems
9
9.1 Usage with Mac OS X
9
9.1.1 Formatting the RAID Group
9
9.1.2 Mounting and Unmounting Volumes
9
9.2 Usage with Windows Operating Systems
9
9.2.1 Formatting the RAID Group
9
9.2.2 Mounting and Unmounting Volumes
10
10. RAID is Not A Backup
10
11. Technical Specifications
11


