Page: 3
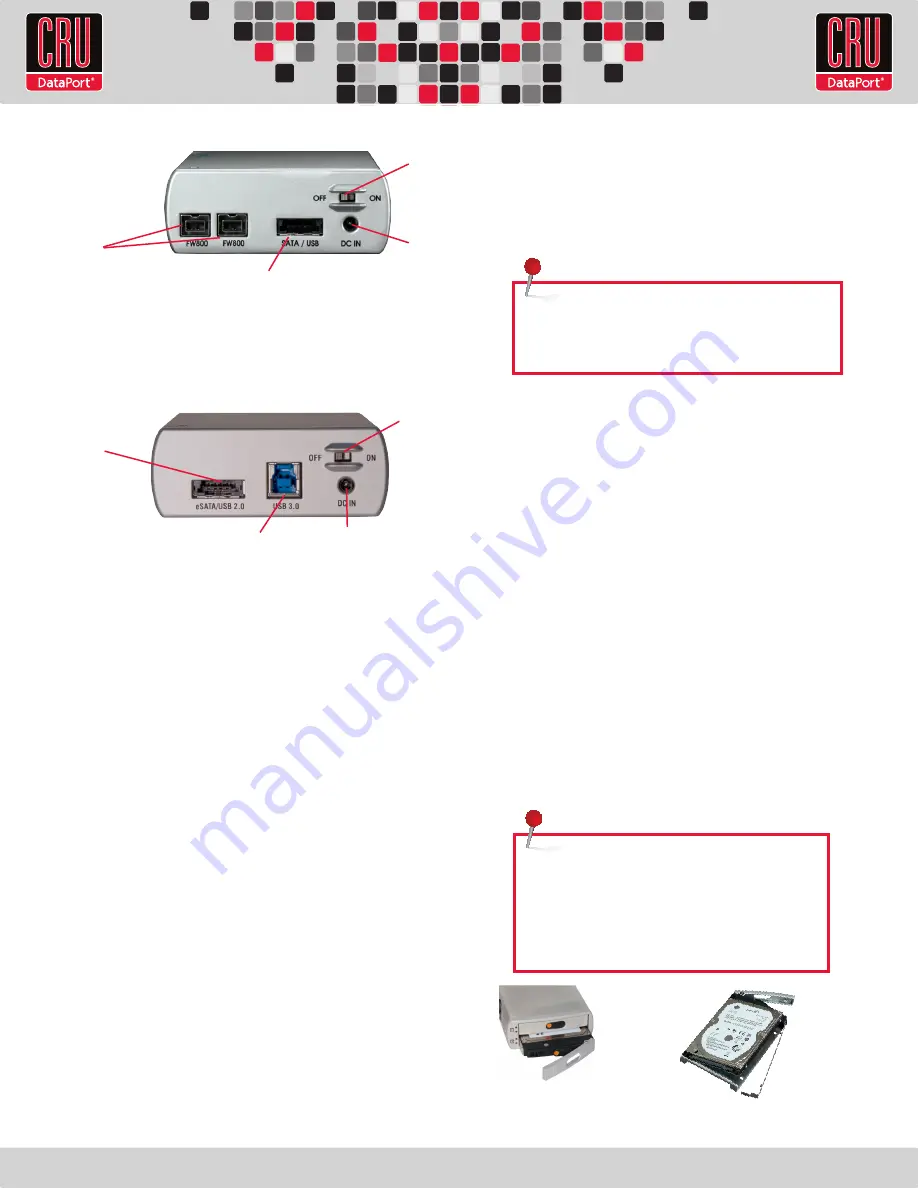
1. FireWire Ports
2. eSATA/USB 2.0 Combined Port
3. Power Switch
4. Power Supply Input
1
2
3
4
drives. If one drive were to fail, your data would still be preserved
on the other drive. After replacing a failed drive you can rebuild
the RAID on the fly so that your data is once again redundant and
secure.
1.3.3 Single Disk Mode
In this mode the unit will support a single drive.
2. Hardware Setup
2.1 Installing Hard Drives
ToughTech Duo is compatible with 2.5-inch SATA hard drives that are
no more than 9.5 mm in height. Follow these steps for installing or
removing a drive.
a. Push the ejection button. The handle will swing open.
b. Remove the drive sled and swing the side panel out.
c. Insert the drive with the label up.
d. Close the side panel. Ensure the panel is flush with the drive.
e. Secure the drive with the provided screws (optional).
f. Slide the drive sled back into the unit.
g. Close the handle and ensure the sled is securely in place.
1.3 Consider your RAID Configuration
If you purchased ToughTech Duo with drives pre-installed and pre-
configured, skip to Hardware Setup.
ToughTech Duo supports RAID 0, RAID 1 and a single drive. Consider
which configuration best suits your needs. All hard drives must be
initialized prior to use in the ToughTech Duo. It is not possible to add
a drive to ToughTech Duo and access pre-existing data on that drive.
The hard drive must be initialized by the unit, which will cause the
loss of all data on the drive. The drive(s) must be configured to RAID
0, RAID 1 or a single drive.
1.3.1 RAID 0
In this mode, the unit will configure the drives in a “striped”
RAID. This will split your data between the drives, offering faster
performance and allowing you to use the full capacity of the drives
in a single volume. However, this mode offers no protection for the
data; if either hard drive were to fail, all data would be lost.
1.3.2 RAID 1
In this mode, the unit will “mirror” the two drives for best data
protection. In this mode, you will work with a single volume equal
in size to the capacity of one drive. When you copy data to the
volume, ToughTech Duo will simultaneously write the data to both
NOTE:
There is no way to convert a drive in Single Disk
Mode to RAID 1 without creating a new array which will
cause loss of the data on the hard drive.
Step a
Step b
NOTE:
If any of the drives are inaccessible after
powering on the unit, try the following steps:
1. Turn off the power.
2. Remove the drive(s) in question.
3. Reinsert the drive(s).
4. Turn on the power.
Rear of ToughTech Duo-QR
1. eSATA/USB 2.0 Combined Port
2. USB 3.0 Port
3. Power Switch
4. Power Supply Input
1
4
2
4
Rear of ToughTech Duo-3SR


