Installation and Programming Instructions for Electronic Stand-Alone Cylindrical Locks
- 8 -
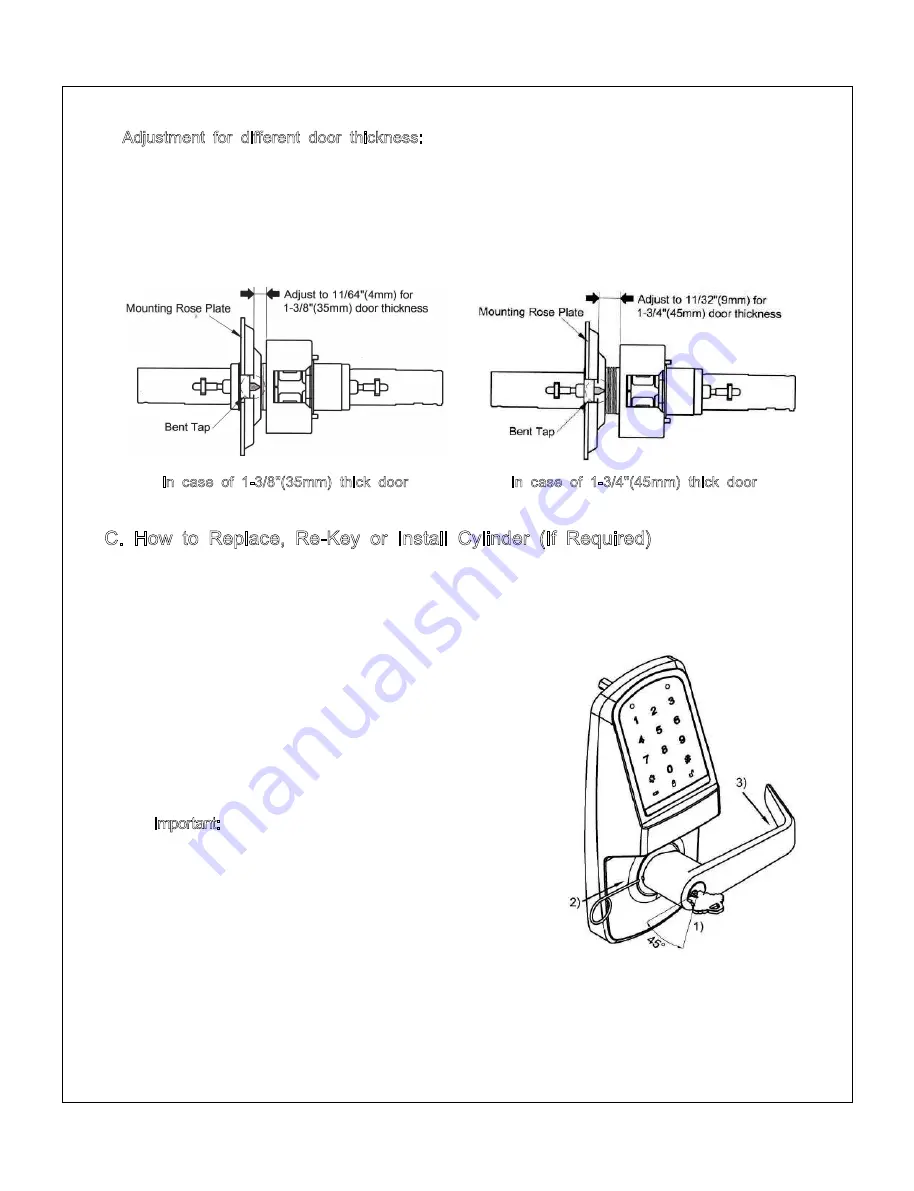
1. Remove outside lever, spacer bushing and outside assembly (See C below).
2. Rotate outside mounting rose plate for proper door thickness as shown below.
3. Position of bent taps as shown below must match (ensure the bent taps are
horizontally crossed).
4. Reassemble outside assembly, spacer bushing and outside lever by reversing
procedures.
In case of 1-3/8"(35mm) thick door
In case of 1-3/4"(45mm) thick door
1. Remove outside lever
1) Insert key, rotate 45° clockwise and hold.
2) Depress lever retainer with lever removal tool
(provided).
3) Slide lever off lock.
2. With outside lever in hand, use standard pliers to pull
out cylinder retainer.
3. Remove key and cylinder from outside lever.
4. Insert new cylinder.
5. Secure by pressing cylinder retainer flush with the
lever.
6. Insert key into cylinder.
Important: Make sure the key-cut side of key lines up
facing towards the end of the lever. If the key is
inserted incorrectly, the lock will reassemble and might
appear to properly work; however, when the key is
removed, the latchbolt will remain retracted.
7. Rotate key 45° counterclockwise.
Push the lever onto the spindle until fully seated.
Pull on lever to insure properly seated.
Adjustment for different door thickness:
C. How to Replace, Re-Key or Install Cylinder (If Required)
- 9 -
- 8 -


