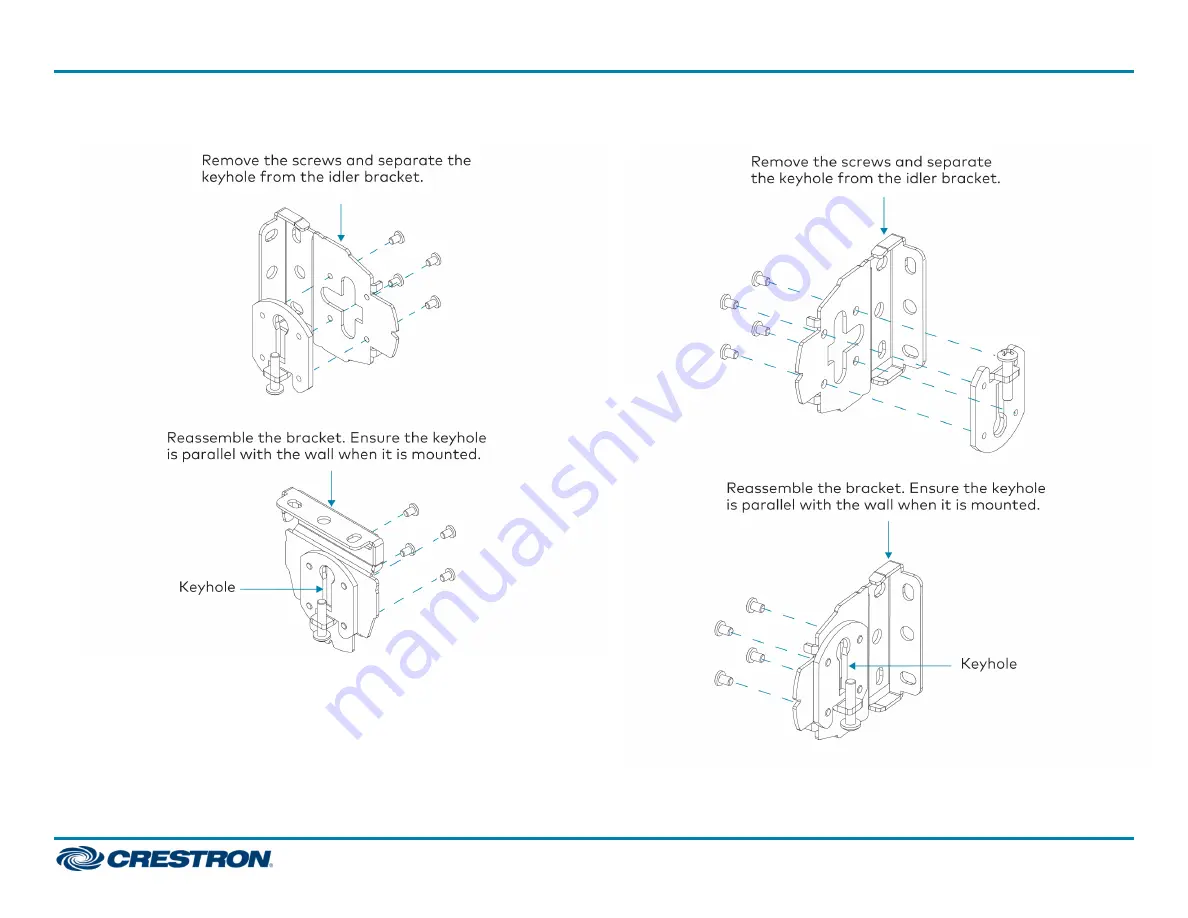
Rotate Keyhole: Right-Side Wall Mount to Ceiling Mount
Rotate Keyhole: Right-Side Wall Mount to Left Side Wall Mount
6
CSA-DECOR3 Series
Quick Start
Shade Motor Bracket Installation and Motor Programming
Page 1: ...masonry installations It is the responsibility of the installer to make sure that the mounting method used is secure l Ensure that all mounting brackets are level and on the same plane l All shades m...
Page 2: ...right side of the window opening l The motor bracket mounts on the left side of the window opening NOTES l The stamped L and R should face the wall and window l For inside mounts secure the mounting...
Page 3: ...idler pin into the top of the keyhole on the right bracket and slide it down into the keyhole The idler pin sits on the vertical adjustment screw Insert the Idler Pin into the Keyhole 2 Raise the mot...
Page 4: ...air is coming in through a window l A foreign object is stuck to the shade fabric for example tape bugs dust etc Ways to prevent telescoping l Use the leveling features built into the shade brackets t...
Page 5: ...d on mounting location Swapping the hardware requires a Phillips screwdriver Left Side Idler Bracket Wall Mount Right Side Idler Bracket Wall Mount Left or Right Side Idler Bracket Ceiling or Header M...
Page 6: ...otate Keyhole Right Side Wall Mount to Ceiling Mount Rotate Keyhole Right Side Wall Mount to Left Side Wall Mount 6 CSA DECOR3 Series Quick Start Shade Motor Bracket Installation and Motor Programming...
Page 7: ...the Cables To ensure proper functionality and a clean look consider the following when routing cables and making connections l The cables should exit the wall near the motor end of the shade assembly...
Page 8: ...erformed remotely using a control system The timeout and LED indicators are the same as described in this document Controls and Indicators The Crestron CSM I QMTDC shade motors have UP SET and DN down...
Page 9: ...the shade hangs level and plumb Upon startup run the shade all the way down and check for plumb Observe the shade closely as it rolls up If the shade begins to telescope stop immediately and take the...
Page 10: ...upper limit was successfully set Joining an infiNET EX Network infiNET EX Interfaces Only The device connects to the Crestron network via the infiNET EX communications protocol Use the procedures out...
Page 11: ...s to provide a visual reference that the motor is operating normally or if it is in an error state Normal Operation The following table provides a list of possible LED patterns encountered during norm...
Page 12: ...The motor is not being polled by the control system Ensure that the Net ID matches the control system program and that the program is running on the control system Troubleshooting The following table...
Page 13: ...is licensed to Crestron dealers CSPs and end users under a separate End User License Agreement Both of these Agreements can be found on the Crestron website at www crestron com legal software_license...