Creality Ender 3 Pro Assembly Instructions V1.0
30
www.rb42.blog
11.
3
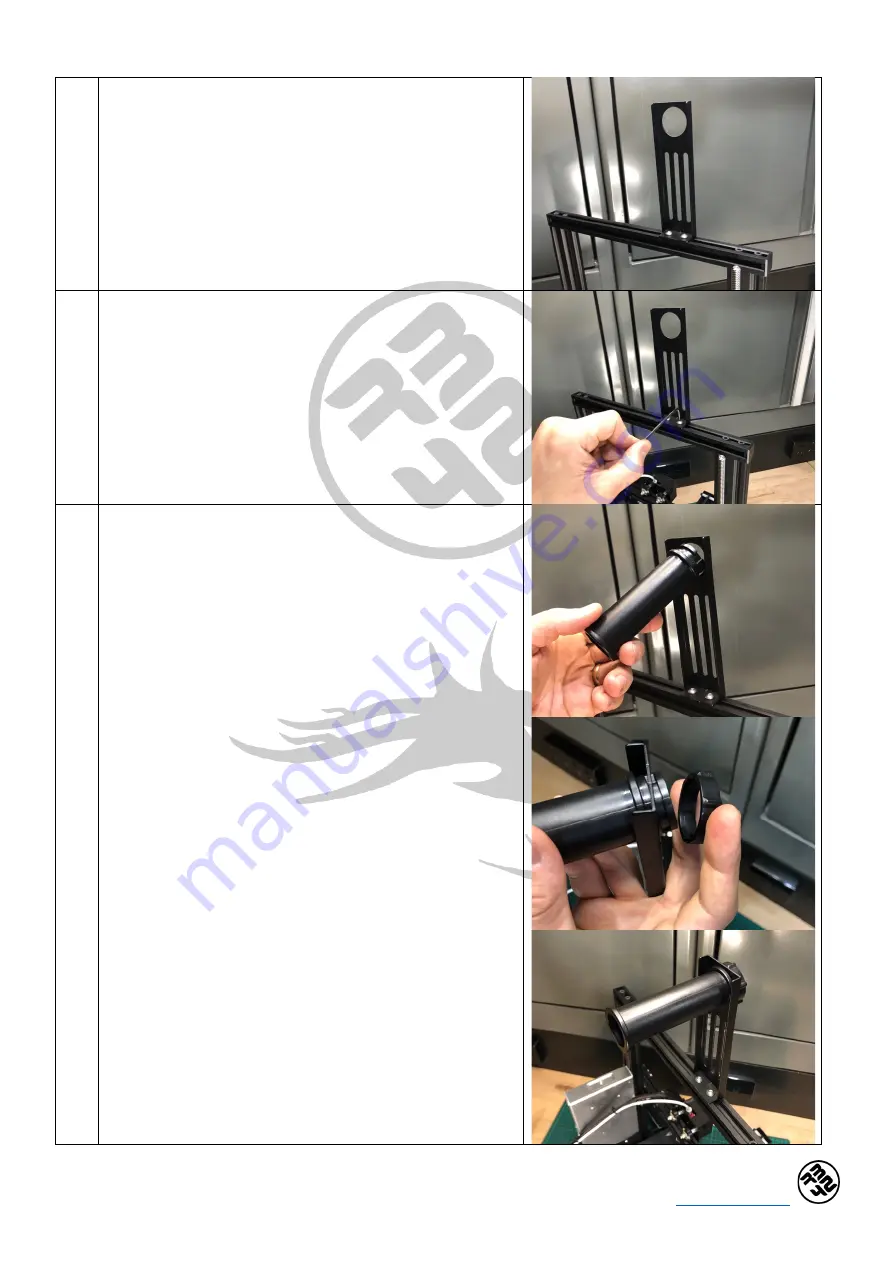
Position the (11) Spool holder frame onto of the top surface
of the (19) Top profile (from step 10) in a suitable location,
typically this is 50-60mm (approx.) from the end of the (19)
Top profile on the left-hand side. Ensure the orientation of
the frame is with the folded tabs of the part facing towards
the rear of the printer.
11.
4
Once in the channel, rotate the T-slot nuts by 90 degrees
making them perpendicular to the channel and the profile.
When in the correct position, tighten the M5x8 hex socket
cap screws, using an M3 Hex Key (Allen Key), so the spool
holder frame is firmly held in place. Confirm that both the T-
slot nuts remain at 90 degrees to the top profile once fully
tightened in place.
11.
5
Remove the locking nut off the (10) Spool holder tube and
then insert the main body of the tube into the hole at the
top of the (11) Spool holder frame. Position the tube so it is
orientated towards the rear of the printer and sitting more
or less directly inline and above the extruder. Secure the
main body in place to the frame with the locking nut,
tightening securely to ensure no free play or movement of
the tube.
Summary of Contents for Ender 3 Pro
Page 1: ...Version 1 0...


