


AFA ultraCUBE User Manual
19
Ultraviolet (UV) Lamp Installation or Replacement
WARNING:
Disconnect power to the WCS 2.0 before changing the UV lamp and
follow the lamp replacement instructions. Exposure to UV light is hazardous to
exposed skin and eyesight.
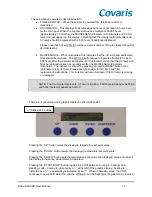
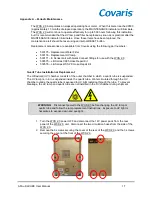
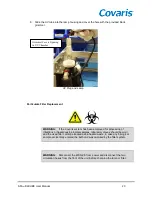
1. Turn the WCS 2.0 power OFF and disconnect the 12V power pack from the side panel of
the WCS 2.0 unit. Disconnect the two circulation hoses from the front of the WCS 2.0.
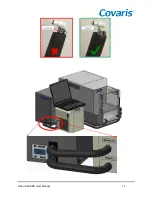
2. Remove the 6 screws securing the cover at the rear of the WCS 2.0 and the 3 screws
securing the cover at the front of the WCS 2.0.
3. Carefully remove the outside cover of the WCS 2.0 by pulling it up and off the WCS 2.0
chassis.
4. Identify the UV lamp enclosure mounted on the rear wall of the WCS 2.0, next to the water
filter.
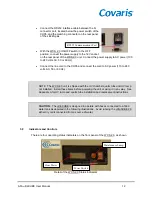
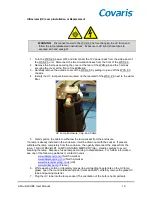
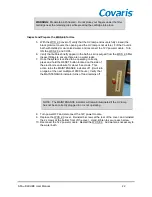
UV Lamp Enclosure, Cap, and Cable
5. Gently pull on the cable to withdraw the lamp socket from the enclosure.
If a lamp is already installed in the enclosure, it will be drawn out with the socket. If present,
withdraw the lamp completely from the enclosure, then gently disconnect the socket from the
lamp. THE ULTRAVIOLET LAMP CONTAINS MERCURY (Hg). Handle carefully to avoid
breaking the lamp. Dispose of used lamps according to disposal laws. For further information,
see one of the following websites or contact Covaris.
www.lamprecycle.org
(North America)
www.lamprecycling.com
(North America)
www.mercuryrecycling.co.uk
(UK)
www.malampe.org
(France)
6. While wearing cotton or laboratory gloves (to avoid getting fingerprints on the UV lamp
glass), open the round cardboard cylinder (marked LAMP), carefully remove the glass UV
tube and packing material.
7. Plug the UV tube into the lamp socket (The orientation of the bulb is not important).


