LINC PAN0RAY
LINC PAN0RAY
28
29
3 EVENT WATERSKIING
3 EVENT WATERSKIING
Plus Setting
- This On/Off setting is included in the Pull Type pop-up
menu. The plus setting is for heavier/stronger skiers who are looking for
a faster start and quicker throttle response. This setting is independent
of the Pull Type setting, but works in conjunction with Pull Type.
Rope Length
- this setting requires the operator select the rope
length of the Slalom skier. LINC will take this setting, cross-reference it
with the set speed, and will determine how to use the Microtuners and
Hydrogate to ensure a flat wake at the proper location for the skier.
Auto Rope Advance
- when turned on, will automatically go to the next
shortest rope length after each pass through the slalom course.
Wait Time
- this setting determines the amount of time a skier can
wait in the water before the warning timer starts to beep, which
indicates that it is time to start the skier’s pass. This setting is mostly
used for actual tournaments where consistent wait times ensure
the same course conditions for each skier. The chief officials will help
determine the proper wait time in an actual tournament.
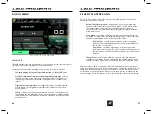
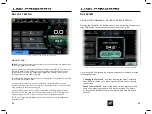
The “Slalom Tournament” event also contains the following items on the Event
Details tab (right side of screen).
Current and Previous Course Times
- the buoy times will be displayed
top-to-bottom according to the skier score (0-6). The Rope Length used
for that pass will be displayed above the buoy times.
Change Event
- this function will bring up a pop-up menu with the 7
available Events. When the pop-up appears, the desired event may be
selected by touching the screen or by using the Helm Command knob.
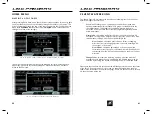
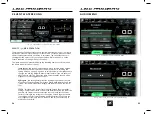
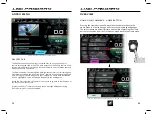
Please note that a gold “Tournament” label will be displayed in the very center
of the screen when the boat is in Tournament mode. Just below, the Zero Off set
speed area will change color based on the status of the Zero Off speed control.
If it is turned on, then that area will be green (as shown in the screenshot in the
previous page). If Zero Off speed control is turned off, then that area will be red.
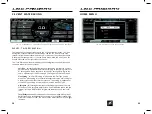
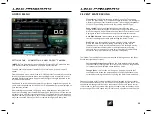
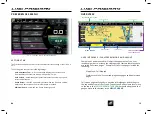
EVENTS - SLALOM TOURNAMENT
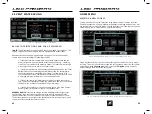
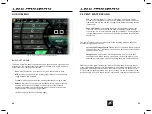
The image above shows a screenshot in the “Slalom Tournament” event.
The “Slalom Tournament” event only makes tournament official set speeds
available and ensures that all other settings are also tournament compliant. The
screenshot above is showing that the operator is 1) on the Home Menu, Main tab
and 2) is on the Event Details tab on the right side of the screen.
The “Slalom Tournament” event will display the following items on the Main tab
on the Home Menu (left side of screen):
Pull Type
- determines how the engine will react to a skier’s pull in order
to accelerate/decelerate according to the skier’s preference. There are 9
different settings with B2 being the default setting. The letters A, B and C
dictate how quickly the engine will respond. The numbers 1, 2, and 3
dictate the intensity of the throttle response to the skier’s pull.
A
Slower engine response out of the buoy, but boat will tend to move ahead as skier
approaches the next buoy
B
Moderate, balanced engine response compared to
A
and
C
C
Faster engine response out of the buoy, but the boat will tend to hold back as the
skier approaches the next buoy (used by Advanced skiers)
1
Softest pull from the boat. This requires the smallest amount of load from the
skier before the system initiates an RPM change
2
Moderate pull from the boat as compared to
1
and
3
3
Hardest pull from the boat. This requires the largest amount of load from the skier
before the system initiates an RPM change
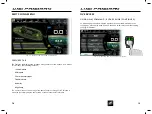
FIG. C1 - SCREENSHOT OF “SLALOM TOURNAMENT” EVENT
LINC PAN0RAY
LINC PAN0RAY
68
69
GOPRO MENU
GOPRO MENU
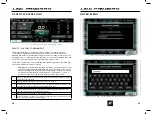
SETTINGS TAB - CONNECTING A NEW GOPRO
®
CAMERA
*NOTE
- Before initiating the connecting process through LINC, make sure that
your wireless network is turned on from your GoPro
®
camera.
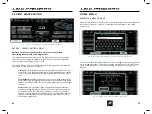
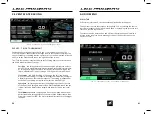
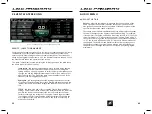
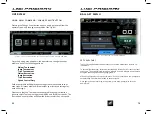
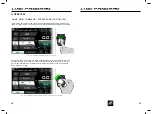
To add a new camera, select “New GoPro Camera” and a pop-up menu will
appear.
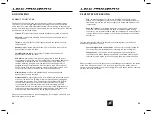
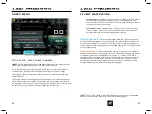
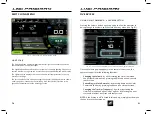
From the pop-up menu, select “Scan for GoPro Cameras” so that LINC can search
for nearby wireless networks. When the scanning process is complete, a list of
available wireless networks will appear with the signal strength indicated to the
left of the network name.
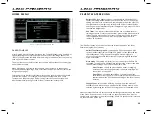
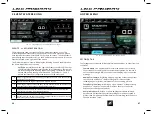
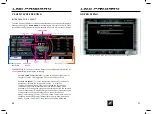
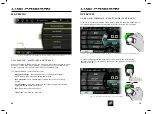
Scroll down to select the desired camera. From there, a keyboard will pop up for
you to enter the password for the GoPro WiFi (the password may be displayed on
your camera’s screen).
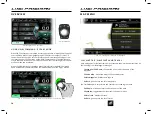
After entering the password, the pop-up menu will disappear, the system will
finish the connecting process with the camera, and then the name of the camera
will appear with a battery status icon and the “Connected” text. At this stage, you
may now remotely control your GoPro
®
camera through the “Control” tab or you
may view the saved files on your GoPro
®
camera through the “Gallery” tab.
FIG. G3 - CONNECTING TO A NEW GOPRO
®
CAMERA*
FIG. G4 - POP-UP MENU FOR CONNECTING A NEW GOPRO
®
CAMERA
FIG. G5 - POP-UP MENU FOR ENTERING WIFI PASSWORD FOR A GOPRO
®
CAMERA

