background image

18

19

C O R N I N G   C E L L   C O U N T E R

Instruction Manual

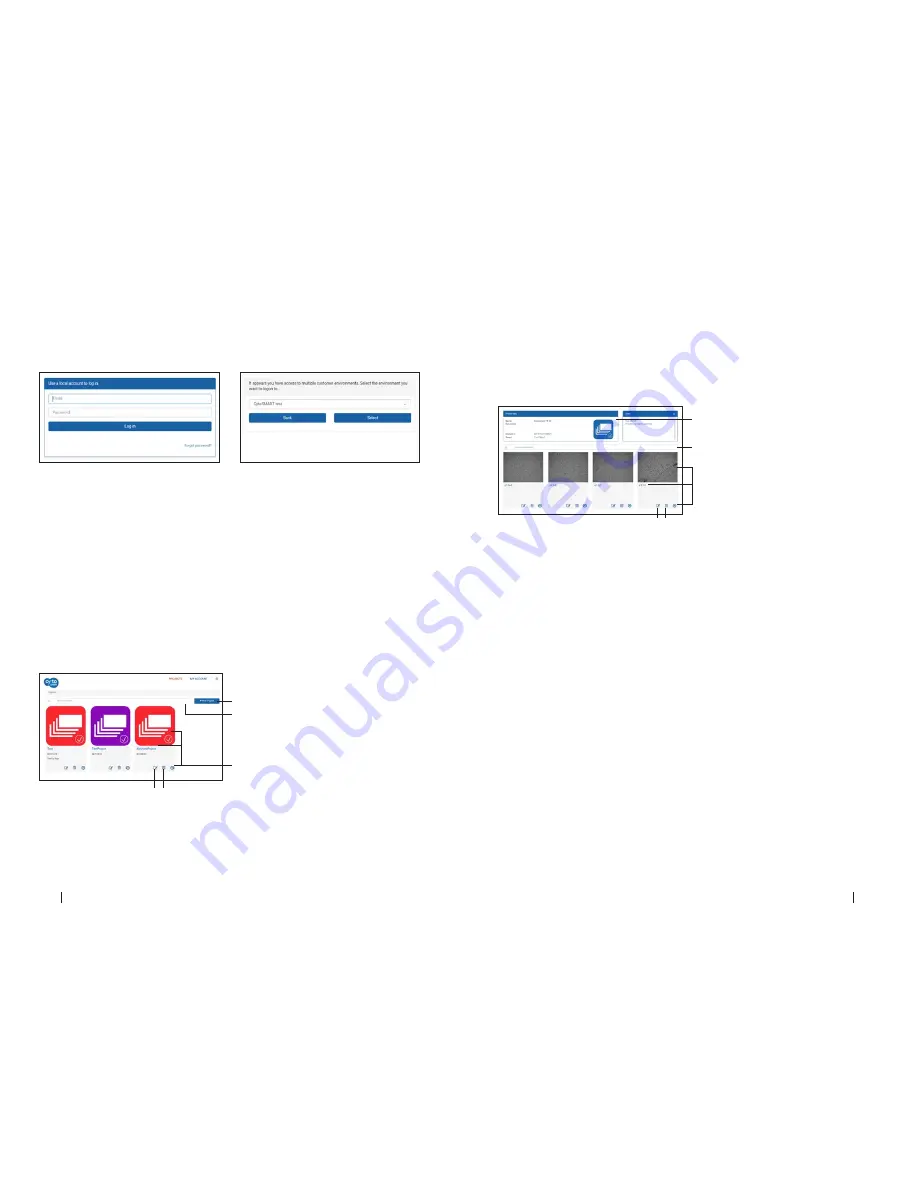
This link will lead you to the CytoSMART™ Connect login page (Figure 21). Log in using 
the credentials you created earlier. If you have multiple customer environments, choose 
which environment you would like to access (Figure 22).

Figure 21. 

Connect login page

Figure 22. 

Choose an environment

Figure 23. 

Project overview

A

C

D

E

B

Experiment Overview 

After selecting a project (C), you will get access to an overview of all experiments 
assigned to that project (Figure 24). At the top, you can see an overview of the project 
data (F). As with the project overview, use the ‘Search’ bar (G) to find a specific 
experiment within a project.

Figure 24. 

Overview of all experiments assigned

F

G

H

E D

Project Overview

After logging in to the Cloud, you will get access to an overview of all projects (Figure 23). 
Navigating the portal is simple. If you have multiple projects in an account, use the 
“Search Projects” bar (A) to quickly search for a project. To create a new project, select 
“New Project” (B). This is similar to beginning a new project, as described in Section 3.  
It is not possible to start an experiment from the cloud.

To access a project and all its assigned experiments, select the projects corresponding 
“Project Icon”, “Project Title”, or “Arrow Icon” (C).

To delete a project, select the “Waste Bin Icon” (D). Select the “Pencil Icon” (E) to edit 
project details. This allows you to change the project name and its description.

Select a specific experiment by clicking on its “Experiment Image”, “Experiment Title”, or 
the “Arrow Icon” (H). This will bring up the experiment page of that specific experiment.

To edit details of an experiment, select the “Pencil Icon” (E). This allows you to change 
the name and description of an experiment. To delete an experiment entirely, select the 
“Waste Bin Icon” (D).

Summary of Contents for 6749

Page 1: ...Corning Cell Counter Accurate Cell Counts in a Flash Instruction Manual Cat No 6749...

Page 2: ...Plate Placement 12 Sample Loading 13 Live Dead Sample Loading 14 Counting Chamber Placement 14 4 0 Performing a Cell Count 15 Focusing of the Cells 15 Performing a Count 16 5 0 Connecting to the Clou...

Page 3: ...the device 1 0 Introduction Technology to Make Your Work Easier Thank you for purchasing the Corning Cell Counter The Corning Cell Counter is a benchtop automated image based cell counter which uses...

Page 4: ...ew of the Corning Cell Counter 1 Light Arc 2 USB Cable 5 Focus Knob 3 Optical Window 4 Adapter Plate 2 0 Getting Started Product contents include the following items Figure 2 1 Manual and Quick Starte...

Page 5: ...on has completed an icon for the CytoSMART Cloud App will be visible on the desktop Figure 3 4 Start the CytoSMART Cloud App by double clicking the icon on the desktop A notification to connect the de...

Page 6: ...can perform a single count or multiple counts within a project The CytoSMART Cloud App software automatically stores the results within a project which you can view later in the CytoSMART Connect Figu...

Page 7: ...ownwards until it clicks into place on top of the Corning Cell Counter Figure 15 Figure 13 Start cell count Figure 14 Slide the adapter plate into place Figure 15 Carefully press the adapter plate dow...

Page 8: ...installed you can place the counting chamber in the adapter plate that has been inserted on the Corning Cell Counter 4 0 Performing a Cell Count After placing the loaded counting chamber on the Corni...

Page 9: ...nnect environment 5 If you want to perform another cell count simply press Start new cell count E Figure 19 Overview of the result page A B C D E 5 0 Connecting to the Cloud One of the features of the...

Page 10: ...verview of all projects Figure 23 Navigating the portal is simple If you have multiple projects in an account use the Search Projects bar A to quickly search for a project To create a new project sele...

Page 11: ...circles Experiment Pane The experiment pane provides an overview of the experiment i e project start date owner number of cells and viability Notes Pane Notes that you have added after counting the ce...

Page 12: ...r before loading a new sample Figure 29 Cell clump example Figure 30 Air bubble example Figure 31 Debris present in the counting chamber No cells are visible This may be due to cell concentration of t...

Page 13: ...causes not arising from defects in original material or workmanship This warranty does not cover motor brushes fuses light bulbs batteries or damage to paint or finish Claims for transit damage shoul...

Page 14: ...te electrical and electronic equipment WEEE the Corning Cell Counter is marked with the crossed out wheeled bin and must not be disposed of with domestic waste Consequently the buyer shall follow the...

Page 15: ...tact your local Corning sales office 2018 Corning Incorporated All rights reserved 2 18 CLS EQ 486 11319 30504 Corning Incorporated Life Sciences 836 North St Building 300 Suite 3401 Tewksbury MA 0187...

Reviews: