5
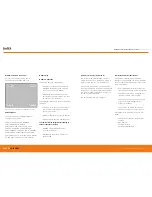
Connect camera to a PC running CorDEX MONITIR
software, select Direct Connection, Ethernet and
use the default address 192.168.1.100. You can now
configure the camera for your network, for more
information on CorDEX MONITIR Application, please
refer to the specific software user manual.
6
Once the camera has been locally configured for your
network, attach the RJ45 connector and replace the
weather cover.
7
The camera is now ready for use.
NETWORK INFORMATION
AND PARAMETERS
IMPORTANT NOTICE
CorDEX MN4000 cameras are shipped as DHCP enabled as setup configuration is via the
USB port located on the front of the camera.
CorDEX MN4100 cameras are shipped with a
STATIC IP ADDRESS of 192.168.1.100
This is
the default address the CorDEX MONITIR PC Application uses in Direct Ethernet Connect
mode when communicating with the camera during initial setup.
Please refer to your Network Administrator and obtain the correct parameters before
connecting MN4xxx cameras to your network.
RUGGED
AUTHORITY
MONITIR Series Thermal Imaging Cameras
– User Manual
15
Document Reference MONITIRSERIESUM Rev. A


