background image

FAX Operation (Advanced) 

OPERATION GUIDE

4-35

4

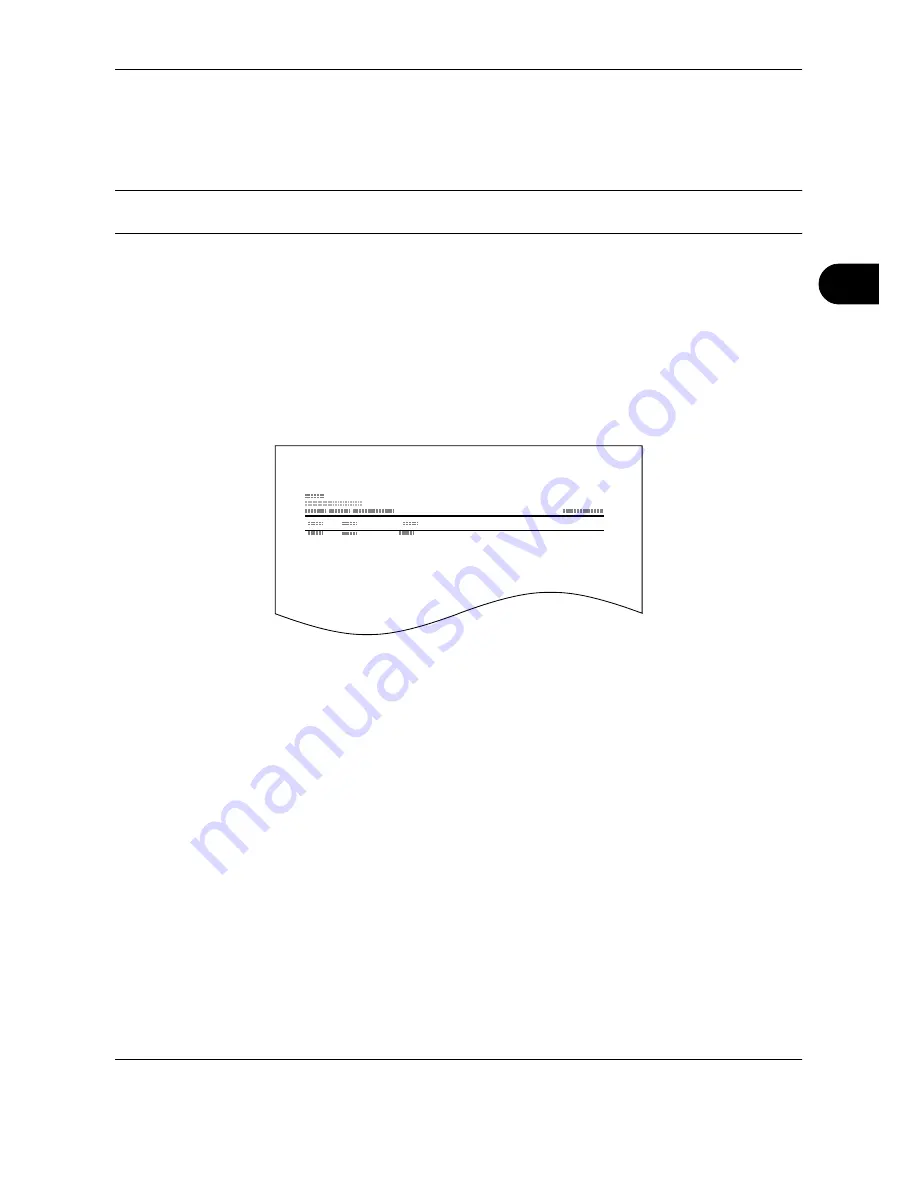
Printing a FAX Box List

You can print the FAX Box list in which the list of Box No.’s and Box names of the registered FAX Boxes are 
described. When there are originals in the FAX Boxes, the number of pages is displayed.

NOTE: 

The list can be printed when user login has been enabled and the machine is logged in with 

administrator privileges.

1

Press the 

System Menu

 key.

2

Press [Document Box/Removable Memory], [Next] 
of 

FAX Box, 

and then [Print] of 

FAX Box List

.

3

When the printing confirmation screen appears, 
press [Yes]. The machine prints a list of the FAX 
Boxes.

FAX Reception Box

Summary of Contents for 250ci

Page 1: ...250ci 300ci 400ci 500ci FAX System Q OPERATION GUIDE Please read this Operation Guide before using this machine Keep it close to the machine for easy reference...

Page 2: ...Introduction In this Operation Guide 250ci 300ci 400ci 500ci are referred to as 25 ppm model 30 ppm model 40 ppm model and 50 ppm model respectively...

Page 3: ...d points Symbols The symbol indicates that the related section includes safety warnings Specific points of attention are indicated inside the symbol The symbol indicates that the related section inclu...

Page 4: ...ii OPERATION GUIDE Note Due to performance updating information in this Operation Guide is subject to change without notice...

Page 5: ...eiving System Redial 3 31 4 FAX Operation Advanced Long Originals 4 2 Delayed Transmission 4 3 Broadcast Transmission 4 6 Standby Transmission 4 8 Interrupt Send 4 9 Chain Dial 4 10 Manual Send 4 12 M...

Page 6: ...put 6 30 2 in 1 Reception 6 31 Remote Diagnostics 6 32 Prohibiting FAX Printing at Specified Times Unusable Time 6 33 7 Optional Equipment Expansion Memory 7 2 Dual FAX 7 2 8 About Network FAX What is...

Page 7: ...g in order to eliminate exposure to direct sunlight Power supply Grounding the machine Do not connect this machine to the same outlet as an air conditioner or copier etc Precautions for Use CAUTION Do...

Page 8: ...produce audible tones or clicks on the line can disrupt or cause termination of facsimile communications No matter what the status of the unit if the sound of the motor within the unit is audible neve...

Page 9: ...to the telephone company 2 This equipment connects to the network via USOC RJ11C 3 A plug and jack used to connect this equipment to the premises wiring and telephone network must comply with the app...

Page 10: ...n the first page of the transmission the date and time it is sent and an identification of the business or other entity or other individual sending the message and the telephone number of the sending...

Page 11: ...nformer aux r glements pertinents quant l limination des piles CONSERVER CES INSTRUCTIONS CANADIAN IC REQUIREMENTS This product meets the applicable Industry Canada technical specifications The Ringer...

Page 12: ...ermore explains sub address communication functions of the machine that are compatible with other makers systems and job accounting functions convenient for checking the communication status of fax Ch...

Page 13: ...NOTE This Operation Guide contains information for using both the inch and metric versions of this machine The inch version of this machine is shown in the screens in this guide If you are using the...

Page 14: ...displayed on the PC screen Press the Start key Regular Indicates the touch panel keys Press OK Italic Indicates the messages displayed on the touch panel Ready to copy is displayed Note Indicates supp...

Page 15: ...re used to indicate originals and paper placement directions on the touch panel Placement direction Indicated size The size of the originals paper that can be used depends on the function and source t...

Page 16: ...xiv OPERATION GUIDE...

Page 17: ...art Names and Functions This chapter explains the names of parts when the machine is used as a fax machine after installing the FAX kit For other parts refer to the machine s Operation Guide Operation...

Page 18: ...splays the Copy screen Displays the screen for sending You can also change this to show the address book screen Displays the Document Box screen Displays the Program screen Blinks while data is transm...

Page 19: ...Blinks while the machine is accessing the hard disk fax memory or USB memory general purpose item Blinks while data is received Returns settings to their default states Pauses the printing job in pro...

Page 20: ...on with this panel 2 Main power switch Set this switch to the ON side when performing the fax or copier operation The touch panel lights to enable operation 3 MP Multi Purpose tray Set the paper in th...

Page 21: ...12 8 7 7 Original placement indicator Indicates the original status in the Document Processor The left indicator lights in green when the original is correctly set 8 Top cover Open this cover when th...

Page 22: ...Part Names and Functions 1 6 OPERATION GUIDE...

Page 23: ...me after the FAX kit is installed in the machine There is no need for the customer to undertake this preparation if it has already been carried out by a service representative Selection of Telephone L...

Page 24: ...x NOTE If you install 2 optonal FAX Kits Dual FAX option and then use 2 phone lines select the option for each line 1 Press the System Menu key 2 Press FAX Next of Transmission Next of FAX and then Ch...

Page 25: ...e location of the information to be printed you can select inside or outside of the page image being sent NOTE Normally the Local FAX Name is printed in the transmit terminal identification TTI Howeve...

Page 26: ...acter Entry Method on page 2 of the Appendix 4 Press OK Local FAX Information Entry Register the local FAX information local FAX number ID printed on in the transmit terminal identification TTI area T...

Page 27: ...e the cursor Pressing Backspace deletes the character to the left of the cursor 5 Press OK Local FAX ID Entry 6 Press Change of Local FAX ID The entry screen is displayed 7 Using the numeric keys or e...

Page 28: ...press OK NOTE Press or to view the next region 4 Press Off or On of Summer Time and then press OK NOTE If you select a region that does not utilize summer time the summer time setting screen will not...

Page 29: ...llowing basic operations Enter key and Quick No Search key 3 2 Automatic Send 3 4 FAX Automatic Reception 3 12 Cancelling Communication 3 14 Using the Address Book 3 17 Using One touch Keys 3 27 Using...

Page 30: ...that the Enter key performs the same action as OK 2 Once you have set the date and time press the Enter or OK key Using the Quick No Search key Use the Quick No Search keys to perform an action by si...

Page 31: ...d 3 digits long press the Enter key or OK The specified destination appears in the destination list Status 2008 10 10 10 10 Original Sending Data Format Quick Setup Destination Color Image Quality Adv...

Page 32: ...rocedure 1 Press Advanced Setup and then FAX Direct Transmission 2 Press On 3 Press OK Status 10 10 2008 10 10 Original Sending Data Format Quick Setup Destination Color Image Quality Advanced Setup D...

Page 33: ...s Memory Transmission When originals are placed on the glass surface This method is suitable for sending book originals that cannot be placed in the document processor After originals placed on the gl...

Page 34: ...glass surface has been sent Every time one page is scanned you perform an operation to allow continued scanning Placing Originals 3 Place the originals on the glass surface or in the optional document...

Page 35: ...ng dialing after you dial a specific number 3 If necessary make any detailed settings Press each key to change the setting and press OK 10 10 2008 10 10 Cancel OK Next Dest Pause FAX No Entry Sub Addr...

Page 36: ...de When the destination includes fax the fax jobs are printed in monochrome and the other sending jobs are printed as the same color as the scanned originals Selecting the Resolution 5 Select the reso...

Page 37: ...an resolution should be equal to or higher than the fax resolution If the selected resolutions are not in this condition the machine automatically adjusts the resolution and changes the selection 1 To...

Page 38: ...the originals 1 To change the original density press Color Image Quality and then Density 2 Select the density 3 Press OK Send Start 7 Press the Start key Transmission begins Checking the Send Status...

Page 39: ...iginals are being scanned cancels the transmission Log abc def com 438 14 47 1 1 10 10 2008 10 10 Status Printing Jobs Sending Jobs Storing Jobs Device Communication Paper Supplies Detail InProcess St...

Page 40: ...eption methods Auto Normal Auto FAX TEL Refer to page 6 2 Auto TAD Refer to page 6 4 Auto DRD Refer to page 6 14 Manual Refer to page 4 13 Checking and Changing the Reception Method 1 Press the System...

Page 41: ...s screen refer to the machine s Operation Guide Reception Print 2 Received originals are output on the top tray with the print side facing downward Up to 250 sheets of plain paper 80 g m can be held o...

Page 42: ...them out from the original output table Cancelling Memory Transmission during communication During memory transmission to cancel communication after it has started following the completed scanning of...

Page 43: ...ect transmission to cancel communication during transmission press the Stop key on the operation panel or Cancel on the touch panel The originals that have been scanned are ejected and the screen retu...

Page 44: ...transmission delete the polling transmission original saved in the polling box For information on how to delete the saved original refer to Deleting Originals in a Polling Box on page 4 47 Overwriting...

Page 45: ...System Menu key 2 Press Edit Destination Register Edit of Address Book Add Contact and then Next 3 Press Change of Address Number 4 Using or the numeric keys enter the custom address number 0001 to 2...

Page 46: ...external line you can use this method to insert a pause before resuming dialing after you dial a specific number 10 Press Change of Sub Address When you do not use sub address communication go to step...

Page 47: ...nals in the receiving system select Off press OK and go to Step 19 17 Press On and enter the encryption FAX Box number four digits with the numeric keys and press OK 18 Press OK 19 If necessary press...

Page 48: ...tion Perform the necessary contact registration in advance 1 Press the System Menu key 2 Press Edit Destination Register Edit of Address Book Add Group and then Next 3 Press Change of Address Number 4...

Page 49: ...9 Press Add 10 Select the destination contact to be registered to the group NOTE You can search for destinations by name or address number 11 Press OK 12 To add a destination repeat steps 8 to 11 Che...

Page 50: ...Setup Destination Color Image Quality Advanced Setup Destination Detail Address Book Folder Path Entry E mail Addr Entry No 1 100 AAA BBB CCC DDD EEE FFF GGG HHH III JJJ 0004 0003 0005 0001 0002 0006...

Page 51: ...up2 Group3 Name Register Edit Address Book 1 2 i FAX FAX ABC DEF JKL MNO PQRS TUV WXYZ GHI 0 9 2 1 4 3 Keys used Search method Search words etc 1 Search Name Search by the registered name 2 Search No...

Page 52: ...t the destination or group to edit NOTE The destinations and groups can be rearranged and searched by destination name group name and address number 4 Press Detail 5 When editing the destination of a...

Page 53: ...ete Press Yes in the confirmation screen to remove the contact You can view detailed information on the selected contact by pressing Detail When deleting the destination of a contact registration or g...

Page 54: ...ou can sort the list in the order of names or address numbers of the destinations 1 Press the System Menu key 2 Press Edit Destination and then Next of List Print 3 Press Print of Address List Name or...

Page 55: ...001 to 1000 Pressing Quick No Search key or No directly selects the One touch key number 4 Press Register Edit 5 Select the destination contact or group to register to the One touch key from the Addre...

Page 56: ...ber to edit 0001 to 1000 Pressing Quick No Search key or No selects the One touch key number by direct input 4 When changing the destination to another destination 1 Press Register Edit 2 Select the n...

Page 57: ...FAX Operation Basic OPERATION GUIDE 3 29 3 When deleting registration contents 1 Press Delete 2 Pressing Yes on the deletion confirmation screen deletes the registration contents of the One touch key...

Page 58: ...mber you don t need to enter zero 0 at the beginning For example you can enter as 1 for One touch key number 1 In this case press OK after entering the number Status 10 10 2008 10 10 Original Sending...

Page 59: ...t to send the fax to the same receiving system press Recall and you can call the receiving system you dialed on the destination list 1 Press Recall The receiving system you dialed is displayed on the...

Page 60: ...FAX Operation Basic 3 32 OPERATION GUIDE...

Page 61: ...ssion 4 6 Standby Transmission 4 8 Interrupt Send 4 9 Chain Dial 4 10 Manual Send 4 12 Manual Reception 4 13 Remote Switch Function 4 15 Printing Sending Received Faxes by Requirements Memory Forwardi...

Page 62: ...an as standard size Refer to 1 sided 2 sided Selection on page 4 53 Originals of up to 1 600 mm 63 long can be scanned 1 Press the Send FAX key 2 Place the originals in the optional document processor...

Page 63: ...and Sending Delayed Transmissions Queued on page 3 15 You can change destinations of a delayed transmission any time before the specified transmission time Refer to Changing Deleting Delayed Transmis...

Page 64: ...formation 1 Press the Status Job Cancel key 2 Press Sending Jobs and then Scheduled Job 3 Select the job you want to change or delete from the list and press Detail Detailed information of the selecte...

Page 65: ...ation screen to change the destination When deleting the destination or deleting the job 1 Press or to select the destination you want to delete 2 Press Delete 3 Press Yes in the confirmation screen t...

Page 66: ...e of transmission 1 Press the Send FAX key 2 Place the originals 3 Select the destination Enter the fax number 1 Press FAX No Entry and use the numeric keys to enter the fax number Press Next Dest to...

Page 67: ...4 After selecting all the destinations press the Start key Transmission begins NOTE In addition to a fax you can include e mail transmission and folder SMB FTP transmission to send as one job For det...

Page 68: ...communication has prolonged due to broadcast transmission NOTE Together with delayed transmission and interrupt send up to 200 transmissions can be scheduled You can use other functions such as broadc...

Page 69: ...e to interrupt transmission immediately 1 Press the Send FAX key 2 Load the originals to be sent using Interrupt Send 3 Press Advanced Setup and then FAX Direct Transmission 4 Press On 5 Press OK 6 Se...

Page 70: ...and press OK To use the Address Book or One touch keys select the destinations to which 212 has been registered NOTE For the Address Book and One touch keys refer to Using the Address Book on page 3 1...

Page 71: ...tination from the list You can select several destinations 3 Press OK The chain number 212 is automatically added to all the destinations Select fax number from One touch key Select the destination fr...

Page 72: ...hen you hear the fax tone the telephone line has connected to the receiving system Press the Start key Transmission begins Using a Telephone to Send When you want to talk to the person at the receivin...

Page 73: ...available on port 2 is FAX Automatic reception Receiving after Confirming Connection to the Sending System You can receive originals after confirming by sound that the telephone line has connected to...

Page 74: ...sending system When the conversation is over follow steps 1 to 2 above After the sending system has started transmission the machine starts receiving originals 4 When reception starts when the Receiv...

Page 75: ...it is necessary to connect the tone signal sending telephone set commercially available product to the machine However even if it is a tone signal sending telephone set this function may not be used s...

Page 76: ...ng operation 1 The connected telephone set makes a ringing tone 2 Lift the handset of the telephone 3 When you hear the fax tone from the handset enter the two digit remote switch dial number using th...

Page 77: ...o a folder SMB or FTP Requirements for Forwarding IMPORTANT If the forwarding requirements are specified only one destination matching the requirements are printed from the registered destinations The...

Page 78: ...ing a sub address as the forwarding requirement you can restrict relay broadcasting to a specific communication NOTE When forwarding is used you can select whether to print or not to print the receive...

Page 79: ...rd Destination 8 Set the Forwarding Destination Select the other party by pressing one of the following keys and press OK to add the other party to the list NOTE You can register multiple destinations...

Page 80: ...You can change the following settings Number of Copies Enable time setting File name registration NOTE For details on above settings refer to Forwarding Detail Settings on page 4 26 13 Press OK E mai...

Page 81: ...rement number between 001 and 100 7 Press OK 8 Press Change of Requirement Name 9 Enter the requirvement name and press OK NOTE For details on character entry refer to Character Entry Method on page 2...

Page 82: ...ts with Ends with Includes 13 Press OK 14 Press Next of Forward Setting 15 Press Change of Forwarding 16 Select On or Off whether to forward or not to forward the received documents and press OK 17 Pr...

Page 83: ...Encrypted TX setting NOTE For details on above settings refer to Forwarding Detail Settings on page 4 26 21 Press OK 22 Press Change of Storing in FAX Box Key Description Address Book Select the desti...

Page 84: ...5 You can change the following settings Number of Copies Activating time setting File name registration Priority setting NOTE For details on above settings refer to Forwarding Detail Settings on page...

Page 85: ...ep 4 3 Press Delete When the confirmation screen is displayed press Yes and go to step 6 4 Press Detail 5 Refer to steps 5 to 26 of Registering Settings by Requirement on page 4 21 to change the setti...

Page 86: ...Select All Day or Preset Time To forward received originals all day select All Day press OK and then go to step 5 To set the forwarding time select Preset Time and go to the next step 4 Press to ente...

Page 87: ...s Operation Guide 4 Press OK E mail Subject Add Info Setting Specify whether any information will be added to the subject of the E mail When adding information you can select either Sender Name or Sen...

Page 88: ...he date time and the job number or fax number 1 Follow steps 1 to 3 of Using Requirements for All Receptions on page 4 19 Follow steps 1 to 4 of Registering Settings by Requirement on page 4 21 and mo...

Page 89: ...r 2 In the Address or Location bar enter the machine s IP address as the URL e g http 192 168 48 21 The web page displays basic information about the machine and COMMAND CENTER as well as the current...

Page 90: ...Menu key 2 Press Document Box Removable Memory Next of FAX Box and Register Edit of Register Edit Box 3 Press Add 4 Press Change of the required items NOTE The Owner and Permission are displayed when...

Page 91: ...racter entry refer to Character Entry Method on page 2 of the Appendix When Box Password is selected 1 Press Password and enter the password Up to 16 digits can be entered 2 For confirmation press Con...

Page 92: ...2 to 4 6 After deleting and changing FAX Boxes press Close Printing Originals from a FAX Box To print the originals that have been sent to a FAX Box use the following operation 1 Press the Document B...

Page 93: ...the FAX Box after printing is completed To delete the data press On 7 Press Start Print The print starts Deleting Originals from a FAX Box Use the procedure below to delete an original that you have...

Page 94: ...4 32 2 Press Detail 3 The details for the selected original are displayed 4 When you have finished checking the details press Close Close File Name Detail Date and Time Delete Print Size 1 1 0001 1 10...

Page 95: ...nals in the FAX Boxes the number of pages is displayed NOTE The list can be printed when user login has been enabled and the machine is logged in with administrator privileges 1 Press the System Menu...

Page 96: ...based communication can be used together with various kind of functional communication When registering a sub address and sub address password in the Address Book and One touch keys you can omit thei...

Page 97: ...Press Password and enter the sub address password using the numeric keys NOTE You can use up to 20 digits including the numbers from 0 to 9 space and characters to enter a sub address password When th...

Page 98: ...Press Register 3 Press the program number to be registered 01 to 10 NOTE When selecting a program number that has been registered you can replace the currently set function with the function represen...

Page 99: ...ion screen the program is deleted Using Program Dial 1 Press the Program key 2 Place the originals 3 Press Recall and then the key of the program number to call up 01 to 10 NOTE You can also use the p...

Page 100: ...d File to Off the originals are stored in the Polling box until you delete them You can use polling transmission with the same originals as many times as you wish Refer to page 4 41 NOTE You can store...

Page 101: ...ing sub address bulletin board communication refer to Using Polling Reception with Sub Addresses on page 4 45 Deleting Originals After Polling Transmission Originals intended for polling transmission...

Page 102: ...to 30 sheets to be placed in the document processor File Name Entry Allows you to rename the files created from scanned originals You can also use this function to add the job number and or date Dens...

Page 103: ...lling box Polling Reception This function automatically triggers transmission of originals stored on the sending machine when the receiving machine dials the sending machine s number If multiple conta...

Page 104: ...ddresses below 1 Press the Send FAX key 2 Press Advanced Setup and then FAX Polling RX 3 Press On 4 Press OK 5 Select the destination NOTE Only fax numbers can be selected as destinations You can sele...

Page 105: ...ith the same type of sub address communication function IMPORTANT Check the sub address set by the sender beforehand 1 Press the Send FAX key 2 Select the destination Here refer to Sub Address Transmi...

Page 106: ...inal NOTE To cancel a selection press the checkbox again so that it is no longer ticked For information on working with lists in a Polling box refer to the machine s Operation Guide 4 Press Print 5 Wh...

Page 107: ...lling transmission Refer to page 4 41 1 Follow steps 1 to 3 in Printing from a Polling Box on page 4 46 2 Press Delete 3 When the deletion confirmation screen appears press Yes The original is deleted...

Page 108: ...4533 10 10 2008 09 45 23 Polling Box doc10102008095022 10 10 2008 09 50 4 doc10102008100011 5 Preview Store File 10 10 2008 10 10 10 10 2008 10 10 Status KB KB KB File Close Status 10 10 2008 10 10 Ch...

Page 109: ...hine s Operation Guide Item Description Registration of User Register user access privileges User ID and Password Enable Disable User accounting Enable User accounting Item Description Registration of...

Page 110: ...FAX Box Encrypted transmission Manual send when dialed from this machine to the receiving system Polling transmission Network FAX transmission IMPORTANT You can use Make a call Checking FAX Job Histo...

Page 111: ...rd 4 Enter the password and press OK 5 After confirming that the correct User ID and password have been entered press Login NOTE You can check the number of pages used by a user by entering the user n...

Page 112: ...abled the screen for entering a User ID and Password is displayed 1 Use the numeric keys to enter Account ID and press Login NOTE You can check the number of pages used by a department by entering the...

Page 113: ...l document processor to place originals of different sizes together and send them In this method up to 30 sheets can be placed in the document processor NOTE For direct transmission you cannot use Mix...

Page 114: ...hod originals are scanned until you press Scan Finish You can change the following items during scanning Original Size Selection 1 sided 2 sided Selection Sending Size Selection Original Orientation I...

Page 115: ...als Border Erase Book Erase black borders found around and in the middle of pages of thick books You can set the width of Border Erase for around and in the middle of books separately Individual Borde...

Page 116: ...to inform when the transmission of e mail is completed Send and Print When you send originals this feature allows you to print a copy of the document being sent Send and Store When you send originals...

Page 117: ...is chapter explains how to check fax transmission results and functional registration status Various Tools for Checking Transmission Results and Registration Status 5 2 Checking FAX Job History 5 3 Pr...

Page 118: ...stored Any time 5 3 Send result report Receiptresult report Report printing Latest send or receipt result Automatic printout after every sending or receiving operation No Print Output or Error Only i...

Page 119: ...and Storing Jobs to check the results of file storage in FAX Boxes and Polling box Then press Log 3 Press in Job Type and select FAX Description of the Job Log Screen Items shown in each job log scree...

Page 120: ...ion Job No Job acceptance number End Date Job completed date Type Icon indicates job type Fax transmission Destination Recipient destination name or fax number User Name User name Blank if no informat...

Page 121: ...b acceptance number End Date Job completed date Type Icon indicates job type Storing fax reception data Job Name Job name User Name User name Blank if no information is available Result Result is indi...

Page 122: ...ail to check the result for each destination Job Type Job type Destination Recipient The number of destinations is displayed User Name User name Blank if no information is available Job Name Job name...

Page 123: ...eport and Next of Result Report Setting Then press Next of Send Result Report and Change of FAX 3 Press Off not to print On to print or Error Only If you selected On or Error Only you should then indi...

Page 124: ...ult Report 3 Press Off not to print On to print or Error and Forward Only 4 Press OK Activity Report Activity reports are reports of both the sent faxes and the received faxes Each report lists the hi...

Page 125: ...y 50 faxes sent or received 1 Press the System Menu key 2 Press Report and Next of Admin Report Settings Then press Change of Outgoing FAX Report or Incoming FAX Report 3 Press Off not to print or On...

Page 126: ...of user setups FAX related information includes the Local FAX Number Local FAX Name fax line setting etc You can print it out as necessary 1 Press the System Menu key 2 Press Report and Next of Print...

Page 127: ...cation is only provided when an error occurs or the received original is forwarded to other faxes computers and FAX Boxes 1 Press the System Menu key 2 Press Report and Next of Result Report Setting T...

Page 128: ...Checking Transmission Results and Registration Status 5 12 OPERATION GUIDE...

Page 129: ...s 6 6 Volume Adjustment 6 7 Retry Times 6 8 Receiving Mode 6 9 Reception Date Time 6 10 Media Type for Print Output 6 11 MP Tray Paper Output 6 13 DRD Reception Available for inch versions only 6 14 T...

Page 130: ...stem does not respond Flow of reception NOTE At the end of the conversation you can also manually receive the originals Refer to Manual Reception on page 4 13 FAX FAX Telephone When the other party ha...

Page 131: ...ringing tone rings Refer to FAX TEL Auto Switch Reception on page 6 2 2 When the call is from a telephone 1 The machine makes a ringing tone urging the user to respond Lift the handset of the telephon...

Page 132: ...to use FAX Answering Machine Auto Switch Reception it is necessary to connect an answering machine equipped telephone set commercially available product to the machine For details such as responding t...

Page 133: ...g tone the machine enters a status the same as manual reception Refer to Manual Reception on page 4 13 2 The answering machine responds When the call is from a telephone but the user is absent The ans...

Page 134: ...Normal Auto TAD and Auto FAX TEL NOTE The number of ringing times can be set to between 1 and 15 times for Rings Normal and Rings TAD and 0 and 15 times for Rings FAX TEL For Rings FAX TEL this change...

Page 135: ...built in speaker when the line is connected without pressing On Hook such as in memory transmission 1 Press the System Menu key 2 Press Common Settings Next of Sound and then Change of FAX Speaker Vol...

Page 136: ...utomatically NOTE Retry times can be set to between 0 and 14 For Redial refer to Dialing the Same Receiving System Redial on page 3 31 1 Press the System Menu key 2 Press FAX Next of Transmission Next...

Page 137: ...er to page 6 14 Manual Reception Manual Refer to page 4 13 Select the mode appropriate for the way the machine is used NOTE DRD reception mode is available only for inch models 1 Press the System Menu...

Page 138: ...on if the fax is from a different time zone NOTE When the received data is printed on multiple pages the reception date time is printed on the fist page only It is not printed on the pages that follow...

Page 139: ...utput of received faxes By specifying the media type faxes can be received on the corresponding cassette Faxes will be automatically reduced to the set paper size 1 Press the System Menu key 2 Press C...

Page 140: ...ax reception settings For the setting procedure refer to Media Type for Print Output on page 6 11 Select the same media type that was selected in step 6 Common Settings Paper Size Set cassette paper s...

Page 141: ...er Output You can select whether to use the MP tray paper when printing out the received fax 1 Press the System Menu key 2 Press FAX Next of Reception Next of Basic and then Change of Multi Purpose Tr...

Page 142: ...achine DRD reception is only possible if you subscribe to the Distinctive Ring Pattern service provided by your telephone company Contact your telephone company for further information on the Distinct...

Page 143: ...g the predetermined ring pattern When the call is from a telephone Lift the handset and speak with the other party When the conversation is over fax reception can be initiated manually When the call i...

Page 144: ...on Establishing Requirements Send Restrictions Register Permitted FAX numbers or Permitted ID numbers Refer to Registering Permit FAX No on page 6 17 or Registering Permit ID No on page 6 21 Send rest...

Page 145: ...Rejection Register Reject FAX numbers Refer to Registering Reject FAX No on page 6 19 Reception restriction settings are specified in Reject List in Reception Restrictions Refer to Setting Reception R...

Page 146: ...s Detail 4 Use the numeric keys to reenter Permit FAX No Up to 20 digits can be entered NOTE Press Pause to insert a pause between numbers Press Space to enter a space Use or to move the cursor Pressi...

Page 147: ...ect FAX No Up to 20 digits can be entered NOTE Press Pause to insert a pause between numbers Press Space to enter a space Use or to move the cursor Pressing Backspace deletes the character to the left...

Page 148: ...or to move the cursor Pressing Backspace deletes the character to the left of the cursor 5 Press OK When the change confirmation screen appears press Yes Go to step 7 6 Press Delete When the deletion...

Page 149: ...rmit ID No 0000 to 9999 NOTE Press the Clear key to display the previous number 5 Press OK 6 To register other Permit ID numbers repeat steps 3 to 5 7 Press Close FAX Permit ID List FAX ID Register an...

Page 150: ...7 To change and delete other Permit ID numbers repeat step 2 to 6 8 Press Close Setting Send Restriction You can restrict the other parties to which you send originals only to the ones registered in P...

Page 151: ...de also allows you to set a Reject List for Reception Restriction so that reception from senders on the list of Rejected FAX numbers or from senders whose Local FAX Number is not registered are reject...

Page 152: ...e the same 16 digit encryption key When the encryption key differs between the sending system and the receiving system the encryption cannot be conducted Therefore the sending system and the receiving...

Page 153: ...Press FAX Next of TX RX Common and then Register Edit of Encrypt Key Registration 3 Select the unregistered encryption key and press Register Edit 4 Press Encryption Key 5 Use the numbers 0 to 9 and...

Page 154: ...ears press Yes 8 To change or delete other encryption keys follow steps 2 to 7 Operation at the Sending System When sending originals by encrypted transmission use the Address Book registered for encr...

Page 155: ...ption box is not used 8 Press On and use the numeric keys to enter the encryption box number 4 digits and press OK 9 Press OK 10 Press OK 11 Press the Start key The transmission will start 10 10 2008...

Page 156: ...tem Refer to Registering an Encryption Key on page 6 25 2 Press the System Menu key 3 Press FAX Next of Reception and Change of Encrypted Reception 4 Press On select the encryption key number and pres...

Page 157: ...t size 1 Press the System Menu key 2 Press FAX Next of Reception Next of Basic and Change of Reduced RX Size 3 Select Off or On 4 Press OK Item Description Off Print the received data at 100 of the or...

Page 158: ...eived multiple pages of data are the same width they can be printed out on both sides of paper having the same width as the data 1 Press the System Menu key 2 Press FAX Next of Reception Next of Basic...

Page 159: ...tion prints 2 pages of the original at a time on one Letter or A4 size sheet of paper NOTE If you specify 2 in 1 reception and duplex printing at the same time 2 in 1 reception is disabled 1 Press the...

Page 160: ...ok for problems NOTE To use Remote Diagnostics you must first sign an agreement with our service representative and register a Predetermined ID on the machine For more information contact your Service...

Page 161: ...ing all other operations are all prohibited during the unusable time period including printing of copy jobs printer jobs and received e mails printing and sending from USB Memory and Network FAX trans...

Page 162: ...Setup and Registration 6 34 OPERATION GUIDE...

Page 163: ...OPERATION GUIDE 7 1 7 Optional Equipment This chapter introduces the optional equipment available for the FAX kit Expansion Memory 7 2 Dual FAX 7 2...

Page 164: ...al broadcast transmissions to multiple recipients Also because you can then send and receive simultaneously there will be fewer occasions when you cannot receive a fax during fax transmission Dual FAX...

Page 165: ...If user login administration is invalid the user authentication screen is displayed Enter a login user name and password and press Login 3 Press Next of Job Accounting Setting Register Edit of Accoun...

Page 166: ...Optional Equipment 7 4 OPERATION GUIDE...

Page 167: ...ns how to use Network FAX Please also read the Network FAX Driver Operation Guide Online Manual contained in the included CD ROM which describes how to operate your PC to send a fax using Network FAX...

Page 168: ...nsmission is available Operation is as simple as printing Flow of Network FAX Sending Network FAX sending is performed in the following sequence Flow of Network FAX Receiving Network FAX receiving is...

Page 169: ...X OPERATION GUIDE 8 3 8 NOTE The memory forwarding function allows not only reception by the networked PC but also forwarding of the received fax by e mail forwarding to another fax machine or storing...

Page 170: ...etwork FAX Driver Operation Guide Online Manual contained in the included CD ROM Network FAX Driver Operation Guide Online Manual The Network FAX Driver Operation Guide Online Manual is contained in t...

Page 171: ...ON GUIDE 9 1 9 Troubleshooting This chapter explains how to deal with problems Indicators During Sending Receiving Operation 9 2 Precautions When Turning Power OFF 9 3 Error Messages 9 4 Troubleshooti...

Page 172: ...nsmission status The Send indicator blinks when the machine is sending a fax The Receive indicator blinks when the machine is receiving a fax The Memory indicator blinks when source data is being stor...

Page 173: ...Before turning off the main power switch press the Power key on the operation panel Make sure that the Power indicator and the Memory indicator are off before turning off the main power switch CAUTION...

Page 174: ...n If the message still appears note the error code Turn the main power switch off and unplug the power cord Call your service representative FAX box limit exceeded FAX Box capacity is used up with doc...

Page 175: ...d paper of the same size as indicated When the type of printing paper is specified the necessary paper types are also displayed To use another paper source select the paper source and press Continue P...

Page 176: ...he registrations correct both at sender and recipient Double check the registrations both at sender and recipient 6 24 Cannot use the remote switching function Is a pulse line used Some phones may tra...

Page 177: ...s transmission feature Sub address transmission cannot be performed unless the recipient fax machine has a similar sub address transmission feature Is the entered sub address identical to the sub addr...

Page 178: ...unication function If the other party s fax machine does not have the same sort of sub address bulletin board communication function it cannot receive faxes via a sub address bulletin board Check with...

Page 179: ...x Character Entry Method Appendix 2 Specifications Appendix 5 Menu List Appendix 6 Received FAX Sizes and Paper Priority Inch Model Appendix 10 Received FAX Sizes and Paper Priority Metric Model Appen...

Page 180: ...10 2008 10 10 Use the keyboard to enter Backspace Upper case Lower case No Symbol Space Cancel OK Lower case _ Q W E R T Y U I O P A S D F G H J K L Z X C V B N M Input characters Limit characters 0 1...

Page 181: ...oard to enter Backspace Upper case Lower case No Symbol Space Cancel OK Lower case _ Q W E R T Y U I O P A S D F G H J K L Z X C V B N M Input characters Limit characters 0 128 Status 10 10 2008 10 10...

Page 182: ...oard containing and 1 9 Press and 1 10 Check that the entry is correct Press OK Status 10 10 2008 10 10 Use the keyboard to enter Backspace Upper case No Symbol Space Cancel OK Lower case 1 2 3 4 5 6...

Page 183: ...m Automatic Document Feed Max 100 sheets with optional document processor Scanner Resolution Horizontal Vertical 200 100 dpi Normal 8 dot mm 3 85 line mm 200 200 dpi Fine 8 dot mm 7 7 line mm 200 400...

Page 184: ...peed ECM Encrypted Transmission Sending On Hook One Touch Key Chain Dial Type of Original Transmission Original Size Mixed Sized Originals 2 sided Book Original Original Orientation Sending Size Long...

Page 185: ...agnosis Transmission Basic Local FAX Name Entry TTI FAX Local FAX Number 1 Local FAX Number 2 Dialing Mode Port 1 Dialing Mode Port 2 Local FAX ID Retry Times Reception Basic Media Type MP Tray Reduce...

Page 186: ...s Result Report Setting Send Result Report FAX Attach Send Image FAX RX Result Report RX Result Report Type Edit Destination Address Book FAX Sub Address Transmission Start Speed ECM Encryption Key No...

Page 187: ...inting Jobs Status Log Sending Jobs Status Scheduled Job Log Storing Jobs Status Log Device Communication Cancel of Transmission Disconnection of Communication Manual Reception Log Activity Report Pri...

Page 188: ...o the following priority Same Size Override Priority Received FAX Size Paper Size 1 Paper orientation is different from the received document The image is printed after being rotated 90 automatically...

Page 189: ...atement STR Statement R LT Letter LTR Letter R LG Legal LD Ledger When a paper type is selected in Media Type a received fax is printed using the matching paper source Refer to page 6 11 Even if All M...

Page 190: ...matching paper source Refer to page 6 11 Even if All Media Types is selected paper types such as transparency cannot be used for fax printouts Priority Received FAX Size Paper Size 1 Paper orientatio...

Page 191: ...machine automatically chooses the printing paper according to the following priority Same Size Override Priority Received FAX Size Paper Size 1 2 3 4 5 6 7 8 9 10 A5 B5 A4 R A4 FL B4 A3 A5 R B5 A4 R A...

Page 192: ...d using the matching paper source Refer to page 6 11 Even if All Media Types is selected paper types such as transparency cannot be used for fax printouts Paper orientation is different from the recei...

Page 193: ...such as transparency cannot be used for fax printouts Priority Received FAX Size Paper Size 1 Paper orientation is different from the received document The image is printed after being rotated 90 auto...

Page 194: ...with the sender machine although the line connection was established U00600 U00690 Communication was stopped due to the machine failure Send or receive again U00700 Communication was stopped due to f...

Page 195: ...in the other party s fax machine Check with the other party U03200 Sub address bulletin board reception was attempted and the other party s machine is an our brand model but the specified sub address...

Page 196: ...nt machine or the sub address does not match U04100 Recipient machine is not equipped with a sub address box function or the sub address does not match U04200 Encrypted transmission was canceled becau...

Page 197: ...no more free space in the memory of the recipient machine Check with the recipient U19000 Memory reception was stopped because there is no more free space in the memory of this machine Create free spa...

Page 198: ...Appendix 20 OPERATION GUIDE...

Page 199: ...endix 2 Entering Characters Appendix 4 Entry Screens Appendix 2 Checking Transmission Results and Registration Status 5 1 Continuous Scan 4 54 D Date 2 6 Delayed Transmission 4 3 Cancel 3 15 Changing...

Page 200: ...1 Flow of Receiving 8 2 Flow of Sending 8 2 Online Manual 8 1 8 4 Setup 8 4 No Print Output 9 6 O One touch Keys 3 27 Change Delete 3 28 Registering a New Destination 3 27 Select Destination 3 28 Ope...

Page 201: ...s Page 5 10 Resolution 3 8 Rings 6 6 S Safety Conventions i Selection of Transmit Terminal Identification TTI 2 3 Send and Print 4 56 Send and Store 4 56 Send Status 3 10 Sending Size Selection 4 53 S...

Page 202: ...Index 4 OPERATION GUIDE...

Page 203: ...MEMO...

Page 204: ...MEMO...

Page 205: ...MEMO...

Page 206: ...E1...

Page 207: ......

Page 208: ...First edition 2008 12 Printed in China 303MB56020...

Reviews: