


5
5.
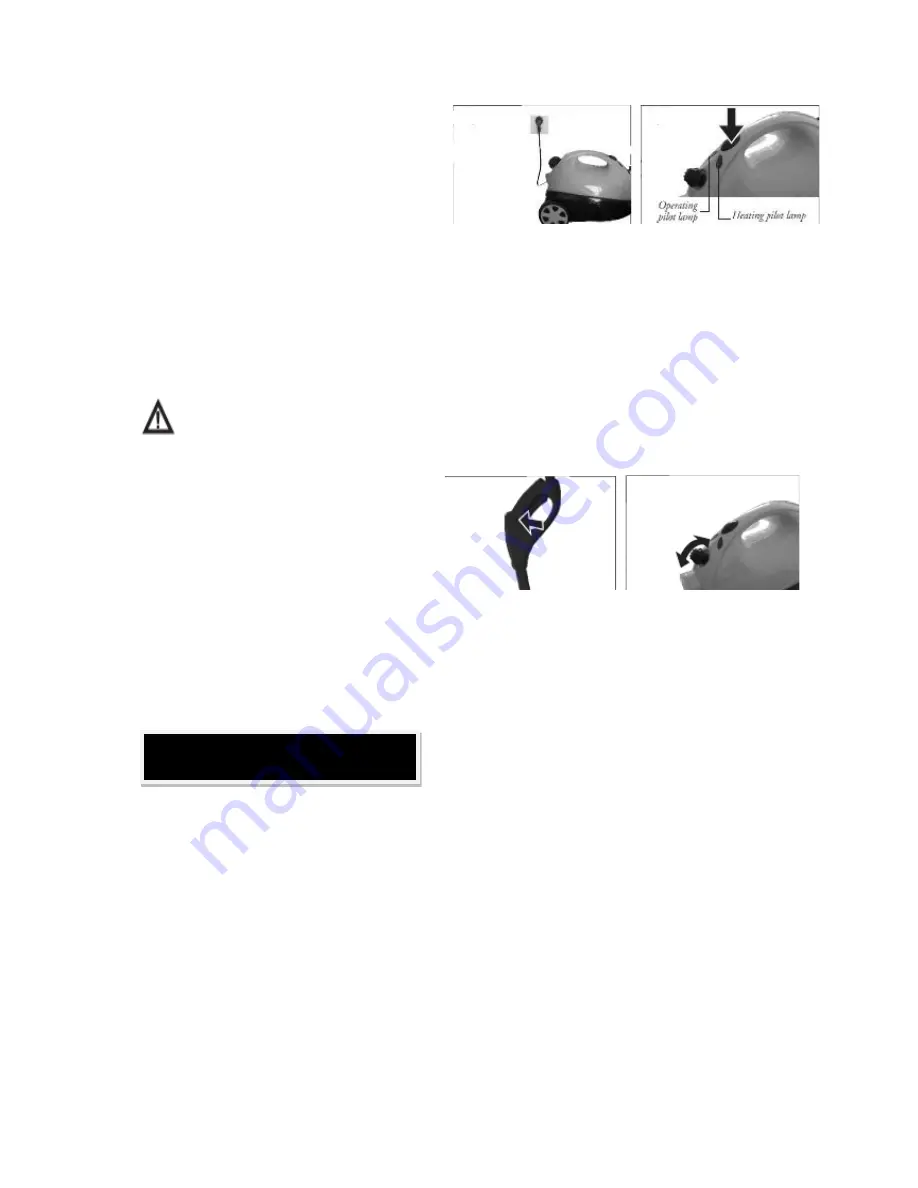
Plug the steam cleaner into the mains socket
and switch appliance on. The ON/OFF switch is
located on the front of the carry handle. Once
on, the Green Operating Light and the Red
Heating light should both come on, these are
also located on the front of the carry handle.
The green operating light is there to indicate to you when the steam cleaner is switched on. The red
heating light indicates that the steam cleaner is heating up; it will take approximately 10 minutes for
the Steam cleaner to reach its optimum temperature. When this happens the red heating light will
go out. The appliance is now ready for use
6.
You are now ready to use your Steam Cleaner!
Caution:
Patch testing must be done on a small area of any material before use of the
Steam Cleaner. Not suitable for some materials
7.
The flow rate of steam emitted can be
regulated by turning the steam controller
(pictured far right) it may need to be adjusted
depending on the heaviness of the stains and
dirt. Turn clockwise for less steam and anti-
clockwise for more steam. To release the
steam from the steam gun, press on the trigger as pictured above, do this as often as steam is
needed, you then loosen the area of stain or dirt by moving the steam jet backwards and forwards
over it. As pictured, there is also a triangular shaped child lock button on the steam gun located on
the left hand side. Simply push through to right hand side to lock the steam gun trigger. To release,
push back through to left hand side.
1. Switch off appliance using ON/OFF button. Once appliance is switched off the green operating
light should go out
2. Press steam trigger on steam gun to release any remaining pressure. Secure the steam gun the
locking pin located on the left hand side of the handle.
3. Remove the plug from the mains and allow the appliance to cool down.
4. Empty the water tank so that no deposits can settle.
5. Do not close water tank until it has dried out
6. Before storing the steam cleaner must have completely cooled down
7. Store appliance out of reach of children
After use & Storage:
Summary of Contents for 9283
Page 9: ...9...


