IP CAMERA QUICK START GUIDE
1. CONTENTS
Packaging Contents
Technical Documents
IP Camera x1
Fitting Screws x3
Quick Start Guide x1
Wall Plugs x3
Mounting Template x1
Hex key x1
Silica Gel x1
Analogue SVO Cable x1
2. INSTALLATION
Important: Ensure all precautionary procedures are observed during installation.
It is recommended that the camera is tested in low light and harsh lighting
conditions during installation to ensure continuity of effective CCTV monitoring.
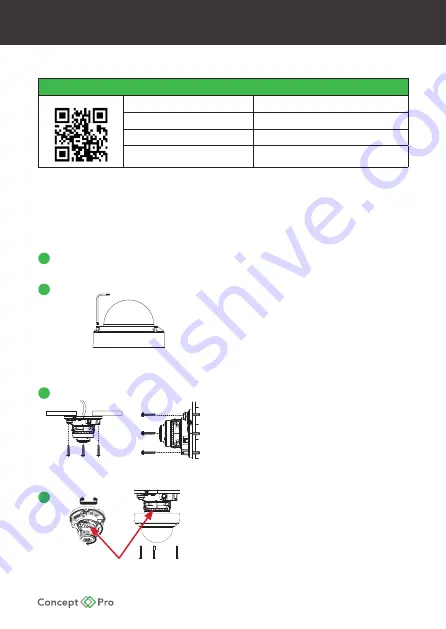
Open Packaging
Open packaging, remove camera, and set aside the included accessories.
Drill Mounting Holes
Attach the included mounting template to the desired
mounting surface (ceiling or wall). Ensure the surface
can bear the camera weight. Drill mounting holes and
cable throughput holes according to the template.
Insert the included wall plugs into the holes. Use the
included L-wrench to loosen the three dome cover
screws and remove the dome cover.
Mount the Camera
Insert required cables through the cable throughput
holes and rubber cable grommets on the camera.
Connect the cables to the appropriate terminal on the
camera. Position the camera over the mounting holes
and use the included fitting screws to affix the camera
to the mounting surface.
Adjust Camera Positioning
Adjust the camera lens so that it can monitor the
desired area. Confirm all connections are secure.
Replace the dome cover and tighten the dome cover
screws. It is recommended that silicon is injected into
the gap between the camera and mounting surface for
secure waterproofing.
2
3
4
1
.
PAN
TILT
ROTATE
PAN
TILT
ROTATE
.
Note: Rotate the lens from the rear of the
lens gimbal where there are grip notches.
Summary of Contents for CVP5325DNIR-IP2M/2.8
Page 12: ......


