32
COMUNELLO
®Copyright 2016 - All rights reserved
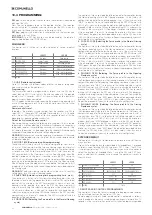
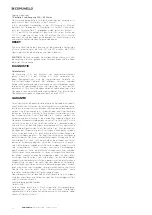
10.4 PROGRAMMING:
SEL key:
selects the type of function to store; the selection is indicated by
blinking of the LED.
Press the key repeatedly to go to the required function. The selection
remains active for 10 seconds shown by blinking of the LED; when this
interval elapses the control unit returns to the original state.
SET key:
programs the information in accordance with the function type
preselected with the SEL key.
IMPORTANT:
The SET key function can be replaced by the remote if
programmed beforehand (CODE LED on).
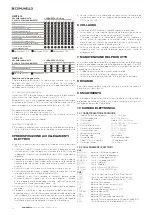
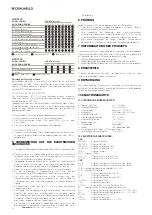
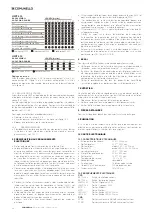
MAIN MENU
The control unit is factory set to allow selection of several important
functions.
LED OFF
LED ON
L1
TX CODE
No code
Code entered
L2
MOTOR TIME
Factory T. setting
Programmed time
L3
PAUSE TIME
Without aut.close
With automatic close
L4
FORCE OPEN
Maximum
Med – min set by speed
L5
FORCE CLOSE
Maximum
Med – min set by speed
L6
SLOWING OPEN
Maximum
Med – min set by slowing
L7
SLOWING CLOSE
Maximum
Med – min set by slowing
LEV MENU
ON
1. CODE (Remote control code):
Up to 120 remotes with different codes of either the fixed or rolling code
type can be saved on the control unit.
Programming.
The transmission code is programmed as follows: use the SEL key to
select blinking LED L1 and transmit the chosen code with the required
remote within 10 seconds; LED L1 will remain steady on to indicate that
programming has been completed.
If all 120 codes have been saved, repeating the programming operation will
cause all the programming LEDs to start blinking to signal that no further
codes can be saved.
Remote controls reset.
To delete all the previously saved remotes from the receiver, use SEL to
select LED L1, then press SET and hold it pressed for > 5 s. At the end
of this interval the LED will switch off for two seconds to confirm that the
procedure has been completed successfully.
Rule of the first saved Remote control:
When programming remotes the following rule is applied: if the first remote
to be saved is a rolling code type, the receiver will subsequently accept only
rolling code remotes, thus providing enhanced anti-intrusion security; if the
first remote to be saved is a fixed code type, the receiver will subsequently
accept both fixed code remotes and rolling code remotes.
WARNING:
Whenever you reset the remotes on the receiver, all the saved
remotes will be deleted and also the rule of the first saved remote control
will be reset to default.
2. MOTOR TIME (Barrier working time programming):
The control unit is factory set with a standard work profile for a barrier with
a 5 m arm. If the Operator working time and slowing stages duration must
be changed, reprogramming must be performed with the barrier closed
as follows: use the SEL key to select blinking LED L2 and then press the
SET key momentarily; the Operator will start an Opening cycle; when the
required slowdown starting point is reached, press the SET key again;
LED L2 will start blinking more slowly and the Operator will decelerate; on
reaching the required position press SET to terminate the Opening cycle.
When Opening cycle time programming is completed, the Operator restarts
immediately in the Closing cycle: repeat the operations described above for
the Closing cycle.
WARNING:
The barrier working time function must be set with sensitivity
setting higher than 50% and at reduced speed.
3. PAUSE TIME (Automatic closing time programming 4 min. max.):
The control unit is factory set with automatic closing disabled. If you wish
to enable automatic closing proceed as follows: use the SEL key to select
blinking LED L3 and press the SET key momentarily; now wait for a time
equivalent to the required time; press the SET key again momentarily
and at the same time the automatic closing time will be saved and LED
L3 will remain steady on. If you wish to restore the initial condition (no
automatic closing) select blinking LED L3 and then press the SET key twice
consecutively in an interval of 2 seconds. The LED will switch off and the
operation will be completed.
4. FORCE OPEN (Selecting the Force profile in the Normal Opening
cycle):
The control unit allows you to define different operator Force profiles during
the Normal operating cycle in the Opening movement. In the factory set
configuration, operator Force during opening is set at the maximum level
“MAX” (i.e. identical to the setting selected using the SPEED trimmer with
LED L4 off); if you wish to change the profile to a medium level value “MED”,
proceed as follows: use the SEL key to select blinking LED L4 and press the
SET key; at the same time LED L4 becomes steady on and programming
will be completed. If you wish to change the profile to a Minimum value
“MIN” repeat the operation described above, pressing the SEL key twice
(LED L4 will blink rapidly) rather than once. Repeat the procedure if you wish
to restore the initial configuration.
5. FORCE CLOSE (Selecting the Force profile in the Normal Closing
cycle):
The control unit allows you to define different operator Force profiles during
the Normal operating cycle in the Closing movement. In the factory set
configuration, operator Force during closing is set at the maximum level
“MAX” (i.e. identical to the setting selected using the SPEED trimmer with
LED L5 off); if you wish to change the profile to a medium level value “MED”
proceed as follows: use the SEL key to select blinking LED L5 and press the
SET key; at the same time LED L5 becomes steady on and programming
will be completed. If you wish to change the profile to a Minimum value
“MIN” repeat the operation described above, pressing the SEL key twice
(LED L5 will blink rapidly) rather than once. Repeat the procedure if you wish
to restore the initial configuration.
6. SLOWING OPEN (Selecting the Force profile in the Opening
Slowdown cycle):
The control unit allows you to define different operator Force profiles during
the Slowdown operating cycle in the Opening movement. In the factory set
configuration, operator Force during the opening slowdown stage is set at
the maximum level “MAX” (i.e. identical to the setting selected using the
SLOWING trimmer with LED L6 off); if you wish to change the profile to a
medium level value “MED” proceed as follows: use the SEL key to select
blinking LED L6 and press the SET key; at the same time LED L6 becomes
steady on and programming will be completed. If you wish to change the
profile to a Minimum value “MIN” repeat the operation described above,
pressing the SEL key twice (LED L6 will blink rapidly) rather than once.
Repeat the procedure if you wish to restore the initial configuration.
7. SLOWING CLOSE (Selecting the Force profile in the Closing
Slowdown cycle):
The control unit allows you to define different operator Force profiles during
the Slowdown operating cycle in the Closing movement. In the factory set
configuration, operator Force during the closing slowdown stage is set at
the maximum level “MAX” (i.e. identical to the setting selected using the
SLOWING trimmer with LED L7 off); if you wish to change the profile to a
medium level value “MED” proceed as follows: use the SEL key to select
blinking LED L7 and press the SET key; at the same time LED L7 becomes
steady on and programming will be completed. If you wish to change the
profile to a Minimum value “MIN” repeat the operation described above,
pressing the SEL key twice (LED L7 will blink rapidly) rather than once.
Repeat the procedure if you wish to restore the initial configuration.
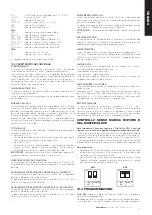
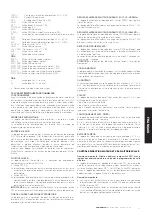
EXTENDED MENU 1
The control unit is factory set to allow direct selection exclusively of the main
menu functions.
If you wish to enable the functions described in Extended Menu 1, proceed
as follows: select blinking LED LEV and press SET 1 times. The LED will
start blinking alternately 1 0 1 0 1 0. This means you have 30 seconds to
select the functions of Extended Menu 1 using the SEL and SET keys;
once an additional 30 seconds have elapsed, the control unit reverts to
the main menu.
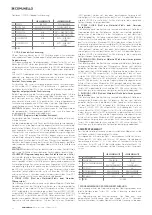
LED OFF
LED ON
L1
REMOTE PROGRAMMING
OFF
ON
L2
PUSHBUTTONS PUL
PUL=AP/CH
PUL=CH
L3
AUTO PROGRAM
UNSCHEDULED TIME
PROGRAMMED TIME
L4
FOTO TEST
OFF
ON
L5
DO NOT USE
DO NOT USE
DO NOT USE
L6
DO NOT USE
DO NOT USE
DO NOT USE
L7
NC AS 8K2
OFF
ON
LEV
MENU
1 FLASH
1. REMOTE RADIO CONTROL PROGRAMMING:
The control unit allows the transmission code to be programmed remotely
without acting directly on the control unit SEL key.
Remote programming of a Radio remote control is performed as follows:
send the code of a previously saved remote continuously for more than 10
seconds; at the same time the control unit switches to programming mode
Summary of Contents for LIMIT 500
Page 3: ...3 COMUNELLO Copyright 2016 All rights reserved FIG 2A FIG 2B FIG 3 FIG 4 FIG 3B FIG 5...
Page 5: ...5 COMUNELLO Copyright 2016 All rights reserved FIG 7A FIG 7B FIG 8A FIG 8C FIG 8B FIG 9A...
Page 7: ...7 COMUNELLO Copyright 2016 All rights reserved FIG 13A FIG 13B FIG 14A FIG 14B...
Page 8: ...8 COMUNELLO Copyright 2016 All rights reserved FIG 16A FIG 16B FIG 15...
Page 9: ...9 COMUNELLO Copyright 2016 All rights reserved FIG 17 FIG 18A FIG 18B...
Page 10: ...10 COMUNELLO Copyright 2016 All rights reserved DEFLECTOR FIXING FIG 20A...
Page 14: ...LIMIT 800 SWING DOWN SUPPORT 45 MIN FIG A FIG C FIG B...
Page 16: ...LIMIT 600 BAR AND SKIRT FIG A FIG C FIG B 110 MIN 110 MIN 200 200...
Page 68: ...NOTES...
Page 69: ...69 COMUNELLO Copyright 2016 All rights reserved NOTES...
Page 70: ...NOTES...
Page 71: ...71 COMUNELLO Copyright 2016 All rights reserved NOTES...

