background image


I

NTELI

C

OMPACT

-NT,


SW

 VERSION 

1.3,


©C

OM

A


S

EPTEMBER 

2011 R

EFERENCE 

G

UIDE

.

PDF


5


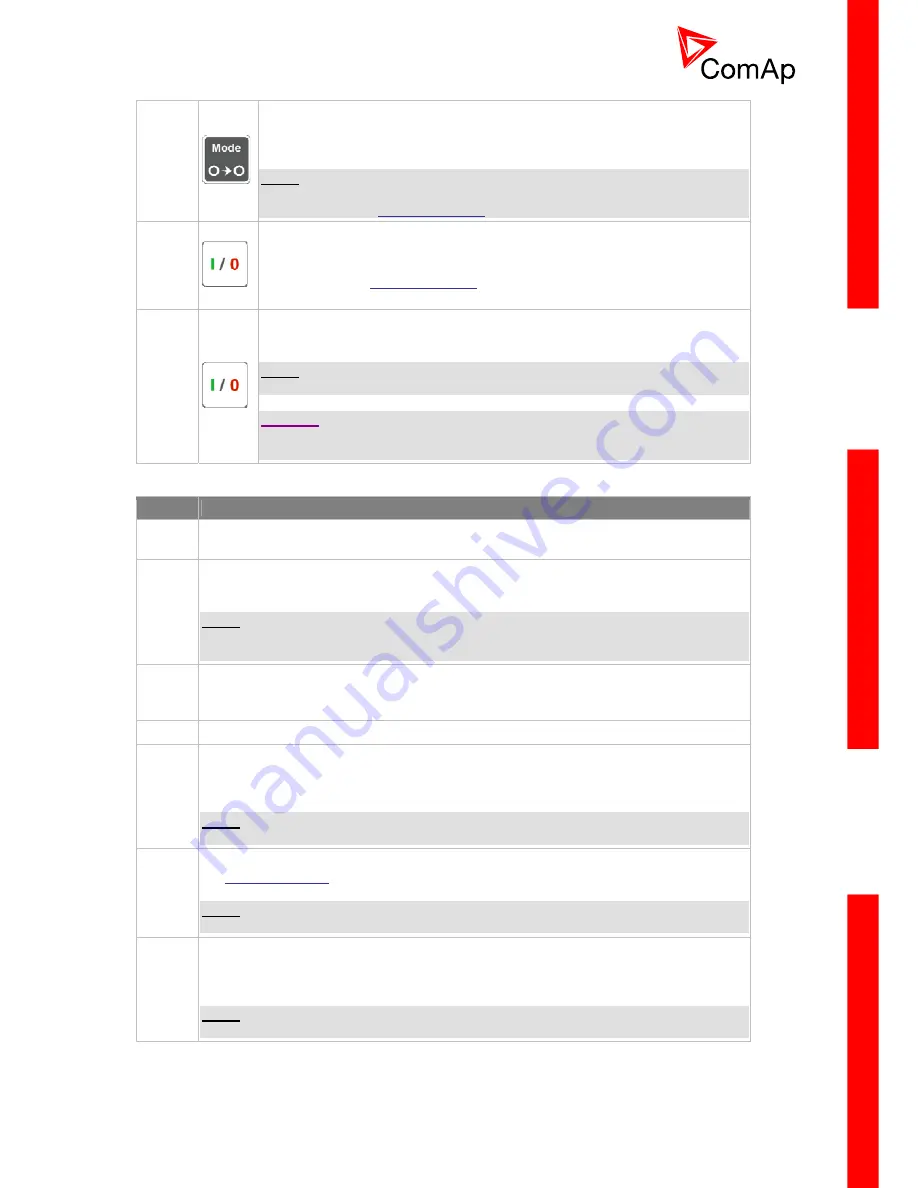
MODE RIGHT

 button. Use this button to change the mode. The button works 

only if the main screen with the indicator of currently selected mode is 
displayed.  
 

N

OTE

:


This button will not work if the controller mode is forced by one of binary 
inputs listed in the 

Reference Guide

 – “Operating modes” chapter.  


GCB

 button. Works in MAN and TEST modes only. Press this button to open 

or close the GCB or start synchronizing manually. Note that certain conditions 
must be valid otherwise GCB closing resp. starting of synchronization is 
blocked. See the 

Reference Guide

 – “Connecting to the load” chapter for 

details.  


MCB

 button. Works in MAN and TEST modes only. Press this button to open 

or close the MCB or start reverse synchronization manually.  
 

N

OTE

Only in InteliCompact SPTM version. 
 

C

AUTION

!


You can disconnect the load from the mains supply with this button! Be sure 
you know well what you are about to do! 


G

EN

-

SET OPERATION INDICATORS


P

OSITION

  D

ESCRIPTION


General alarm

. This red indicator lights if at least one alarm is present in the alarm list. 

It blinks if a new alarm has appeared and is still not acknowledged.  

10 

Gen-set voltage OK

. This green indicator lights if the generator voltage and frequency 

is in limits.  
 

N

OTE

:


The limits for the generator voltage and frequency are given by setpoints in the Gener 
Protect group. 

11 

GCB position

. This green indicator blinks if the forward sychronizing is currently in 

progress; otherwise it shows current status of the generator circuit breaker according to 
the feedback input.  

12 

Bus under voltage

. This green indicator shows if the bus is under voltage or not.  

13 

MCB position

. This green indicator blinks if the reverse sychronizing is currently in 

progress; otherwise it shows current status of the mains circuit breaker according to the 
feedback input.  
 

N

OTE

Only in InteliCompact SPTM version. 

14 

Mains voltage OK

. This green indicator lights if the mains is evaluated as healthy. See 

the 

Reference guide

 – “AMF function” chapter for details about mains evaluation.  


N

OTE

Only in InteliCompact SPTM version. 

15 

Mains failure

. This red indicator lights when the mains failure is detected and after the 

gen-set has started and is about to take the load it lights permanently until the mains 
failure disappears.  
 

N

OTE

Only in InteliCompact SPTM version. 


D

ISPLAY AND DISPLAY CONTROL BUTTONS


Summary of Contents for InteliCompact NT

Page 1: ...g gen set controller SW version 1 3 1 December 2011 Operator Guide Copyright 2011 ComAp s r o ComAp spol s r o Kundratka 17 180 00 Praha 8 Czech Republic Tel 420 246 012 111 Fax 420 266 316 647 E mail...

Page 2: ...ide 4 2 1 Front panel elements 4 2 2 User interface modes 6 2 3 Display screens and pages structure 6 2 4 View measured values 8 2 5 Setpoints view and change 8 2 6 Browsing the history log 9 2 7 Brow...

Page 3: ...ders attention to a notice or related theme CAUTION This type of paragraph highlights a procedure adjustment etc which can cause a damage or unproper function of the equipment if not performed correct...

Page 4: ...nue See the Reference Guide Engine cooldown and stop chapter to learn more about stop sequence 3 FAULT RESET button Use this button to acknowledge alarms and deactivate the horn output Inactive alarms...

Page 5: ...in the alarm list It blinks if a new alarm has appeared and is still not acknowledged 10 Gen set voltage OK This green indicator lights if the generator voltage and frequency is in limits NOTE The li...

Page 6: ...er mode gives the qualified person full access to all pages and screens See the chapter User interface mode selection in Reference Guide to learn how to switch the user interface mode 2 3 Display scre...

Page 7: ...INTELICOMPACT NT SW VERSION 1 3 COMAP SEPTEMBER 2011 REFERENCE GUIDE PDF 7 STRUCTURE OF THE DISPLAYED DATA BASIC...

Page 8: ...to continue into the selected group 2 Now you will see the list of setpoints which belong to the selected group together with their current setting Use the or buttons again to select the setpoint you...

Page 9: ...records have 1 2 etc 2 Use the button to move over columns within the selected record Pressing it repeatedly will move cyclically through the columns i e after last column the first one will be displ...

Page 10: ...s the alarm is stil active i e the appropriate alarm conditions are still present Inactive alarms are displayed as black text on white background It means the alarm is no more active i e the appropria...

Page 11: ...ss the button repeatedly until you will see the main controller screen with the mode 2 Hold down the selector and kW analog meter button and simultaneously press the button to see the controller disap...

Page 12: ...LAYED DATA ADVANCE The information screen contains following information Controller Name Firmware identification string Serial number of the controller ESF version Firmware version application version...

Page 13: ...will appear use or buttons to select the desired language 4 Press to confirm the selection 2 11 User interface mode selection To switch the User interface mode follow instructions below 1 Display the...

Reviews: