background image


Cab Descriptions


Suspension Seat 

The suspension seat has multiple adjustments to set the seat to a comfortable operat-

ing position. Fore-aft, backrest tilt, height and suspension weight. DO NOT adjust seat  

while in motion. 


Joy Stick Control 

The Joy stick controls the shaker head extension and retraction and up and down. The 

joy stick grip contains the push buttons to operate the clamping, shake and roll func-

tion. (diagram following page) 


Propulsion Pedal 

The propulsion pedal controls the direction of travel for the shaker. Depressing the   

pedal to the left activates forward to the right reverse. Releasing the pedal will bring the 

shaker to a stop. 


Hydraulic Throttle pedal 

The hydraulic throttle pedal controls hydraulic flow of the ground drive and shaker 

head. To increase speed of these functions depress the pedal. To decrease the speed 

of functions release the pedal.   


Steering column 

The steering column is tilt adjustable. To Tilt wheel push on the lower portion of the 

rubber boot as indicated. Move wheel to desired position and release.  


Cooled storage 

The cooled storage operates when the AC is on. DO NOT store perishable items in the 

storage box. 


DASH & INCONTROL display  

The dash contains the stereo, climate control & ignition switch. The INCONTROL dis-

play contains the engine & fuel information & function buttons for lights, travel / harvest 

mode, parking brake, sweepers, cab pressurizer, service, traction (if equipped) engine 

RPM control & AXIOM lift (if equipped).   


The INCONTROL display also has adjustments for ground drive & function trim options 

as well as clamp pressure adjustments,  water system, tree counter, shake adjust-

ments & ESHAKE (optional item).  


The INCONTROL display also has the rear view camera that will display in a window 

on the main screen & switches to full screen when in reverse.  

   O

peration 

  6 

Summary of Contents for R Series

Page 1: ...OWNERS MANUAL COE S7 R SERIES SIDE MOUNT SHAKER VERSION 1 1 ...

Page 2: ......

Page 3: ...y Operation 10 Shaker Operation Tips 11 16 Vitals 17 Do Nots 18 Service Points 19 Service Point Descriptions 20 Shaker Head Call Outs 21 22 Belt Drive 23 Energy Wheel Components 24 Patterns 25 26 Component Locations 27 Component Descriptions 28 Water System 29 Auburn Gears 30 Maintenance 31 Trouble Shooting 32 36 Circuits 37 42 Shaker Head Parts 43 44 ...

Page 4: ... and your operator s on the proper operation characteristics service and maintenance of your new shaker The proper operation and service of your machine is important in maintaining consistent performance It also will help maintain your re sale value Always remember to operate the equipment and perform service in a safe manner COE recommends to only use genuine COE re placement parts The proper per...

Page 5: ...a limited warranty of 250 hours 12 Warranty will not pertain to normal wear parts such as but not limited to a Shaker head flaps slings pads b Shaker head birdcages hanger mounts mount bolts c Shaker head drive belt hydraulic hoses d Shaker head arm upper lower wear plates e Carriage wear strips carriage bumpers f Conveyor elevator belts chains sprockets g Tires track belts track mid rollers h Bat...

Page 6: ...ipment with arms or legs hanging outside of operators area K Never allow riders or passengers on equipment while in operation L Prior to starting equipment conduct a visual inspection to ensure the equipment is in good safe operating condition M Never work beneath equipment unless engine is shut off on level ground with the wheels and shaker head blocked with the ignition key removed N Listen for ...

Page 7: ...ers DO NOT work beneath place any body part or stand below shaker head DO NOT place any body part near clamp arm openings or clamp jaws DANGER PINCH POINT DO NOT work on shaker head while it is operating DO NOT allow people or objects between shaker head and cab DANGER PINCH POINT ALWAYS re install guards after service or repair Back Up Danger DO NOT back up without looking back BE ALERT to people...

Page 8: ...Operation 5 Cab OPERATORS CAB AREA DISPLAY JOYSTICK ...

Page 9: ...s depress the pedal To decrease the speed of functions release the pedal Steering column The steering column is tilt adjustable To Tilt wheel push on the lower portion of the rubber boot as indicated Move wheel to desired position and release Cooled storage The cooled storage operates when the AC is on DO NOT store perishable items in the storage box DASH INCONTROL display The dash contains the st...

Page 10: ...Operation 7 Joystick functions DOWN UP OUT IN ROLL LEFT ROLL RIGHT UN CLAMP ESHAKE CANCEL CLAMP SHAKE TRIGGER BUTTON SWITCH FROM AUTO SHAKE TO MANUAL ESHAKE CANCEL ...

Page 11: ...NS USE THE HYDRAULIC THROTTLE PEDAL TO CONTROL GROUND DRIVE SHAKER HEAD SPEED if in manual shake mode 6 IN OUT ROLL CLAMP SPEEDS DO NOT RESPOND TO INPUTS FROM HYDRAULIC THROTTLE PEDAL 7 GROUND DRIVE CLAMP SHAKE FUNCTIONS CANNOT BE OPERATED AT THE SAME TIME WHEN CLAMPED THE GROUND DRIVE IS NOT AVAILABLE UNCLAMP TO RE ACTIVATE DRIVE HARVEST MODE AVAILABLE FEATURES 1 HEAD IN OUT UP DOWN CLAMP WITH SE...

Page 12: ...to 2 400 RPM to have the power flow available for shaking The Hydraulic Throttle Pedal can be used to create variations in the pattern by depressing or releasing the Hydraulic Throttle Pedal All shake patterns have multiple frequencies and can be varied by using MORE or LESS weight Engine RPM must be set at a minimum of 1 800 for ESHAKE automated features to function AUTO SHIFT The R Series is equ...

Page 13: ... IN LIEU OF COE SLING LUBE EXCESSIVE BARKING WILL OCCUR SHAKER BODY PRIOR to starting PERFORM these simple procedures LUBRICATION Grease ALL points as per schedule and chart in the SERVICE section of this manual USING only a high quality lubricating grease INSPECTION Visually inspect the shaker frame components tires hoses and connectors and all other items for cracks wear loose items leaks and ma...

Page 14: ...L STATE DELIVER FULL SHAKE POWER TO TREE DO NOT PLACE TRUNK ON CLAMP ARM SIDE THIS WILL PULL STATIONARY SIDE CAUSE BINDING OF MOUNT SYSTEM DELIVERING SHAKE ENERGY INTO MACHINE POSITION 8 10 INCH CLEARANCE FROM THE SHAKER HEAD EDGE TO THE TRUNK POSITION OF 12 INCHES OR MORE FROM TREE MAY NOT ALLOW ENOUGH EXTENSION TO CLAMP PROPERLY ...

Page 15: ...EMENT WILL ALLOW HEAD TO BE IN A NEUTRAL STATE DELIVER FULL SHAKE POWER TO TREE MAKE SURE TREE TRUNK IS VISIBLE DO NOT PLACE TRUNK ON CLAMP ARM SIDE THIS WILL PULL STATIONARY SIDE CAUSE BINDING OF MOUNT SYSTEM DELIVERING SHAKE ENERGY INTO MACHINE ROLL HEAD TO MATCH LEANING TREE IRREGULARITIES ...

Page 16: ...AP OR PAD DAMAGE SLIDE RETAINERS IPX WEAR PLATES RETAINER SHOULD BE ADJUSTED TO NO MORE THEN 1 8 INCH GAP AS IPX WEAR PLATES WEAR RETAINER SHOULD BE AD JUSTED OR RETAINER PLATE WILL BREAK KEEP MAST SLIDE SURFACE CLEAN TO REDUCE WEAR UPPER IPX IS 1 2 LOWER PLATES ARE 3 8 COE REPLACEMENT PARTS ARE RECOMMENDED USING NON ORIGINAL PARTS MAY NOT PROVIDE SATISFACTORY PERFORMANCE OR LIFE Operation 13 Shak...

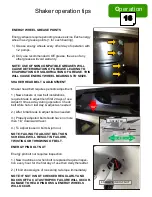
Page 17: ...GROUND WILL DECREASE THE LIFE AND THE OVER ALL SPEED OF THE BRUSHES THUS LOSING EFFECTIVENESS THE SWEEPER MOTORS RUN IN SERIES SO INCREASED RESISTANCE TO ROTA TION EFFECTS ALL SWEEPERS PERIODICALLY CHECK SWEEPERS FOR TRASH LIKE TREE ROPE THAT WILL WRAP AROUND THE MOTOR SHAFT AND CAUSE THE SHAFT SEAL TO LEAK RECOMMENDATION FOR RUBBER FINGER SWEEPERS RUBBER FINGERS SHOULD HAVE 1 OF FLAT GROUND ENGAG...

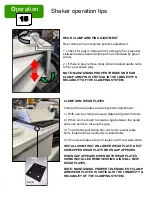
Page 18: ...m wear plates requires periodic adjustment 1 With use the clamp arm wear plates will get worn down 2 When worn enough to create a gap between the guide arms use shims to take up the gap 3 To add shim pull clamp arm out remove wear plate bolts install shim as needed re install bolts 4 Once wear plates are worn replace with new wear plate INSTALL SHIM FIRST ON LOWER WEAR PLATE NEXT SHIM UPPER WEAR P...

Page 19: ...of use then daily thereafter 2 If bolt shows signs of loosening re torque immediately NOTE IF NUT IS NOT CHECKED REGULARLY AND BACKS OFF A CATASTROPHIC FAILURE WILL OCCUR DAMAGE TO HEAD PIN BOSS ENERGY WHEELS WILL OCCUR SHAKER HEAD BELT ADJUSTMENT Shaker head belt requires periodic adjustment 1 New shakers or new belt installations require break in adjustment first 2 days of use Adjust 3 times a d...

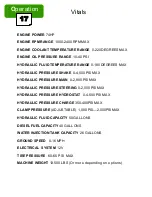
Page 20: ...HYDRAULIC PRESSURE MAIN 0 2 800 PSI MAX HYDRAULIC PRESSURE STEERING 0 2 500 PSI MAX HYDRAULIC PRESSURE HYDROSTAT 0 4 500 PSI MAX HYDRAULIC PRESSURE CHARGE 350 400PSI MAX CLAMP PRESSURE ADJUSTABLE 1 000 PSI 2 000PSI MAX HYDRAULIC FLUID CAPACITY 50 GALLONS DIESEL FUEL CAPACITY 40 GALLONS WATER INJECTION TANK CAPACITY 26 GALLONS GROUND SPEED 0 16 MPH ELECTRICAL SYSTEM 12V TIRE PRESSURE 60 65 PSI MAX ...

Page 21: ...D PRESSURES DO NOT OPERATE MACHINE WITH GUARDS OFF DO NOT OPERATE WITH LOW FLUID LEVELS DO NOT SKIP DAILY OR SCHEDULED MAINTENANCE DO NOT TRY TO TOW OR PUSH MACHINE DO NOT ALLOW RIDERS DO NOT RUN INTO OBJECTS WITH SHAKER HEAD DO NOT UNCLAMP HEAD WHILE SHAKING DO NOT SHAKE IF WATER SYSTEM IS NOT WORKING DO NOT OVER FILL FLUID LEVELS DO NOT STORE PERISHABLE ITEMS IN COOLED STORAGE COMPARTMENT ...

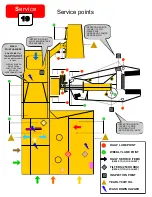
Page 22: ...NS E PIN BOLT NUT MOTOR BOLTS NUTS DAILY LUBE POINT YEARLY 90W OIL DAILY SERVICE ITEMS REFER TO COLOR CHART WEEKLY LUBE POINT FILTERS 250 HOURS REFER TO COLOR CHART INSPECTION POINT WASH DOWN HAZARD WASH POINT HAZARDS DO NOT DIRECTLY power wash areas with electrical components Use low pressure water to clean DISPLAY SCREEN DRIVE PEDAL THROTTLE PEDAL ECU AREA WIRE CONNECTIONS ...

Page 23: ...r cleaner DAILY or MORE OFTEN in severe dust con ditions When cleaning check SAFETY element for any signs of dust that may indicate faults in the PRIMARY air cleaner INSPECT air cleaner ducting regular ly to for loose clamp holes or cracks This can help prevent a dusted motor BATTERY It is recommended to remove battery during off season storage Check for any damage check water level and store on t...

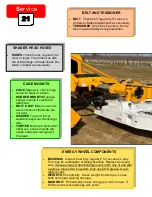
Page 24: ...T Check belt regularly for tension and wear Make adjustments as necessary TENSIONER Check belt tension hourly when new and daily during inspection ENERGY WHEEL COMPONENTS BEARINGS Inspect bearings regularly for excessive play This may be a indication of failing bearings Replace as neces sary Grease energy wheel bearings every other day of use with 2 pumps more often if needed Only use COE grease o...

Page 25: ...4 ports to make sure flow is equal FLAP Replace flap when worn or damaged CLAMP SYSTEMS CYLINDER Inspect clamp cylinder pins and bush ings regularly Grease Daily WEAR PLATES Periodically check wear plate thick ness Add shims as needed replace if worn to prevent damage to clamp arm pin CLAMP HOSES Regularly check clamp hoses and brackets on inside of case for wear or loose hardware that can come lo...

Page 26: ...AT TO OUTSIDE TO CHECK BELT TENSION PUSH FIRMLY DOWN ON LOWER SECTION OF BELT PROPERLY ADJUSTED BELT SHOULD HAVE LESS THEN 1 4 MOVEMENT BELT ROUTING as viewed from top of head TWISTED BELTS ARE A SIGN THAT THE BELT IS TOO LOOSE LOOSE BELTS CAN BE THROWN OFF WHEELS BECOMING ENTANGLED IN HEAD PARTS A THROWN BELT CAN DAMAGE IDLER STAND A DAMAGED IDLER STAND CAN CAUSE BELT TO NOT ALIGN PROPPERLY AND B...

Page 27: ...s 11311 Outer bearing spacers 14359 Energy pin 11308 Fastener seal plates 14246 Mid bearing spacer 14358 External seal plates 14254 Bearings 14361 Energy pin bolt 11306 Energy pin nut 12343 Pin boss 13360 O ring 14364 Energy wheel 14369 Energy wheel 14368 FLAT WHEEL V WHEEL ...

Page 28: ...ECT TO ENERGY WHEEL 5 8 X 3 N C RECESSED ALAN CAP SCREW TO CONNECT 2 TH7 LW AW8 BARS TO WEIGHT ADD OR SUBTRACT 1 TO BOLT LENGTH FOR BAR ADDED OR REMOVED Service 25 NOTE WHEN CHANGING WEIGHTS ALWAYS DISCARD USED BOLTS AND IN STALL NEW BOLTS USE LOCTITE BLUE THREADLOCKER PART M LT08531 FAILURE TO USE NEW BOLTS WILL RESULT IN BACKING OUT AND SHEARING OF BOLTS CAUSING EXTREME DAMAGE FOR BEST SHAKE RES...

Page 29: ...M LT08531 FAILURE TO USE NEW BOLTS WILL RESULT IN BACKING OUT AND SHEARING OF BOLTS CAUSING EXTREME DAMAGE 32 LB 22 LB 8 LB HD Pattern FOR BEST SHAKE RESULTS USE 6 BAR WEIGHTS 3 PER STACK USE LESS TO REDUCE SHAKE 5 8 X 4 N C RECESSED ALAN CAP SCREW TO CONNECT TO ENERGY WHEEL TOP WHEEL PART 13513 1 2 PART 13514 1 PART 13512 PART 13511 5 8 X 1 1 2 N C RECESSED ALAN CAP SCREW TO CONNECT TO ENERGY WHE...

Page 30: ...Service 27 Component locations 40A 40A 40A 40A AC 60A RADIATOR 100A 200A AC RADIATOR ...

Page 31: ... screen The electronically adjusted valve the control pressure transducer is located in the main valve CARTRIDGE VALVE BANKS The cartridge valve banks functions for shifting brake sweeper lift WATER SYSTEM PUMP The water system pump and its components are located at the edge near the rear wheel fender Water system flow is adjustable via the INCONTROL display HYDRAULIC RETURN FILTER The hydraulic r...

Page 32: ...cted into one of the water delivery lines Loosen diaphragm when priming water system tighten when water flow occurs Refer to trouble shooting sec tion to assist in resolution of water system issues PRESSURE TRANSDUCER The pressure transducer monitors the water system pressure If no pressure is sensed then a warning is flashed on the screen FILTER SCREENER The filter screener prevents contaminants ...

Page 33: ...p over Re bolt cover back on with nub facing in to disengage hub Reverse to re engage hub HUB SPINDLE not shown Keep spindle area clear of tree rope or vines BRAKE WHEEL MOTOR STUDS FASTENERS not shown The Auburn hub has 2 studs that allow the brake assembly and wheel motor to couple to the hub Check to make sure stud or fasteners have not come loose HUB BOLTS not shown All hubs are attached to th...

Page 34: ... 4 5 PUMPS FILL WITH WATER AND ADD 8 16 OUNCES OF SLING LUBE INSPECT AND TIGHTEN INSPECT AND TIGHTEN INSPECT AND REPAIR INSPECT AND OR AD JUST REPAIR CHECK TENSION CHECK LUG NUT TORQUE REPLACE REFILL ENGINE REPLACE REPLACE INSPECT REPLACE EVERY 3RD MAIN FILTER CHANGE REPLACE REPLACE INSPECT AND OR FILL 80 90W CHECK BEARINGS OR REPLACE INSPECT OR REPLACE INSPECT OR REPLACE INSPECT OR REPLACE INSPEC...

Page 35: ...T OF TIME ENGINE DUSTED ADD OIL TO ENGINE CONTACT JOHN DEERE OR AUTHORIZED FUEL INJECTION FACILITY HAVE ENGINE PROPERLY REPAIRED CHECK POWER VIEW FOR FAULT CODE AIR CLEANER RESTRICTED CLOGGED FUEL FILTER RESTRICTED OR PINCED FUEL LINE CLOGGED FUEL INJECTOR PLUGGED OR FUEL RETURN LINE ENGINE DUSTED BAD OR IMPROPER FUEL TURBOCHARGER NOT WORKING MAKE REPAIRS AS NECESSARY SERVICE AIR CLEANER REPLACE F...

Page 36: ... OR DEFECTIVE SENDER OR GAUGE UNSERVICED INTAKE SCREENS UNSERVICED RADIATORS IMPROPER OIL BAD THERMOSTAT DUAL COOL SYSTEM LOW ON COOLANT DUAL COOL PUMP NOT WORKING DUAL COOL RADIATOR NOT CLEAN REDUCE LOAD ON ENGINE FILL TO PROPER LEVEL REPLACE RADIATOR CAP REPLACE WATER PUMP REPLACE BELT CHECK IDLER PULLEY BEARINGS REPLACE FAN BELT CHECK FOR LEAKS OR LOOSE ITEMS FIX ADD OIL FLUSH COOLING SYSTEM RE...

Page 37: ...REPLACE WEAR PLATES REPLACE LOCK VALVE CARTRIDGE SHAKER PAD OR SLING FAILURE LOW CLAMP PRESSURE HIGH CLAMP PRESSURE WATER SYSTEM NOT WORKING RUNNING INTO TREES NOT USING SILICONE SOLUTION NOT USING PROPER GRADE MATERIAL INCREASE CLAMP PRESSURE REDUCE CLAMP PRESSURE REPAIR WATER SYSTEM DO NOT RUN INTO TREES USE SILICONE SOLUTION USE RECOMMENDED MATERIAL Call Service department for tech support or s...

Page 38: ...ERVOIR DRAIN AND REPLACE WITH PROPER OIL WARM HYDRAULIC CIRCUIT REPAIR PUMP SHAFT REPAIR PUMP REPLACE SUCTION LINE REPLACE HYDRAULIC LINE RE TORQUE ADAPTER Call Service department for tech support or service call GROUND DRIVE PEDAL NOT IN NEUTRAL SHAKER HEAD CLAMPED MACHINE LOW OR OUT OF OIL CHARGE FILTER PLUGGED LOW CHARGE PRESURE GROOVE ON PUMP VALVE PLATE GROOVE ON MOTOR VALVE PLATE REMOTE PEDA...

Page 39: ... LEVEL LOW PRESSURE SWITCH BAD LEAKING OR BAD REFRIGERANT LINE BAD TEMPERATURE SENSOR BLOWN FUSE FAN BLOWER BAD BAD COMPRESSOR FAN BELT MISSING CHARGE WITH REFRIGERANT REPLACE PRESSURE SWITCH REPLACE BAD LINE REPLACE TEMPERATURE SENSOR INSTALL NEW FUSE REPLACE FAN BLOWER MOTOR REPAIR OR REPLACE COMPRESSOR REPLACE FAN BELT Call Service department for tech support or service call BRAKE SYSTEM NOT WO...

Page 40: ...T CYLINDER CLAMP CYLINDER CLAMP LOCK VALVE HEAD LIFT CYLINDERS PUMP PRIORITY ROLL CYLINDER TANK Return Pressure Working TANK PILOT TANK SWEEPER MOTORS TANK OPTIONAL AXIOM LIFT CYLINDER SECONDARY VALVE Load Sense LS FROM STEERING MOTOR LS TO PUMP COMPENSATOR ...

Page 41: ...its 38 S7R hydraulic circuits 5 STATION MANIFOLD BRAKES TANK SHIFT R SHIFT L FROM CHARGE PUMP SHIFT 1 SWEEPER LIFT CYLINDERS TANK TANK TANK STEERING MOTOR FROM STEERING PRIORITY TANK L R T P LOAD SENSE LINE ...

Page 42: ...9 TANK CHARGE PRESSURE SUCTION STRAINER REXROTH HYDROSTAT SHAKER HEAD MOTOR TANK DUALFORCE VALVE GROUND DRIVE FRONT MOTOR GROUND DRIVE REAR MOTORS Shake ground drive circuit DUALFORCE TANK OIL COOLER FLOAT VALVE ...

Page 43: ...AGM CHECK 26 GALLON WATER TANK WATER MANIFOLDS EVEN FLO EVEN FLO Air conditioning circuit CHARGE PORT RECEIVER DRYER PRESSURE SWITCH COMPRESSOR AIR CONDITIONING UNIT AND VALVE AIR CONDITIONING CONDENSOR D S COOLED STORAGE DASH VENTS Coolant discharge Coolant suction ...

Page 44: ...Circuits 41 S7R electrical circuit ...

Page 45: ...Circuits 42 ...

Page 46: ...4254 4 22 INNER O RING FOR SEAL PLATE 1 PER SEAL PLATE 14364 4 23 FASTENER EXTERNAL SEAL PLATES 6 PER 14246 24 24 REVERSING IDLER PULLEY 8V 10 N 2123 1 25 REVERSING IDLER BEARING 14793 1 26 BEARING CAP REVERSING IDLER 8V 2274 1 27 WASHER REVERSING IDLER N 2275 1 28 REVERSING IDLER STAND 1234 1 29 ALIGNMENT IDLER PULLEY 13510 1 30 ALIGNMENT IDLER BEARINGS 1013 1 31 ALIGNMENT IDLER SNAP RING 11317 1...

Page 47: ...LOCK VAVLE BODY 12 SAE PORTS 12902 1 50 CARTRIDGE LOCK VALVE 5838 1 51 ADAPTER MB MJ 12 12 912 4 52 CLAMP CYLINDER PIN CLAMP ARM 11231 1 53 CLAMP CYLINDER PIN MAIN CASE 11233 1 SHAKER HEAD MOUNTING SYSTEM 1 BIRD CAGE 4 X 9 3 4 1834 3 2 HANGER MOUNT 1 1 8 HOLE 14655 12 3 HANGER BOLT 14757 6 4 NYLOCK NUT 2043 6 5 BRIDGE WASHER 1832 6 Shaker head parts ...

Page 48: ...COE ORCHARD EQUIPMENT INC 3453 RIVIERA ROAD LIVE OAK CA 95953 PH 530 695 5121 FAX 530 695 5128 WWW COESHAKERS COM AUTHORIZED DEALER LOCATIONS AVAILABLE AT WWW COESHAKERS COM COE S7 SIDE MOUNT SHAKER ...

Reviews: