background image

FITTING INSTRUCTIONS

DKB200 RING DOOR KNOCKER

LIT-FI-DKB200

Page 5 of 6

T

 01726 871 025    

E

 [email protected]    

W

 coastal-group.com

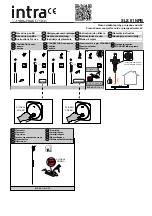
Thread the longer 
fixing bolt into the 
back of the fixing plate 
on top of the Door 
Knocker, turning it 
through 3 turns.

Make sure the 
Anti-spin Peg is at the 
top and thread the 
bolt through the door. 

Check the Knocker is 
square on the door 
and push in so the peg 
on the back enters the 
hole drilled for it on 
the face of the door.

9

Affix washer onto end 
of bolt on back of 
door and secure 
the bolt using the 
decorative nut.

Hand tighten and 
check the Door 
Knocker is square on 
the outside of the 
door.

Then tighten the 
decorative nut using a 
16mm spanner.

10

Summary of Contents for DKB200

Page 1: ...FITTING INSTRUCTIONS DKB200 RING DOOR KNOCKER LIT FI DKB200 Page 1 of 6 T 01726 871 025 E sales coastal group com W coastal group com ...

Page 2: ...or 2 Keeping the template in place on the door drill the 2 x 3mm holes 4mm deep for the Anti spin Pegs Note The holes should be only 4mm deep Then drill 3mm pilot holes for the Fixing Bolts all the way through the door Align the centre line shown on the supplied Hole Drilling Template with the centre line of the door Ensure template is positioned square and plumb on the door then fix top and botto...

Page 3: ...p com HOLE DRILLING TEMPLATE CENTRE LINE NOTE If printing the template yourself from PDF you will need to ensure you print out at 1 1 scale actual size and that the distance between Fixing Bolts hole centres is 87mm as shown on this drawing Measurements shown above are in millimetres Hole for Anti spin Peg Hole for Fixing Bolts ...

Page 4: ...er Thread the shorter fixing bolt into the Impact Plate turning it through 3 turns Remove decorative nut and washer from the 2 x fixing bolts Then on the back of door drill out the 2 x 3mm holes for the bolts to 9mm drilling the rest of the way through from the back Make sure the Anti spin Peg is at the top and thread the bolt through the door Check the Plate is square on the door and push in so t...

Page 5: ...h 3 turns Make sure the Anti spin Peg is at the top and thread the bolt through the door Check the Knocker is square on the door and push in so the peg on the back enters the hole drilled for it on the face of the door 9 Affix washer onto end of bolt on back of door and secure the bolt using the decorative nut Hand tighten and check the Door Knocker is square on the outside of the door Then tighte...

Page 6: ... solution then dried y If a softer metal such as a ring or a key marks the surface it is possible some of this metal may have been left on the PVD coated surface In this case use a soft cloth and mild non acidic cleaner to remove the soft metal deposit If this product has a polished stainless steel or satin stainless steel finish then our DR121 Stainless Steel Renovation Kit should be used at leas...

Reviews: