13. PIP
•
It stands for Picture In picture.
•
Click
the
PIP
button, and it will be displayed 3 PIPs on a full screen.
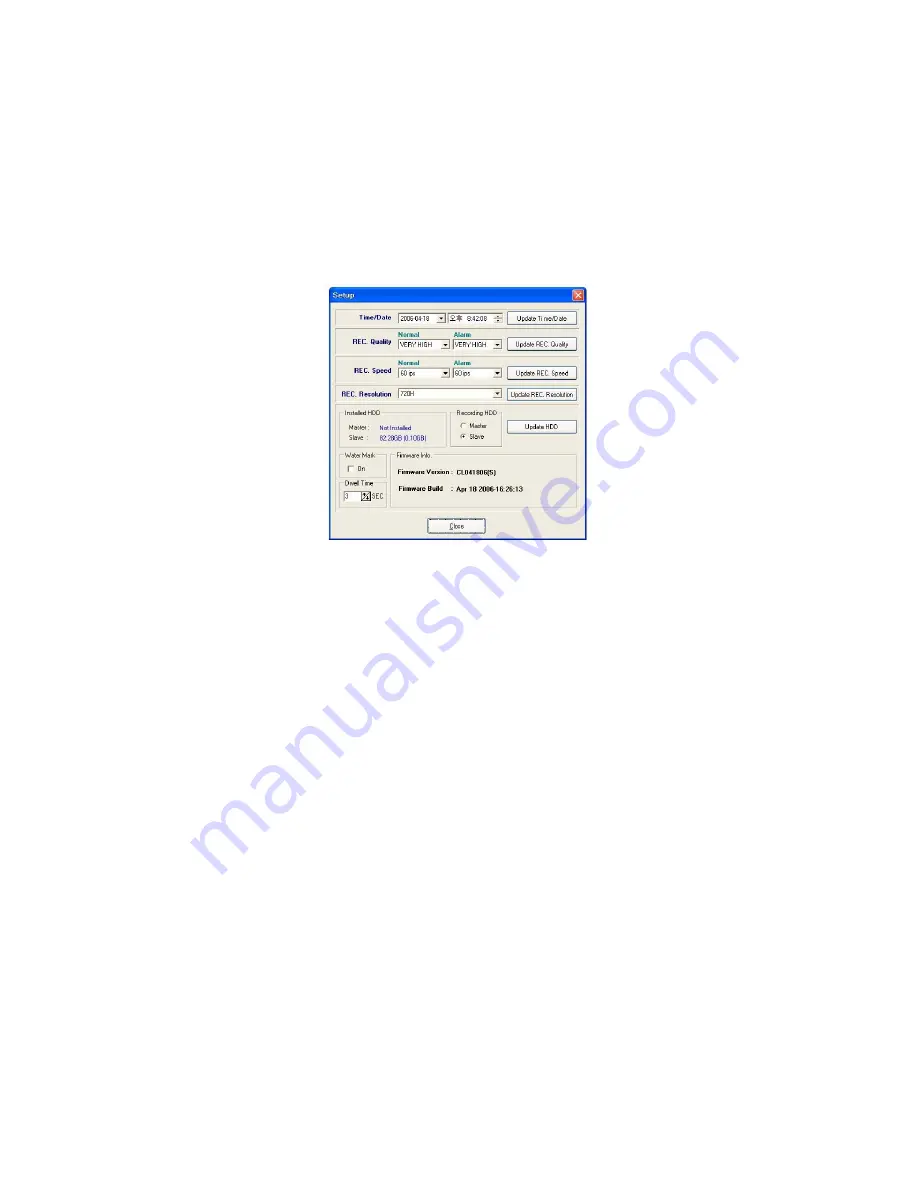
14. SETUP
Click the
SETUP
button on the GUI, and it will be appeared the following window that can
change the values in regards to DVR.
•
Time/Date:
Shows the current time on the computer. After changing the values, press
the
Update Time/Date
button on the right side to save the values. This function does not
affect the DVR.
•
REC. Quality:
Shows the
REC Quality
values on the DVR. Change the values on the
window and press the
Update REC.Quality
button to save them. You can change the
values on the DVR related to the Continuous Recording and Alarm Recording.
•
REC. Speed:
Shows the
REC Speed
values on the DVR. Change the values on the
window and press the
Update REC. Speed
button to save them. You can change the
values on the DVR related to the Continuous Recording and Alarm Recording.
•
REC. Resolution:
Shows the
REC Resolution
values on the DVR. Change the values
on the window and press the
Update REC.Quality
button to save them.
•
Installed HDD and Recording HDD:
Shows currently installed HDD information such as
connection information, whole capacity and used space. It shows currently being
recorded HDD as well. Do not change the recording HDD as possible as you can.
•
Water Mark (
on the GUI
):
The
WATER MARK
allows you to verify if an original image
bas been altered. Click the
WATER MARK ON
to put the
WATER MARK
on the original
images. If the
WATER MARK
on the original images is being broken in the playback
mode, the images have been altered. If not, the images have not been altered.
This function does not affect the DVR.
•
Dwell. Time:
It can be adjusted from 1 to 10 seconds (See #11. AUTO BUTTON for
more details). This function does not affect the DVR.
•
Firmware information:
Current product’s firmware version and time when it was updated.
- 51 -


