background image

USB HD Video Conference Camera                                             User Manual


17


1) Lan 

Settings


The default IP address is 192.168.100.88, the 
MAC address cannot be modified. 

2) Port 

Settings


Set the HTTP, RTSP, TCP, UDP and Sony 
Visca port number of the camera. 
A. HTTP 

Port 

The IP address identifies a network device and 
multiple network programs can run on the 
device, each network program uses the 
network port for data transmission. The port 
setting on this page is to set up which port the 
WEB SERVER program uses to transmit. 
During port mapping, it needs to be consistent 
with the port number (default is 80). 
B. RTSP 

Port 

Set up the RTSP port, default is 554. 
C. TCP 

Port 

Set up the TCP port, default is 5678. 
D. UDP Port 

Set up the UDP port, default is 1259. 
E. Sony Visca 

Sony Visca 52381. 

3) RTMP(S) 

Settings 

Set the MRL of RTMP(S) and select "on", "off", 
"video" and "audio" functions to enable or 
disable video and audio in the two streams. 

4) SRT 

Settings 

Turn On/Off SRT and set up the SRT Port, 
Encryption and Password.   

5) RTSP 

Settings 

Turn On/Off the RTSP Auth. 

6) ONVIF 

Settings 

Turn On/Off the ONVIF and ONVIF Auth. 

7) Multicast 

Settings 

Turn On/Off Multicast, set up the Multicast 
Address (default is 224.1.2.3) and Port (default 
is 6688; 6688 is the multicast port of the first   
stream and 6690 is the multicast port of the 
second stream). 

8) NTP 

Settings 

Turn On/Off NTP time sync, Main time show 
and Sub time show; select the Time Zone; set 
up the Server address, Time interval and the 
Time Show Position of the two streams. 

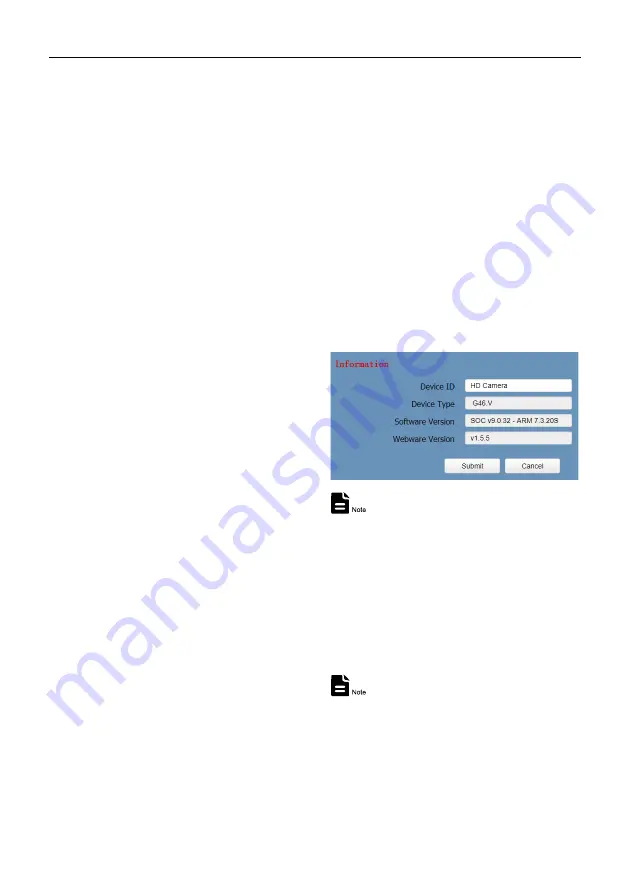
6.6.7 Device Information 

Display the current device information as 
below figure. 


The above information is for reference only, 
please refer to the real product for the actual 
specification. 

6.7  Download the Network Upgrade 

Program 

If you need the camera upgrade program, 
please contact the manufacturer. 


WEB interface and parameters are subject to 
change without notice. 

Summary of Contents for 2612UH-POE

Page 1: ...e cloned copied or translated without the permission of the company Product specifications and information which were referred to in this document are for reference only We may change delete or update...

Page 2: ......

Page 3: ...ommunication Control 6 5 GUI Settings 7 5 1 MENU 7 5 2 EXPOSURE 7 5 3 COLOR 8 5 4 IMAGE 8 5 5 P T Z 8 5 6 NOISE REDUCTION 9 5 7 SETUP 9 5 8 COMMUNICATION SETUP 9 5 9 RESTORE DEFAULT 10 6 Network Funct...

Page 4: ...yer Monitoring 12 6 6 Camera Parameter Setup 13 6 6 1 Homepage Introduction 13 6 6 2 Video Settings 14 6 6 3 Image Settings 15 6 6 4 Audio Settings 16 6 6 5 System Settings 16 6 6 6 Network Settings 1...

Page 5: ...n rotation range Please never power on before installation is completed Do not Dismantle the Camera We are not responsible for any unauthorized modification or dismantling Specific frequencies of elec...

Page 6: ...y reduces the image noise even under the condition of ultra low illumination it keeps the picture clean and clear and the SNR of image is as high as 55dB PoE The wired network supports PoE power suppl...

Page 7: ...Hz 1fps 50fps 60Hz 1fps 60fps Audio Type AAC Audio Bit Rate 96Kbps 128Kbps 256Kbps Protocols TCP IP HTTP RTSP RTMP S ONVIF DHCP Multicast etc USB Features Operate System Windows 7 Windows 8 Windows 10...

Page 8: ...ze mm 144 x 144 x 166 9 Net Weight 1 4Kg 4 3 Interfaces and Buttons Item Name 1 Network Interface 2 HDMI Interface 3 RS232 Interface 4 USB 3 0 Interface 5 LINE IN Interface 6 RS485 Interface 7 DC 12V...

Page 9: ...lt turn the opposite direction as the PTZ control key 9 FOCUS Key Focus adjustment Press AUTO to adjust the focus automatically Press MANUAL to adjust the focus manually When in manual focus mode pres...

Page 10: ...set image after the camera turn to the preset position 19 Shortcut Set 1 OSD menu default English 3 OSD menu default Chinese 4 Display current IP address 6 Quickly recover the default 8 View the camer...

Page 11: ...can be controlled according to the standard protocol For a detailed list of VISCA Pelco D Pelco P protocols please contact with manufacturer 5 GUI Settings 5 1 MENU Press MENU key to display the main...

Page 12: ...Back WB Mode White Balance Mode Auto Indoor Outdoor One Push Manual VAR RG Tuning Red Gain Tuning 10 10 Effective only in Auto One Push VAR mode BG Tuning Blue Gain Tuning 10 10 Effective in Auto One...

Page 13: ...1 5 NR3D Level 3D Noise Reduction Auto Off 1 8 5 7 SETUP When in main menu page move the cursor to Setup and press HOME key to confirm to enter the setup page as shown in below figure SETUP Language V...

Page 14: ...ows 10 Mac OS X Linux Android Network Protocol TCP IP PC Configuration P4 128M RAM 40G HDD support scaled graphics card support DirectX 8 0 or more advanced version 6 2 Equipment Installation 1 Connec...

Page 15: ...tart the camera to take effect the new IP address Method 2 Open upgrade_en exe Select the Config dialog change IP Address and click Set After modified the video conference camera will be restart Chang...

Page 16: ...ntrolled by Dynamic DNS Two dynamic DNS Dyndns org 3322 org Router Port Mapping Tenda Enter the Router Home Page interface page select Advanced Virtual Server enter a new port number in Ext Port enter...

Page 17: ...Configurate the parameters A Video Viewing Window The video viewing window is same as video resolution the bigger the resolution the bigger the playing area Double click the viewing window to show ful...

Page 18: ...r position input the preset number and click Call button to turn the PTZ back to the preset position 6 PTZ OSD Move the cursor to dropdown menu select and click OSD to open the on screen menu and do m...

Page 19: ...will be coding according to the preset speed VBR Variable Bit Rate Video coder will adjust the speed based on preset speed to gain the best image quality 9 Slice Split Enable Enable or disable the Sl...

Page 20: ...type AAC 3 Sample Rate Sample rate 48K 4 Bit Rate Bit rate 96K 128K and 256K selectable 5 Input Type Input type Line in 6 ADTS Options Options On Off 6 6 5 System Settings 1 Reboot Click Reboot to re...

Page 21: ...udio functions to enable or disable video and audio in the two streams 4 SRT Settings Turn On Off SRT and set up the SRT Port Encryption and Password 5 RTSP Settings Turn On Off the RTSP Auth 6 ONVIF...

Page 22: ...tp www videolan org vlc to download and install the 32 bit VLC media player after installation the video image will be displayed normally when visit the camera Other mainstream browsers already suppor...

Page 23: ......

Page 24: ......

Reviews: