


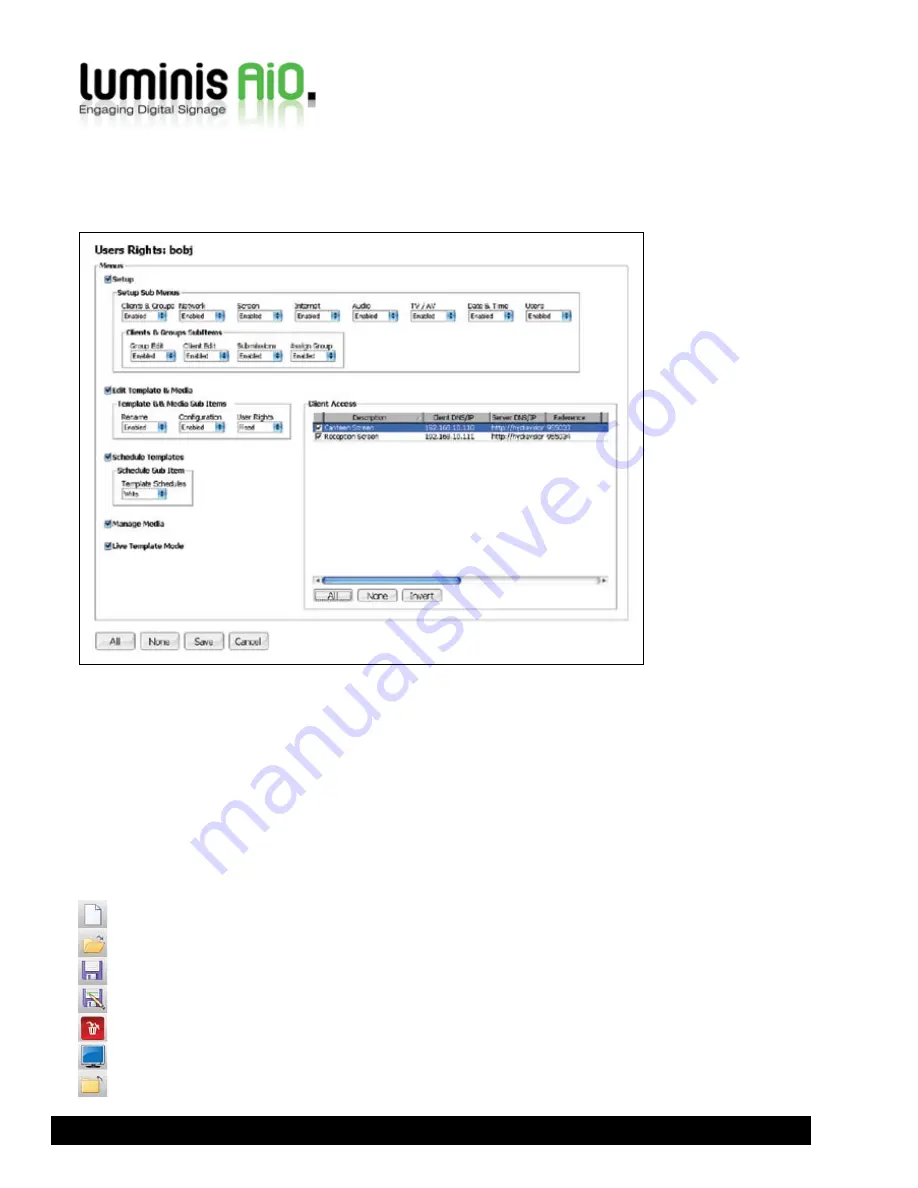
Use the tickboxes and dropdown menus to enable or
disable access to each part of Luminis AiO for the selected
user.
If the Luminis AiO system is configured in network mode,
you can specify which Luminis AiO clients each user can
submit content to. Please refer to Network Mode section of
this user guide for more details.
Use the
All
and
None
buttons to enabled or disable access
to all parts of the software quickly. To commit your changes
and return to the users screen, click Save. To return without
saving changes, click
Cancel
.
User Rights
To change which part of the system users can access, click the grey box next to the username and click the
Rights
button.
Note that you cannot change access rights for the Administrator account.
Network Mode
If you have more than one Luminis AiO unit on your
network it is possible to configure them in a server/client(s)
relationship. Please note that the configuration can be
complicated and requires an understanding of Windows
Internet Information Services, and that this would usually
be performed by a Luminis AiO engineer.
The Luminis AiO Server is the unit that all media and
templates are stored on and where all scheduling occurs.
The clients play media and templates assigned to them by
and sent from the Luminis AiO Server.
Using the rest of this user guide, upload your media files to
the server and setup your templates before proceeding. If
you require different players to show different content, you
24
New layout
Open layout
Save template
Save template as
Delete channel
Template settings
Close layout editor


