CLEARSPAN
™
GREENHOUSES
26
Revision date: 10.03.14
INSTALL MAIN COVER (continued)
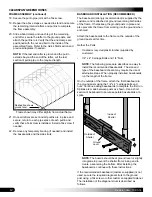
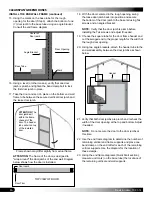
12. Once the first cover is stretched and secure, install the
inflation fan kit in the desired location and according to
the instructions sent with the kit.
Install the Inflation Fan Kit
before
installing the second
main cover. Consult the instructions included with the
Inflation Fan Kit to install the kit.
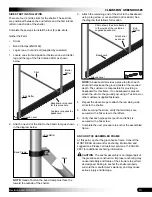
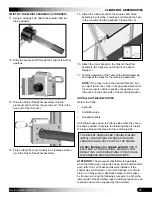
13. After installing the inflation fan kit, repeat the steps to
install the film for the second main cover.
NOTE:
When installing the second cover film, use the
same U-channel used for the first cover film, and a
second run of spring, which is installed on top of the
first U-channel spring already in the channel.
The excess material along the sides is rolled up in the
roll-up side assembly.
14. With the second cover film layer installed, test the
operation of the inflation fan kit.
IMPORTANT:
If trimming the excess cover material at
the ends (not the sides), DO NOT remove too much of
the excess material.
Some excess main cover material (the material that
extends beyond the end rafters) should remain in place
to more easily re-stretch the film if needed.
15. Continue with the Install the
Roll-up Side Assemblies
procedure.
ASSEMBLE THE ROLL-UP SIDE CONDUIT
Gather the Parts:
• Pipe 1.315'' x 75'' swaged 17 GA (#131S0075)
• Pipe 1.315'' x XX'' plain 17 GA (#131P0XX)
• Tek screws (#FA4482B)
The roll-up side conduit assembly is attached to the bottom
of the roll-up side cover material. This assembly runs the
length of the frame and serves as the center pipe that the
roll-up cover wraps around when it is opened to ventilate
the shelter.
This conduit is identical to the purlins that were
assembled and attached to the frame.
NOTE:
The number of pipes used in the roll-up conduit
assembly varies with the length of the greenhouse.
Roll-up conduit assemblies consist of multiple sections of
swaged 1.315" pipe at 75" in length (part #131S075) and
one (1) additional plain 1.315" pipe at a shorter length
(part #131P0XX) determined by the greenhouse, where
XX represents the remaining length required to complete
the roll-up conduit assembly and to reach the end of the
greenhouse.
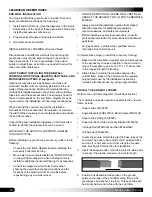
Complete these steps to assemble the roll-up side conduit.
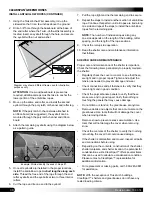
1. Locate all sections of pipe needed to assemble the
cover conduit.
2. Insert the swaged end of each pipe into the plain end of
another pipe until the conduit is assembled.
3. Secure each pipe joint with a Tek screw.
INSTALL THE ROLL-UP SIDE ASSEMBLIES
The instructions below describe how to install a single
roll-up sidewall assembly for one side of the frame. The
procedure is repeated for the remaining side.
The procedures to install the roll-up side include the
following:
1. Assemble the roll-up side conduit.
2. Attach the roll-up conduit to the bottom of the main
cover along the sides.
3. Assemble the Twist-of-the-Wrist assembly and attach it
to the frame and the roll-up side.
4. Install the Anti-Billow Rope system.
5. Test the operation of the roll-up side.
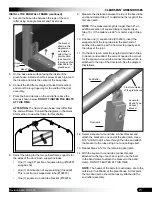
4. Place the assembled conduit at the base of the side
where the end of the main cover is located.
NOTE:
Apply duct tape over Tek screws to prevent
damage to main cover.
5. Repeat the steps to assemble the remaining cover
conduit.
6. Continue with the procedure that follows to attach the
conduit to the main cover.

