CLEARSPAN
™
GREENHOUSES
16
Revision date: 10.03.14
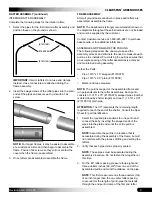
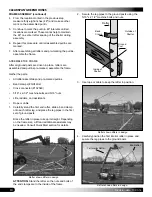
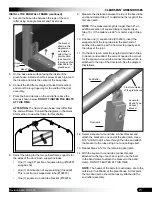
15. Using the marks on the base tube for the rough
opening for the door (Step 6),
attach the bottom of one
(1) door jamb to the base tube using an angle bracket
.
Consult the end frame diagram.
INSTALL THE END WALL FRAME (continued)
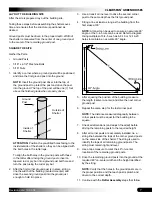
16. Using a level (or other means), verify that one door
jamb is plumb and tighten the band clamp bolt to lock
the first door jamb in place.
17. Take the door and set it in place on the bottom end wall
frame tube between the secured vertical door jamb and
the loose door jamb.
18. With the door centered in the rough opening, swing
the loose door jamb back into position and secure
the bottom of the door jamb to the base rail using Tek
screws and an angled bracket.
NOTE:
Verify that the door jamb is plumb before
installing the Tek screws and adjust if needed.
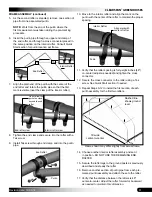
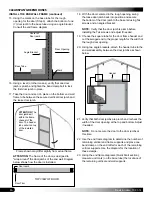
19. Choose the square tube for the door frame header and
cut the swaged end to the proper length for the width of
the rough door opening.
20. Using two angle brackets, attach the header tube to the
end wall assembly between the door jambs as shown
below.
21. Verify that both door jambs are plumb and recheck the
width of the door opening at the top and bottom. Adjust
if needed.
NOTE:
Do not secure the door to the door jambs at
this time.
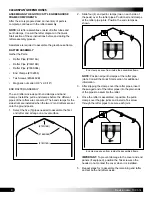
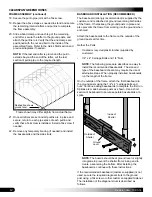
22. Use the end frame diagram to determine the number of
remaining vertical end frame supports and place one
band clamp on the end rafter for each of the remaining
vertical supports. Use the diagram for the location of
these clamps.
23. Using the end frame diagrams (Quick Start section),
measure and mark (on the base tube) the locations of
the remaining vertical end wall supports
.
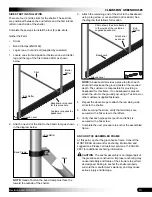
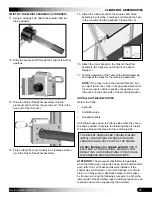
ATTENTION:
The frame of the door is designed to
"wrap around" the door jambs of the end wall. Diagram
below shows how the door is installed.
Door Opening
Angle Bracket
Mark
Base Tube
Center of
Door jamb
ATTENTION
: The
door jambs sit
within the frame
channel of the
door. The header
tube will sit on top
of the installed
door.
Frame shown may differ slightly from actual frame.
Header
Door Trim
Door Jamb
TOP VIEW OF DOOR

