CLEARSPAN
™
GREENHOUSES
20
Revision date: 07.29.14
END PANEL INSTALLATION (continued)
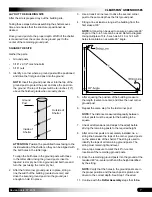
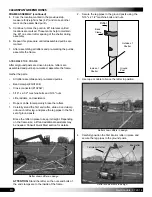
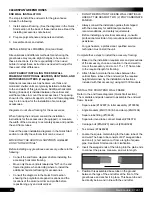
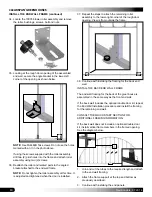
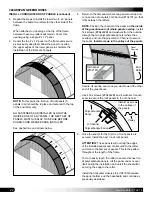
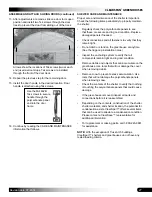
7. Choose the next 12' panel and overlap the top edge of
the bottom panel with the bottom edge of the top panel.
NOTE:
The top panel will overlap the bottom panel by
one rib. (Panels are not to scale.)
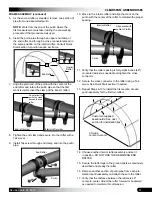
8. Install the horizontal foam strip (104709) to the door
edge of the panel as previously described.
9. Secure the top panel to the end wall framing as
previously described.
10. Once the top panel is secured, finish securing the
bottom panels to the end wall framing (as needed) and
add the next top panel.
11. Repeat the process for the top panel regarding the
other side of the door.
12. Continue to install the remaining panels until the end
wall is covered.
NOTE:
The excess panel removed from the upper-
most 12' panels is used to cover the small sections at
the very top of the end walls. When cutting the panels
to the required length, do not damage the removed
panel sections.
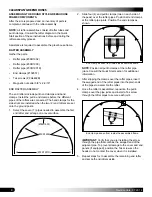
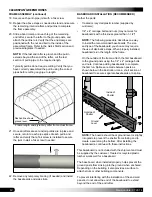
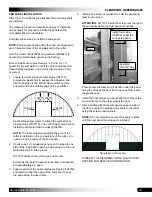
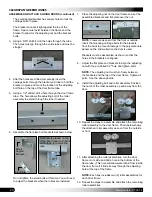
13. Once the door end of the greenhouse is covered with
end panels, cut all panels to the width of the end wall
using the rafter as a guide.
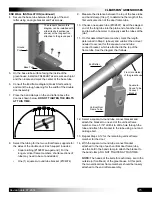
ATTENTION:
The roof panels can be installed on the
outside of a baseboard as shown in the next photo, or
flush with the top edge of the baseboard (not shown).
If you want to attach the roof panels to the outside of a
baseboard, use
the installed baseboard as the outside
edge of the end wall at the bottom
when cutting the
lower end wall panels
to width. See the photo in the
next column for details.
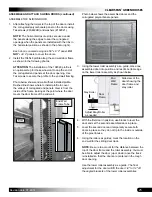
Use the rafter
as the outer
edge of the end wall if you install the roof panels flush
to the top of the baseboard.
12' Panel
12' Panel
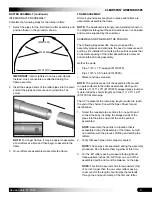
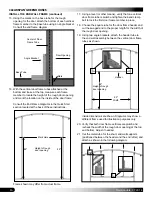
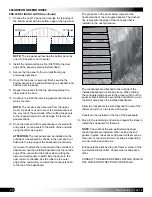
The gray bars in the photo below represent the
horizontal ribs of the corrugated panels. The dashed
line represents the edge of the roof panel that is
installed in the next procedure.
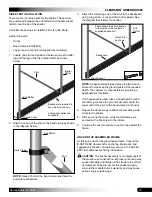
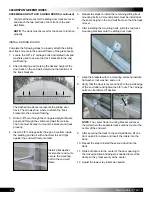
The roof panels are attached to the outside of the
installed baseboard as shown above. When cutting
the corrugated end panels to the proper width, cut the
panel so that it extends beyond the end rafter to cover
the small area above the installed baseboard.
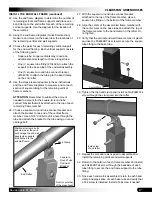
Allow the roof panels to extend beyond the end of the
rafters an inch or so to create a drip edge.
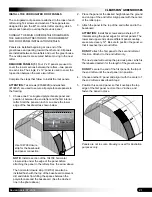
Panels can be installed to the top of the baseboard.
14. Move to the remaining end wall and repeat the steps to
install the end panels for that wall.
NOTE:
The width of the end wall determines how
the end panels are installed. When setting the end
panels in place, the excess end panel material can be
removed, or the next panel can overlap it, depending
on how much panel remains.
End panels are attached to each frame member of the
end wall and to the rafter. Panels must overlap each
other.
CONSULT THE BACK END PANEL DETAILS PAGE IN
THE QUICK START SECTION FOR DETAILS.

