


ASSEMBLE THE FRAME
ATTENTION: Rafter assemblies are heavy and
difficult to handle. Use assistants and the proper
lifts when setting the rafters on the ground posts.
Use temporary bracing as needed to keep the rafters in
the correct position.
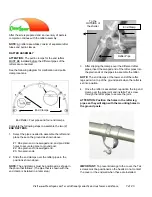
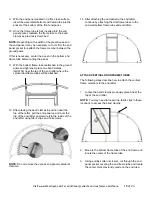
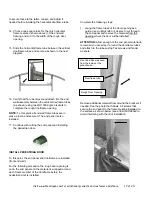
1. Carefully stand the first end rafter and place the leg
pipes in the first set of ground posts.
2. Secure the leg pipes to the ground posts using the
5/16" x 2 1/2" machine bolts and nuts.
3. Carefully position the first interior rafter in place and
secure the leg pipes to the ground posts as
previously described.
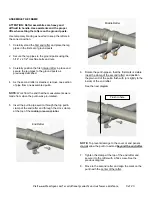
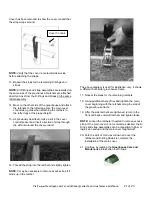
4. As the second rafter is steadied, remove one section
of pipe from one assembled purlin.
NOTE:
Work from the end that the measurements were
made from when the purlin was pre-marked.
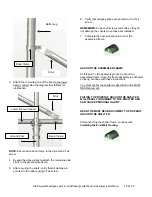
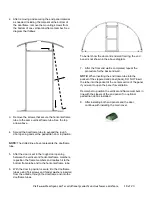
5. Insert the purlin pipe section through the top purlin
clamp of the end rafter and through the cross clamp
at the top of the middle (or second) rafter.
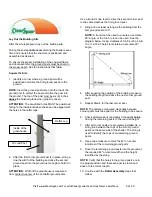
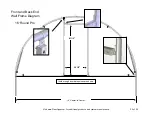
6. Rotate the purlin pipe so that the first mark is visible
(near the clamp of the second rafter) and position
the plain end of the purlin flush with (or slightly to the
inside) of the end rafter.
See the next diagram.
NOTE:
To prevent damage to the cover or end panels,
do not
allow the purlin to extend
beyond the end rafter
.
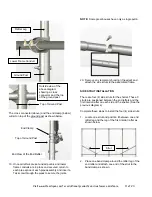
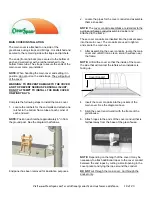
7. Tighten the clamp at the top of the end rafter and
secure it to the rafter with a Tek screw. See the
previous diagram.
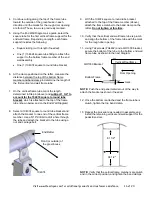
8. Move to the second rafter and align the mark on the
purlin with the center of the rafter.
End Rafter
Middle Rafter
Flush to here
Visit www.ClearSpan.com for additional products and customer assistance.
9 of 24


