


5
E
n
g
li
s
h
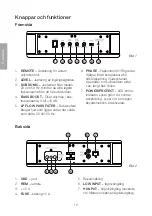
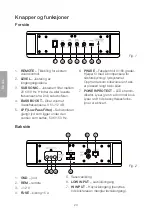
Fig. 4
Fig. 3
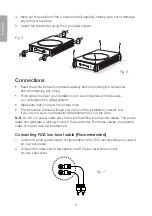
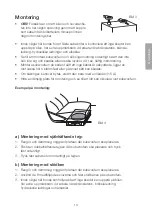
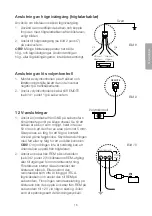
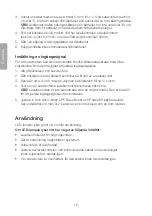
Mounting
•
n.B.
Make sure that the car and head unit are not
conducting any current by disconnecting the nega-
tive lead from the car battery terminal.
•
Before drilling mounting holes for the subwoofer, make sure that you will not dam-
age any vital parts of the car by doing so. Particular care should be exercised
when working close to fuel tanks, fuel lines, hydraulic lines and electrical wiring.
•
Make sure that the subwoofer and all connected parts are firmly secured so that
they cannot move around and damage anything in the event of sharp braking.
•
Mount the subwoofer in such a way that none of its cables is uninsulated, lying
against a sharp edge, pinched or can be damaged in any way.
•
If the fuse needs replacing, use only a fuse of the same rating (15 A).
•
Find a suitable location to mount the subwoofer, where there is adequate
air circulation.
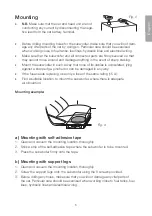
Mounting example:
a) Mounting with self-adhesive tape
1. Clean and vacuum the mounting location thoroughly.
2. Stick a strip of the self-adhesive tape where the subwoofer is to be mounted.
3. Press the subwoofer firmly onto the tape.
b) Mounting with support legs
1. Clean and vacuum the mounting location thoroughly.
2. Screw the support legs onto the subwoofer using the 8 screws provided.
3. Before drilling any holes, make sure that you will not damage any vital parts of
the car. Particular care should be exercised when working close to fuel tanks, fuel
lines, hydraulic lines and electrical wiring.


