background image

N.I.C.E. P200

27

2. Appuyez sur le bouton MENU, puis sur le bouton 

RÉGLAGE.

La première fois que vous accédez au RÉGLAGE, le N.I.C.E. 
P200 affi che l’écran INFORMATIONS DU SYSTÈME.

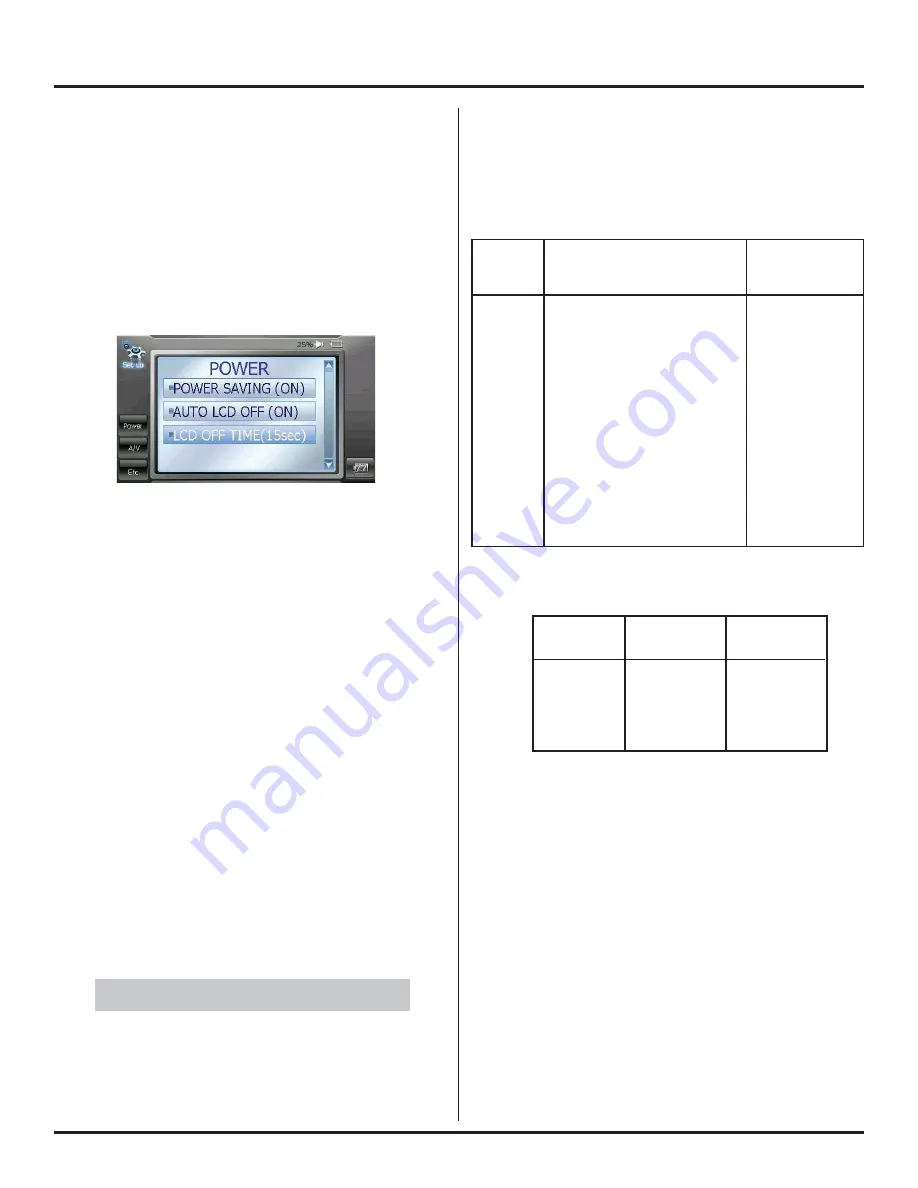
3. Si vous ne voyez pas les options d’alimentation, 

appuyez sur le bouton d’alimentation sur l’écran 
tactile (pas le vrai bouton).

Le N.I.C.E. P200 affi che le menu ALIMENTATION.

Prenez note que le N.I.C.E. P200 met automatiquement 
le mode d’économie de charge en marche quand vous le 
retirez du support. Les options d’économie de charge ne 
sont pas requises quand le N.I.C.E. P200 est alimenté par 
le support.
 
Quand l’option ARRÊT ACL AUTO est activée et que le 
N.I.C.E. P200 est alimenté par la batterie, l’ACL s’éteint 
automatiquement si vous n’y touchez pas pendant le 
nombre de secondes déterminé dans l’option ARRÊT ACL 
AUTO.

4. Appuyez sur l’option DURÉE ACL ÉTEINT pour 

la modifi er en choisissant l’une des 4 durées en 
secondes.

5. Appuyez sur le bouton d’alimentation encore une 

fois pour valider votre sélection.

Une fois que l’ACL est éteint, vous pouvez l’allumer de 
nouveau en appuyant sur l’écran.

Vous pouvez faire jouer de la musique quand l’ACL 
est éteint.

Formats audio et vidéo pris en charge

Assurez-vous que le N.I.C.E. P200 supporte les fi chiers 
audio et vidéo que vous voulez écouter et visionner.

Formats audio pris en charge


Formats vidéo pris en charge

Les codecs vidéo et audio peuvent être utilisés dans 
toutes les combinaisons, mais seulement avec cette liste 
de codecs. Si vous transférez au N.I.C.E. P200 un fi chier 
utilisant un autre codec, le fi chier ne fonctionnera pas.

Par exemple, un fi chier vidéo musical avec l’extension .avi 
utilisant le WMV pour le vidéo et MP2 comme codec audio 
fonctionnera. Par contre, un fi chier vidéo musical avec le 
codec vidéo XVID et un codec audio MPEG ne fonctionnera 
pas.

Comment faire jouer de la musique

1. Branchez le N.I.C.E. à votre ordinateur et copiez un 

ou plusieurs fi chiers de musique pris en charge à 
partir de votre ordinateur au N.I.C.E. P200.

Options d’alimentation

NOTE

Codec

MP2

MP3

OGG

WMA

WAVE 
(PCM)

AC3

Type de fi chier

Mbit/s—Partie 2

Mbit/s—Partie 3

Codec audio Vorbis

Windows® Media Audio

Format de fi chier audio Waveform 
utilisant la modulation par 
impulsion et codage (MIC)

Compression audio numérique par 
les Laboratoires Dolby

Extension du 
fi chier

.mp2

.mp3

.mp3

.wma

.wav

.ac3

Codec

DivX 3/4/5.xx

MPEG-1

XVID

WMV

Défi nition

720 x 480

352 x 240

320 x 240

320 x 240

Extension du 
fi chier

.avi

.mpg

.xvid

.wmv

Summary of Contents for P200

Page 1: ......

Page 2: ...User s Guide 2 ...

Page 3: ...nd a photo image viewer Solitaire and Freecell games A compact 4 inch Thin Film Transistor TFT Liquid Crystal Display LCD provides high resolution images This translates into easy to use mapping and entertainment viewing The display doubles as a touch screen control pad Three power sources cover all conditions A rechargeable battery provides three hours of entertainment away from the GPS cradle A ...

Page 4: ...200 distract Warnings FCC notice This N I C E P200 complies with the interference limits relative to a Class B digital device applicable under Part 15 of the FCC Rules regarding installation in a residential environment If the N I C E P200 is not installed in accordance with these instructions it could cause harmful interference to radio or television reception If this condition persists after cor...

Page 5: ...sic player controls 21 Photo viewer controls 22 Video player controls 23 Contents Sleep mode 25 Power off 25 Frequently asked questions 26 Navigation questions 26 Entertainment questions 27 Application questions 28 2 Installation 29 Vehicle installation 29 Precautions 29 Dock the N I C E P200 in the cradle 29 Attach the mounting bracket to the glass 31 Connect the vehicle power cord 31 Removing th...

Page 6: ...nceling route guidance 54 Previewing your journey 55 Turn route guidance simulation on 55 Define your current location 55 Define your destination 56 Saving the trail 61 Reviewing where you ve been 61 4 Entertainment modes 63 Undocking a N I C E P200 63 Saving battery charge 64 Supported audio and video formats 65 Playing music 66 Locking front panel buttons 68 Playing music while navigating 68 Equ...

Page 7: ... watch 89 Using the calendar 90 Maintaining your schedule 90 Copying appointments 90 Customizing navigation 95 Maximizing space for the map 96 Shortest time or shortest distance 97 Avoiding interstates and toll roads 98 Changing the language 98 Changing distance units 100 Defining origin using lists 100 Defining origin by pointing 101 Turning voice guidance on and off 101 Changing map colors 101 R...

Page 8: ...oute Guidance 122 Edit Address Book 124 Trail Book 125 Current location uses 126 Setup 126 User Preferences 128 MEDIA icons 130 Music and video buttons 131 Music and video mode icons 131 Equalizer icons 132 Stereo mono icons 132 Photo buttons 132 Utility icons 133 Contact buttons 133 Text reader buttons 134 Calendar buttons 134 Setup 134 Power options 135 Audio video A V options 135 Etcetera optio...

Page 9: ... C E P200 9 1 Quick Start Windshield mounting bracket and cradle NAVMOUNT2 N I C E P200 Li lithium polymer rechargeable battery NAVBATTERY Parts list If anything is missing contact your dealer immediately ...

Page 10: ...tainment 3 5mm headphone jack for private listening Hold switch locks unlocks touch screen and physical buttons USB 2 0 5 pin mini port for updating maps downloading media and updating firmware AC DC IN socket connects to 110v power cord adapter for home use Lanyard loop for carrying the N I C E P200 Power LED surrounds the power button on when connected to external power glows red when charging b...

Page 11: ...io video and utilities for up to three hours when the N I C E P200 undocked from the cradle Battery cover lock locks and unlocks the battery cover shown in locked position Battery cover DC IN socket connects to the vehicle power cord GPS antenna port connects to the optional 16 foot GPS antenna NAVGPS ...

Page 12: ...ting bracket and cradle Cradle holds the N I C E P200 Swivel adjustment knobs adjust position of the N I C E P200 when mounted on the windshield Suction cup secures the mounting bracket to the windshield Suction tab at base of cup ...

Page 13: ...s Getting started 1 Press and hold the power button briefly If this is the first time you ve used the N I C E P200 or if you turned the power off by pressing and holding the power button for two seconds the Clarion logo appears above a loading bar and the N I C E P200 displays the main menu After you ve used the N I C E P200 and if you turn it off in sleep mode it starts by displaying the last scr...

Page 14: ...icon displays a menu of utility application features see Using the utilities on page 79 NAVIGATION icon launches navigation mode see Navigation on page 34 SETUP icon provides access to the configuration options see Setup on page 134 USB button connects a computer for down loading media and updating firmware CLOSE button closes main menu SPEAKER button turns speaker on and off MUSIC button turns mu...

Page 15: ... buttons slowly for best performance The N I C E P200 displays the navigation declaration Note 2 Read the navigation declaration and tap the Press to accept button The N I C E P200 displays the map view with your current location indicated by the red arrow Current location Navigation options button F3 ...

Page 16: ...ral procedure 1 Tap the navigation options button F3 The N I C E P200 displays navigation options Exit F1 Returns to navigation 2 Tap Start Route Guidance The N I C E P200 displays several ways to define your destination Destination options This quick start assumes you know your ...

Page 17: ...he N I C E P200 displays the address options Address options 4 Tap State Province Name The N I C E P200 displays the list of states and provinces Page up F2 and Page down F4 buttons Used to view the next or previous page of options Scroll arrows ...

Page 18: ...the state or province works the same as using it to define the city name the example above street name postal code etc 6 Tap the first few letters of the name or number The N I C E P200 displays a list with one or more options If you don t see a list tap the OK to accept checkmark on the keyboard 7 Based on what s easiest for you tap Postal Code City Name or Street Name and use the keyboard to def...

Page 19: ...ng the route Calculation progress bar If the destination is a long way from your current location route calculation may take several minutes If the destination involves travel by air or boat for example you are in San Diego California and want to travel to Honolulu Hawaii the N I C E P200 displays an error message ...

Page 20: ...oom out F2 Compass Next maneuver Next location indicates where you ll be after you make the next maneuver Destination route highlighted in magenta Simulation on Touch screen buttons on off Time to next maneuver Destination direction line of sight Navigation options F3 selects detour cancel route edit address book or set navigation options Current location F5 ...

Page 21: ...ys music Stops selection Selects previous track in folder Selects next track in folder Displays previous page of names Displays next page of names Main music controls Chooses preset equalizer settings Current folder Current music mode Current track Equalizer setting Current volume Current battery charge Total time Elapsed time Stereo monaural icon ...

Page 22: ...rges photo to fill screen Tap the screen to return to photo default size File folder button provides access to additional folders Current photo folder Slide show icon displays when slide show is on Next photo Previous photo Current battery charge icon Pause and play buttons Stop button Next track Previous track ...

Page 23: ...n button accesses configuration options Stop Pause and play buttons Stop button Previous video in folder Next video in folder Previous page Next page Current equalizer setting Current volume Current battery charge Current video mode Current folder File name Equalizer button alternates among preset equalizer settings Track or file Subtitles on off Bat chg Currentlyplaying video The N I C E P200 dis...

Page 24: ...m the remote control toward the infrared sensor on the N I C E P200 front panel Remote features MAIN MAIN CH CH ENTER ENTER CAT VOL OL CH CH MUTE MUTE CAT MENU BAND MEMO F1 F2 F3 F4 F5 F6 1 2 3 4 5 6 7 8 9 Accesses main menu Mutes all sound Confirms menu selection Increases volume Correspond to touch screen buttons functions change based on mode Next previous BAND play Arrows move map arrow CAT se...

Page 25: ...Sleep Mode The N I C E P200 stores your current mode such as navigation mode The LEDs tiny blue lights in the middle of the MENU MUTE and volume buttons remain on In sleep mode the N I C E P200 continues to draw a small amount of power Over time this draw will drain the battery Power off Pressing and holding the power button for two seconds turns the power fully off The LEDs turn off The N I C E P...

Page 26: ...ute indepen dent of the GPS I don t like to drive on freeways interstates Yes In Setup Navigation Preferences tap Avoid Freeway No to change it to Avoid Free way Yes I don t like toll roads Can the N I C E P200 calculate a route that avoids toll roads Yes In Setup Navigation Preferences tap Toll Yes to change it to Toll No Can the N I C E P200 calculate a route that may be a little out of the way ...

Page 27: ...ation button F5 Can I tell how far it is to the next maneuver Voice guidance announces the distance to the Does the N I C E P200 show me how many miles are left to the destination Yes The N I C E P200 displays miles or kilo meters remaining in the box at the lower right of the screen What is the arrow in the upper left of the screen This arrow indicates the next maneuver Entertainment questions Ca...

Page 28: ...to lock the touch screen Yes Slide the HOLD switch up This switch is located on the left side of the N I C E P200 as you face it from the front In the up posi tion the touch screen is locked Application questions Is there a way to copy all contacts and calendar appointments at once No you copy one at a time In my text files each line of text breaks before it should making the text difficult to rea...

Page 29: ...tions could result in accident or personal 2 Installation Warnings the windshield or your view of dashboard indicators and displays Do not mount the N I C E P200 where it might obstruct the operation of a safety device such as air bags etc Dock the N I C E P200 in the cradle The cradle contains the Global Positioning System GPS Designed to be used as a portable entertainment and applications tool ...

Page 30: ...nlock position 5 Slide the N I C E P200 into the cradle making sure that the flanges securely hold it DC IN L 8 0Max Lock switch Locked Unlocked The receptacle on the bottom of the N I C E P200 fits into the connector in the cradle Front of the cradle 6 Move the lock switch to the locked position N I C E P200 connector Flanges ...

Page 31: ...Make sure the assembly does not obstruct the driver s view of the road from any angle but still has a direct path through the windshield to the GPS satellite If you are not sure consult a professional installer for help 2 Press the compression lever 3 Adjust the position of the N I C E P200 using the adjustment knobs Connect the vehicle power cord In a vehicle the N I C E P200 s is powered by the ...

Page 32: ...arette lighter socket of your vehicle 3 Briefly press the power button DC IN L 8 0Max DC IN socket Removing the mounting bracket 1 Disconnect the vehicle power cord from the DC IN socket on the cradle 2 Hold the mounting bracket and cradle as you lift the compression lever Mounting bracket mounted on windshield Suction tab at base of cup Compression lever ...

Page 33: ...200 Left side of the N I C E P200 LCD screen DC IN socket Improving audio As the N I C E P200 is a portable device and designed to travel with you it comes with its own internal speaker To improve the quality of the sound connect the optional audio video output cable NAVCK from the serial port on the cradle to a stereo system either in the car or at home See the documentation that comes with the c...

Page 34: ...lobal positioning works The Global Positioning System GPS provides navigation within the United States and Canada 3 Navigation Obstructions such as nearby buildings high terrain parking garages and tunnels can inhibit communication with the satellite Obstructions inhibit communications Note ...

Page 35: ... P200 may be hot to the touch and sunlight may make it difficult to read the screen 1 Press the MENU button below the LCD Control buttons Caution MENU button The navigation declaration screen appears Navigation declaration screen 3 Read the declaration then tap the Press to accept button ...

Page 36: ...stylus Note GPS icon Navigation options button F3 The red arrow and the bar at the bottom identify your current location Defining your destination Always define your destination while parked Do not attempt to define a destination while driving 1 Tap the navigation options button F3 Warning ...

Page 37: ...7 The Navigation menu appears Navigation menu 2 Tap Start Route Guidance The N I C E P200 displays several ways to select a destination Destination options There are two basic ways to define a Scroll buttons two sets ...

Page 38: ... topic Point of interest For more on this method see Navigating in an unfamiliar city on page 39 Use this method for a destination in your area that you visit occasionally For how to store an address see Updating the address book on page 56 Previous destination This option lists your last 40 destinations Use this method when traveling to quickly recall temporarily important addresses such as your ...

Page 39: ...liar city Point of interest POI lets you define a destination when you don t know its address This method is especially useful when traveling in an unfamiliar city It can save time and the expense of driving around when you need to find for example a gasoline station or a grocery store The N I C E P200 database maintains a list of two million points of interest organized by categories such as city...

Page 40: ...st the N I C E P200 offers five options Four of the point of interest options 1 Scroll down to view the fifth point of interest option Fifth point of interest option visible State Province Name limits all other lists postal code phone and first few letters ...

Page 41: ... know how it might be categorized nor do you know its postal code or phone number 2 Select an option For State Province Name see Scrolling through lists on page 42 For By Postal Code By Name and By Phone see Using the touch screen keyboard on page 43 The following screen displays when you choose By Category Sample categories list The actual list you see depends on previous categories you selected ...

Page 42: ... know the name you re looking for choose Sort By Name The N I C E P200 prompts you to confirm the destination Continue with Traveling to your destination on page 49 Scrolling through lists There are two ways to scroll through a long list such as the list of city names Multi option scroll buttons F2 and F4 scroll up to four options at a time ...

Page 43: ...ng the touch screen scroll buttons F2 and F4 Using the touch screen keyboard Some options display the keyboard automatically Lists let you scroll or use the keyboard to save time 1 If you re viewing a long list such as all the streets in California tap the keyboard button F5 The N I C E P200 displays the touch screen keyboard Accept button Back space ...

Page 44: ...ur state or province This helps avoid typing errors Backspace In the example above the first digit 9 of the postal code appeared automatically and only the keys needed to enter the rest of the postal code are available 2 Tap the first few letters of the name or postal code To tap letters with diacritical marks such as é and ñ tap the special characters button To return to standard characters tap t...

Page 45: ...ns based on the characters you tapped so far The following is an example of a short list of cities The next example is a short list of streets Short list of streets with sample address range Above this list the N I C E P200 displays the address range for the streets in the list A quick check with the address you re seeking should ...

Page 46: ...on of specifying a specific house building number or an intersection Address or intersection If you choose Address the N I C E P200 displays the valid range of addresses at the top of the touch screen keyboard Keyboard with sample address range 5 tap the address and tap the accept button ...

Page 47: ... map 1 Tap the navigation options button F3 Start Route Guidance then scroll down and tap Map OR Tap your destination on the map without tapping the navigation options button F3 first Crosshairs appear at your current location Crosshairs mark the location you touched 2 If the location is not on the map tap the map in Crosshairs Pointer button centers the map at the current location ...

Page 48: ...n as a list option 4 Tap the name to confirm the location If you started by tapping the navigation options button F3 the N I C E P200 prompts you to confirm the destination Continue with the next topic If you just pointed to the destination the N I C E P200 prompts you to select how to use the location Uses for a pinpointed location 5 Tap Use as Destination ...

Page 49: ...m right A long journey may require several seconds to calculate your route A magenta line traces the beginning of your Note page 101 for more information about this option If voice guidance is on you hear Please proceed to the highlighted route 2 Start driving While driving the N I C E P200 provides verbal instructions To hear them again tap the voice guidance button F6 If signal strength seems we...

Page 50: ...next street to turn onto appears in the bar at the top of the screen A close up of your next maneuver displays in the upper left corner of the screen and the distance and time to the next maneuver appears in the upper right corner Your destination appears at the bottom left of the screen just above the buttons The remaining trip distance and time display in the lower right corner Recovering from a...

Page 51: ...rrent road calculates a new route to your destination that guides you off the current road as quickly as possible Avoid Next Road recalculates your route without using the road that was next on your journey Detour Distance lets you enter a number of miles to detour before returning to the original route Avoid Specific Road lets you exclude a road by name You would use this feature if for example y...

Page 52: ...reen Heading Up displays a map with your direction of travel always toward the top of the screen This setting makes the map move around more as you travel but some people prefer it Try both settings to decide which you prefer See Customizing on page 92 Changing map perspective The N I C E P200 offers three different map views 3D perspective with horizon Tap the map button F4 to alternate among 2D ...

Page 53: ...zoom buttons F1 and F2 changes the scale of the map Scale Zoom buttons Viewing an intersection close up When you are within one mile of the next intersection N I C E P200 displays an enlarged view of the intersection on the right side of the screen ...

Page 54: ...ng route guidance 1 On the main navigation screen tap the navigation options button F3 Strong signal globe Weak signal globe with lightening bolt No signal gray The N I C E P200 displays these options Navigation options menu 2 Tap Cancel Route The main navigation screen appears Route guidance simulation icon ...

Page 55: ...tion Preferences 4 Tap Simulation Off to change it to Simulation On The simulation icon replaces the GPS signal Define your current location 1 If necessary tap your location on the map Crosshairs appear and the N I C E P200 centers the point you touched on the screen If the address is not on the map tap the map in the direction of the address as if your finger was doing the traveling Continue tapp...

Page 56: ...nds when the N I C E P200 turns onto a new street Updating the address book Adding addresses to the address book involves selecting an address from the N I C E P200 database and associating a name such as Airport Museum with that address The only aspect of the address book that you can later edit is the name you associate with an address Adding an address You may add your current address or an add...

Page 57: ...ap then zoom in again F1 when you are getting close to the location Continue tapping the map until you find the location 2 Tap the select location button F5 The N I C E P200 displays the selected location as a list option 3 Tap the name to confirm the location The N I C E P200 displays the street name in the Name the Entry box 4 Tap Add to Address Book The N I C E P200 displays the touch screen ke...

Page 58: ...ve the name The N I C E P200 asks for confirmation Sample confirmation message 8 Tap Yes to save the name or No to return to the Adding editing deleting addresses 1 Tap the navigation options button F3 2 Tap Edit Address Book The N I C E P200 gives you four options ...

Page 59: ... Delete removes the address from the address book 3 Tap the desired option If you tapped Add Previous Destination the N I C E P200 displays a list of previous destinations If you chose to edit an existing name the N I C E P200 displays a list of the addresses currently stored Currently stored address list 4 Tap the desired option ...

Page 60: ...it 5 Tap the accept button check mark to save the address using the displayed name OR Tap the backspace button to erase the existing name then tap a name For example rather than use the address of our local school as the name you could change it to SCHOOL 6 Tap the accept button check mark to save the edited name A confirmation screen appears 7 Tap Yes to save your entry or No to return to the Nam...

Page 61: ...ing a named trail Navigation turns off while the N I C E P200 records a trail Starting a trail 1 Tap the navigation options button F3 Note 4 Use the backspace to remove the default trail name and tap a name 5 Start driving As you drive the N I C E P200 displays a dot along your route Saving the trail 1 When you reach your destination and stop driving tap the navigation options button F3 again 2 Ta...

Page 62: ...own and tap Trail Book 4 Tap the trail name 5 Tap Beginning to view the trail from where you started origin OR Tap End to view the trail from your destination The N I C E P200 prompts you to confirm that you want to start simulated route guidance 6 Tap Yes The N I C E P200 simulates your journey ...

Page 63: ...t with you When undocked from the cradle the N I C E P200 may be powered by the 110v power cord and adapter or by the rechargeable battery Undocking a N I C E P200 1 Turn the power off 4 Entertainment modes 2 Slide the lock switch on the back of the cradle to the unlock position Back of the cradle 3 With the cradle and mounting bracket in one hand and the N I C E P200 in the other hand gently slid...

Page 64: ...g the LCD off when you re not using it extends the life of the battery charge 1 With the N I C E P200 undocked from the cradle turn the power on by briefly pressing the power button 2 Press the MENU button followed by tapping the SETUP icon The first time you access Setup the N I C E 3 If you don t see the power options tap the Power button on the touch screen not the physical power button The N I...

Page 65: ...on again for your selection to take effect After the LCD powers off tapping the touch screen powers it back on again You can play music with the LCD off Note Supported audio and video formats Make sure the N I C E P200 supports the audio and video files you wish to play back and view Supported audio formats Codec File type Extension MP2 Mbit s Part 2 mp2 MP3 Mbit s Part 3 mp3 OGG Vorbis Audio Code...

Page 66: ...EG 1 352 x 240 mpg XVID 320 x 240 xvid WMV 320 x 240 wmv Playing music 1 Connect the N I C E P200 to your computer and copy one or more supported music files from your computer to the N I C E P200 To determine which files the N I C E P200 supports see Supported audio formats on page 65 For connecting to the computer and copying files see Copying files from your computer on page 79 To delete a musi...

Page 67: ...on When finished with one track the N I C E P200 plays the next track based on the music mode To view all music subfolders tap the folder button To change the volume press the VOL and VOL buttons below the LCD screen To choose how your tracks play back tap the music mode button Music and video playback alternates among these modes Music and video mode icons Icon Mode Start at the first track and d...

Page 68: ...r pocket HOLD switch Lanyard loop 1 Move the HOLD switch into the locked position up as you face the N I C E P200 from the front In this locked position the touch screen is disabled so that you can t accidentally change a setting while carrying the N I C E P200 for example in your pocket 2 To keep the N I C E P200 handy attach a wrist cloth or lanyard to the loop on the right side of the N I C E P...

Page 69: ...the right side of the screen Main menu Music button Note The music controls overlay appears at the top of the navigation screen Music controls overlay and the navigation screen For a detailed explanation of the music controls see Music controls ...

Page 70: ... N I C E P200 s built in equalizer can be configured to produce smooth sound based on the style of music you listen to most 1 On the main menu tap the SETUP icon 2 Tap the A V button on the left side of the screen Note 3 Scroll down until you see the EQ MODE option AUDIO VIDEO options 4 Tap the EQ MODE option The N I C E P200 displays the five pre defined equalizer settings ...

Page 71: ...is illegal to drive and watch a video at the same time When the GPS detects motion it disables video viewing 1 Connect the N I C E P200 to your computer and copy one or more supported video files from your computer to the N I C E P200 To view a list of supported files see Supported video formats on page 66 For connecting to the computer and copying files see Copying files from your computer on Not...

Page 72: ...tton Folder button 5 Tap the play button to begin the video The N I C E P200 loads and plays the video To view all subfolders tap the folder button To change the volume press the VOL and VOL buttons below the LCD screen Press the MUTE button to silence the audio As the video plays tap the screen to display the video controls overlay Video controls overlay Video mode button ...

Page 73: ...you can set up the N I C E P200 to play another video clip once the current clip is finished 1 Tap the screen to display the video controls overlay 2 Tap the video mode button on the video controls overlay to change the video mode For an explanation of the music and video OR On the main video screen tap the configuration button List of videos Configuration button ...

Page 74: ...VCK cable connected the N I C E P200 can output video to a larger screen for more satisfying use The audio video output cable connects to the serial port on the back of the cradle For more information see the documentation that comes with the accessory Viewing photos In photo mode the N I C E P200 displays digital photos stored on the N I C E P200 s hard drive The N I C E P200 supports the JPEG fo...

Page 75: ...and copying files see Copying files from your computer on page 79 2 On the main menu tap the MEDIA icon The N I C E P200 displays the media icons 3 Tap the PHOTO icon The N I C E P200 locates all photos and displays either the last photo you viewed or the first photo in the folder Screen size button File folder button Next and previous button Slide show icon ...

Page 76: ...e 107 Starting a slide show 1 Tap the SLIDE button The slide show icon appears and the N I C E P200 changes the photo every few seconds Tapping the SLIDE button again stops the slide show 2 To remove the photo controls and enlarge each photo tap the screen size button 3 To return to the small view and photo controls tap the screen ...

Page 77: ... configuration button The N I C E P200 displays the AUDIO VIDEO configuration options 2 Scroll down and tap the PHOTO SLIDE option Tapping this option alternates among the number of seconds between slides 3 To return to the slide show tap the configuration button Adding music to a slide show As the slides change you can listen to music ...

Page 78: ... the music track 1 Tap the SLIDE button to stop the slide show 2 Press the MENU button tap the MEDIA icon and tap the MUSIC icon 3 Tap a different music track 4 Press the MENU button tap the MEDIA icon and tap the PHOTO icon 5 To continue the slide show where you left off tap the SLIDE button followed by the screen size button 6 When you re finished listening tap the stop button on the music contr...

Page 79: ...WATCH provides an easy to use stop watch CALENDAR lets you view the appointment schedule you maintain on your computer Copying files from your computer To play music and video view photos view your contacts and calendar and read text files you must first copy files from your computer to the N I C E P200 Copying from your computer to the N I C E P200 requires a USB 2 0 to 5 pin mini cable which is ...

Page 80: ...s 80 Connect to the computer 1 If it s not already on turn your computer on 2 Press the MENU button The N I C E P200 displays the main menu 3 Tap the USB button The N I C E P200 displays the MASS Storage screen Mass storage screen ...

Page 81: ...s a data drive The exact steps to follow depend on your system and software USB 2 0 port Copy the files 1 On the computer side look for the following folder names on the N I C E P200 drive N I C E P200 folder names Folder name Used to store Calendar Calendar information Contacts Contact information Music Music files Movie Video files Photo Digital photographs ...

Page 82: ... computer properly You could lose data if you just remove the cable 1 Select the mass storage drive Warning For example in Windows XP the mass storage drive appears as an icon in the task tray at the bottom of your PC screen Small fragment of a Windows XP task bar 2 Tap CLOSE on the N I C E P200 3 Remove the USB cable connecting the N I C E P200 to the computer The N I C E P200 displays the main m...

Page 83: ...address you created as a vCard file vcf 3 Copy all vcf files one per contact from the computer to the Contacts folder on the N I C E P200 See Copying files from your computer on page 79 Viewing contact information 1 On the main menu tap the UTILITY icon The N I C E P200 pauses to load the contact information and displays the first contact Contact list 2 Tap a contact name Contact name and phone Pa...

Page 84: ...apter 5 Using the utilities 84 Detail contact information 1 personal information 2 company information 3 additional information Postal ZIP code Page scroll Return to contacts list Go back to previous page ...

Page 85: ...lder on the N I C E P200 See Copying files from your computer on page 79 Opening a text file 1 On the main menu tap the UTILITY icon followed by the TEXT READER icon The N I C E P200 displays the list of text files List of text files 2 If you don t see the list of text files immediately tap the file folder button Page scroll File folder button ...

Page 86: ...0 displays TextReader file folder File folder screen showing only Text folder 3 To select the root folder tap the folder up icon File folder button 4 Tap one of the text files The N I C E P200 displays the text Screen size button Configuration button ...

Page 87: ...ull screen to display the text Full screen viewing To return to small screen tap the screen To scroll down press the VOL button If you Changing the size of the font 1 Tap the Configuration button The N I C E P200 displays the configuration options Configuration button ...

Page 88: ...le is open tapping the SLIDE button displays the text page by page at regular intervals Using the text setup options you can set the number of seconds between each page turn 1 With a text open tap the configuration button Note Your choices are 7 12 or 15 seconds 3 To return to text tap the configuration button The N I C E P200 displays Text Loading 4 Tap the SLIDE button to start quick viewing The...

Page 89: ... 2 Tap the UTILITY icon followed by the CALCULATOR icon The N I C E P200 displays the calculator Using the stop watch 1 To display the main menu press the MENU button 2 Tap the UTILITY icon followed by the STOP WATCH icon The N I C E P200 displays the stop watch ...

Page 90: ...mputer Maintaining your schedule You create and maintain your schedule on your computer and download schedule information into the N I C E P200 Copying appointments 1 Create an appointment on your computer For specific steps see your computer software documentation 2 Save the appointment in vCalendar format vcs 3 Copy all the vcs files you saved one per appointment from the computer to the Calenda...

Page 91: ...he N I C E P200 pauses to load the appointment information and displays the current month Previous month Next month Appointments scheduled on these days The N I C E P200 displays detail information about the appointment ...

Page 92: ... ETC etcetera 6 Customizing This chapter explains how to configure the hardware and customize navigation To customize the entertainment options see the discussion for each application in Entertainment modes on page 63 In the navigation program tapping the navigation options button F3 followed by the Setup bar accesses navigation configuration options See Customizing navigation on page 95 In the en...

Page 93: ...N I C E P200 displays the main menu Hardware setup The first time you access the N I C E P200 it displays the SYSTEM INFORMATION screen Display battery information including current status Accesses power and LCD features Accesses audio video and LCD features Accesses language and upgrade features ...

Page 94: ...tap the SETUP icon on the main menu To display system information again 1 Tap the Etc button 2 Tap SYSTEM INFO Changing screen brightness 1 Press the MENU button The N I C E P200 displays the main menu 2 Tap the SETUP icon then tap the A V button on the left The N I C E P200 displays the AUDIO VIDEO menu Audio video options 3 Tap LCD BRIGHTNESS ...

Page 95: ...ss bars Screen brightness for daytime views Screen brightness for night time views Customizing navigation These general instructions work for all options 1 If you re not already on the main navigation screen tap the navigation options button F3 The navigation menu appears ...

Page 96: ...e option name to turn the feature on off 5 Scroll down to display additional options 6 Tap the return button F6 to go back to the Setup menu 7 When you re finished tap the exit button F1 Maximizing space for the map To see more of the map turn off all the buttons and icons that provide additional information 1 On the Setup menu tap Display Options ...

Page 97: ...time or shortest distance You can configure the N I C E P200 to calculate a route based on the shortest distance or the shortest time 1 On the Setup menu tap Navigation Preferences 2 Tap the Shortest Distance Shortest Time option When set to Shortest Distance the N I C E P200 calculates the route based on the shortest distance When set to Shortest Time the N I C E P200 ...

Page 98: ...te that avoids these roads 1 On the Setup menu tap Navigation Preferences 2 Scroll down to view the following options Tap the Avoid Freeway Yes No option to display the desired setting Tap the Toll Yes No button to display the desired setting 3 When you re finished tap the exit button F1 Changing the language 1 On the Setup menu tap User Preferences 2 Tap Languages ...

Page 99: ...uages menu appears Languages menu 3 Tap the desired language English Spanish or French The navigation declaration screen appears in the selected language Navigation declaration in Spanish 4 Tap the accept button Accept button ...

Page 100: ...Tap the desired distance unit The main navigation screen appears The new units setting appears next time you navigate 4 When you re finished tap the exit button F1 Defining origin using lists If your starting point is in a high rise complex or large manufacturing plant where the N I C E P200 mounted in your vehicle does not have direct access to the satellite signal follow this or the procedure in...

Page 101: ...lays the selected location as a list option 3 Tap the name to confirm the location 4 Tap Save as HOME Turning voice guidance on and off When voice guidance is on the default setting The N I C E P200 provides verbal step by step directions as you travel the selected route 5 On the Setup menu tap Navigation Preferences 6 Scroll down and tap Voice Guidance On Off 7 When you re finished tap the exit b...

Page 102: ...en background In 3D mode choosing Day displays blue sky and clouds above the horizon Choosing Night shows a nighttime sky with stars above the horizon 4 Tap the exit button F1 to return to navigation Returning to factory defaults This procedure returns all power audio video and etcetera options to their factory defaults 1 From the main menu tap the SETUP icon 2 Tap the Etc button 3 Tap the FACTORY...

Page 103: ...an cloth Do not spray any cleaning agent directly on the LCD If you accidently drop the N I C E P200 in water do 7 Care and updating Battery maintenance The battery charges while the N I C E P200 is plugged into power either at home or in the car Over time batteries reach a state where they no longer hold a charge The battery information screen reports on the current charge and health of the batte...

Page 104: ...86mV Battery Temperature 88 73F 29 85C Average Current 102 46mA Time to Empty Charging Change Discharge Count 1 Remaining Capacity The battery s capacity to hold a charge This decreases over time with repeated recharges Battery Voltage Measured in millivolts Battery Temperature Battery operating temperature Average Current Amount of current draw Time to Empty The amount of time left based on the c...

Page 105: ...it 2 If docked remove the N I C E P200 from the cradle For how to remove the N I C E P200 from the cradle see Undocking a N I C E P200 on page 63 3 Turn the N I C E P200 over Caution 4 Slide the battery cover lock to the unlock position Corner of the N I C E P200 showing the battery cover lock Locked Unlocked ...

Page 106: ...d updating 106 5 Using the grip ridges slide the battery cover down Back of the N I C E P200 Grip ridges Battery cover lock 6 Remove the battery cover Battery cover removed 7 Pull up on the tab to remove the battery Tab ...

Page 107: ...rminals in this end Tab 4 Move the battery cover lock to the locked position Updating the map database Clarion continuously publishes new map databases on DVD You can purchase the latest map DVD from the Clarion Website www clarion com When you receive the DVD follow the instructions that come with the DVD Deleting files You delete files from the N I C E P200 using your computer ...

Page 108: ...le bin from which you can retrieve files you may have deleted by mistake When you delete files they are gone Caution Caution Checking navigation software versions Follow these steps if requested by Customer Service to display the current software version number 1 On the navigation screen tap the navigation options button F3 then tap Setup 2 Scroll down and tap System Diagnostics 3 Tap System Infor...

Page 109: ...t controls system features and displays screens and messages Connect to the computer 1 Using a computer download the firmware upgrade file from the clarion com into a folder on your computer 2 Press the MENU button Definition The N I C E P200 displays the main menu Setup menu 3 Tap the USB button ...

Page 110: ...t the N I C E P200 to a computer using a USB 2 0 to 5 pin mini cable not included 6 Click and drag the upgrade file from your computer to the N I C E P200 drive 7 Disconnect properly from the computer Upgrade the firmware 1 Tap CLOSE on the N I C E P200 2 Tap the SETUP icon on the main menu 3 Tap the Etc button ...

Page 111: ...ge Verifying satellite signal This procedure verifies that the N I C E P200 is receiving the best possible GPS satellite signal 1 Press MENU then tap the NAVIGATION icon and tap the Press to accept prompt to enter navigation mode 2 Tap the navigation options button F3 3 Tap Setup 4 Tap the page down button F4 once to scroll down 5 Tap System Diagnostics 6 Tap GPS Diagnostics ...

Page 112: ... 7 Check your signal against the example above GPS diagnostics range should be from 800 1000 Local time latitude longitude and elevation depend on your current location The other parameters such as satellites visible and used should be as indicated in the illustration 8 To return to navigation tap the exit button F1 ...

Page 113: ...P200 does not turn on The power cord may not be properly connected Check power cable Check the fuse in the cigarette lighter adapter If you re using the N I C E P200 away from the cradle the battery may require charging Remove the N I C E P200 from the cradle and seat it again in the cradle ...

Page 114: ...e GPS While in navigation mode 1 Tap the navigation options button F3 then tap Setup 2 Tap the page down button F4 twice to scroll down then tap System Diagnostics 3 Tap GPS VP Reset The same list of diagnostics options appears 4 To return to navigation tap the exit button F1 Description Probable Cause Remedy ...

Page 115: ...00 on page 11 If the signal is still weak consider purchasing the NAVGPS an externally mounted GPS antenna Consult your dealer for further assistance The GPS signal was lost while en route The N I C E P200 s line of sight to the GPS satellite has been obstructed such as by entering a tunnel or parking garage Check the signal strength meter If the signal does not return you can manually set the veh...

Page 116: ...200 s internal speaker The speaker may be turned off or redirected to the stereo speakers in your car or home The video output feature may be on To turn video output off see Viewing video on a larger monitor on page 74 1 Press the MENU button tap Setup Navigation Preferences 2 Scroll to Voice Guidance and tap the button to change the setting from Off to On 3 Tap the return button F6 to go back to ...

Page 117: ... power off and back on again and start over If powering off and back on again fails press the reset button See Resetting the N I C E P200 on page 118 When trying to update firmware the N I C E P200 displays OS Update File can t be found See Upgrading the firmware on page 108 Description Probable Cause Remedy ...

Page 118: ...nd updating 118 Resetting the N I C E P200 If the system stops working insert the end of a bent paper clip into the reset button hole on the left side of the N I C E P200 as you face it from the front Resetbutton hole ...

Page 119: ...U Displays the main menu MUTE Turns sound on and off VOL Reduces the volume VOL Increases the volume 8 Reference Main menu reference Main menu icons Enters navigation mode For navigation options see Setup on page 134 Accesses audio and video options For an explanation of each media option see MEDIA icons on page 130 Enters game mode Accesses business and personal applications For a brief explanati...

Page 120: ...This button appears on the main menu only after initiating navigation Navigation reference Touch screen buttons Exit button F1 returns immediately to the navigation map Zoom in button F1 expands map detail Multi option scroll button F2 for scrolling up back in a list displays previous options four at a time Zoom out button F2 shows more of the map at once Navigation options button F3 starts ...

Page 121: ...me or address to include in the address book Voice guidance button F6 repeats the current verbal instruction Keyboard button F5 accesses the touch screen keyboard Start typing the first one or two letters on the touch screen keyboard then tap the accept button check mark to view potential names from the map database To avoid typing mistakes the N I C E P200 grays out keys you don t need Return but...

Page 122: ...button turns them on again Start Route Guidance To access these options press the MENU button tap the Press to accept button tap the navigation options button F3 then tap Start Route Guidance Address Intersection Defines specific address or intersection to which you re headed your destination State Province Name selects the location state or province Use this option if the destination is in a diff...

Page 123: ...than one street exists with the same name the system lists all streets followed by a list of cities in which this When you ve defined the state city and street the N I C E P200 prompts you to narrow your destination by defining a specific address or intersection Point of Interest Defines a public location such as a bank or hospital as your destination State Province Name selects the state or provi...

Page 124: ... E P200 prompts you to define how to view the points of interest by distance nearest first or by name alphabetical order Address Book Previous Destination Displays a list of your last 40 destinations from which to choose your current destination Simulated destinations are included Edit Address Book Adds and deletes entries from the address book and allows you to edit a name associated with the add...

Page 125: ...ete the address and add it again Delete Trail Book This features stores a list of routes you have taken Adding and naming a trail lets you use the N I C E P200 to record your route rather than to guide you to a predefined destination To access these options from the navigation screen tap the navigation options button F3 then tap Trail Book Add Lets you create a name for a new journey trail using t...

Page 126: ...e currently marked location Add to Address Book adds the marked location to your address book Save as HOME sets the marked location as your home This is the starting location the N I C E P200 uses when it cannot locate the satellite Setup To access these options from the navigation screen tap the navigation options button F3 then tap Setup Navigation Preferences Simulation On lets you preview and ...

Page 127: ...calculates a new route when you turn off your current route Off disables recalculation Display Options Heading Up sets the top of the map display to the direction in which you are traveling This is the default North Up sets the top of the map display to north GPS Icon Display On turns display of the GPS icon on Off turns display of the GPS icon off Status Bar Display Scale Icon Display Compass Ico...

Page 128: ...egardless of the time of day Point of Interest Selects the default scale for the map Choices are 1 32 1 16 1 8 1 4 1 2 1 and 4 Set Units Miles displays distances in miles Kilometers meters displays distances in metric kilometers and meters Miles yards displays distances in miles and yards Languages This option allows you to choose the language English Spanish or French to use for explanatory text ...

Page 129: ...t places you set as a destination Map moves the red arrow to a place you tap on the map System Diagnostics GPS VP Reset resets the GPS signal System Information displays the current software version Detour management While driving you can alter your route based on current circumstances such as an accident or unexpected road works To access these options from the navigation screen route guidance mu...

Page 130: ...N I C E P200 calculates a route that brings you back to the interstate after traveling for 10 miles on surface streets Avoid Specific Road Cancel Route Tapping this option immediately cancels the current route No confirmation is required MEDIA icons Enters video mode For video buttons see below For video icons see Music and video mode icons on page 131 Enters music mode For music buttons see below...

Page 131: ...dio video options Play button plays current selection Pause button temporarily stops current Music and video mode icons Previous button selects the previous track or video in the folder Next button selects the next track or video in the folder Page up button scrolls up a full page of music or video file names in the current folder Page down button scrolls down a full page of music or video file na...

Page 132: ... field configured for rock music Equalizer sound field configured for pop music Equalizer sound field configured for jazz Stereo mono icons Photo buttons Stereo sound production Monaural mono sound production Stereo mono undetected appears momentarily before a music track begins to play Folder button displays the Photo folders Screen size button removes the control ...

Page 133: ...plays previous slide Next button displays next slide View contacts for more information see Using contact information on Contact buttons Calculator for more information see Using the calculator on page 89 Stop watch for more information see Using the stop watch on page 89 Calendar for more information see Using the calendar on page 90 Information button provides access to four screens of informati...

Page 134: ...l the screen Tapping the screen returns it to the smaller size Slide show button displays the text page by page at regular intervals Configuration button accesses text Calendar buttons Setup Each application provides access to setup options Next button displays the next page of text Information button returns you to the calendar view Previous button displays the previous month Next button displays...

Page 135: ... off if you don t tap the screen for a pre defined period of time OFF LCD stays on selected automatically when Audio video A V options Number of seconds of inactivity before LCD turns off Values are 10 15 20 or 30 seconds Controls video out OFF Video out disabled ON Video out enabled For connecting through the optional NAVCK cable to external video player Provides access to LCD brightness options ...

Page 136: ...emains on the screen during a slide show in photo mode 3 5 7 or 9 seconds Selects pre configured equalizer settings FLAT No equalizer Etcetera options Upgrades the firmware Returns all setup values to their factory settings Automatically controls tiny LEDs embedded in the MENU MUTE VOL and VOL buttons ON Lights on when cradle detected OFF Lights off when undocked Displays system version informatio...

Page 137: ...e options Press the MENU button tap UTILITY tap TEXT READER icon then tap configuration button Selects the font size for reading Options are 14 20 and 26 points Controls the length of time a page of text remains on the screen while reading a file in quick view mode 7 12 or 15 seconds ...

Page 138: ...mbedded processor High Performance Embedded 32 bit RISC ARM 9 Core Memory 64MB SDRAM 32MB Flash Memory 20GB Hard Disk Drive Power source 12v 24v DC using cigarette jack 5v DC using AC DC adapter Map database NavTeq Map Database Temperature 32 F 0 C 140 F 60 C Liquid crystal display LCD 4 wide TFT LCD 480 horizontal x 272 vertical pixels ...

Page 139: ...touring around 51 Add Current Location to address book 56 125 Add Previous Destination to address book 56 124 Add to Address Book current location 126 Index Address book 38 124 129 editing name 125 updating 56 124 Address Intersection 38 39 122 128 Antenna external GPS 13 Applications calculator 89 calendar 90 contact management 83 stop watch 89 text reader 85 Audio equalizer settings 70 formats 6...

Page 140: ...r lock 11 information 104 installing 107 maintenance 103 removing 104 replacement packs 13 saving charge 64 music on photo screen 22 music video 131 MUTE 10 72 119 navigation 20 120 on the N I C E P200 119 photo 22 132 power 10 reset 10 text 134 video 23 volume VOL VOL 10 By Category 40 124 By First Few Letters 124 By Name 41 By Phone Number 41 124 By Postal Code 41 124 ...

Page 141: ...N I C E P200 103 Close button on main menu 14 CLSS classical equalizer icon 70 Color scheme 101 Compass 52 127 Compression lever 31 32 Computer copying files from 79 Contacts buttons 133 copying 28 copying from your computer 83 detail 84 viewing 83 Contents of package 9 Controls music 21 music on slide show screen 78 photo viewer 22 75 video player 23 Cradle 12 back view 11 compression lever 31 co...

Page 142: ...er socket home use 10 DC IN power socket vehicle use 11 Declaration at start of navigation 35 Defaults returning to factory 102 Destination defining 17 36 56 finding in an unfamiliar city 39 pointing to 47 travel to 49 Detour Distance 130 options 51 129 taking 51 DEVICE LED 136 Diagnostics GPS 111 112 129 reference 129 Dimensions 138 Direction of top of screen 52 Display Options 127 Distance ...

Page 143: ...r icons 132 Etcetera options 136 F F3 on navigation screen 15 FACTORY DEFAULT 136 Factory defaults setting 102 FAQ 26 Freecell 78 Freeways avoiding 26 98 G Games playing 78 Global positioning 34 GPS antenna on cradle 31 antenna port 11 can t find satellite 116 diagnostics 112 129 external antenna optional 13 Icon Display 127 location 34 lost signal 115 resetting signal 129 ...

Page 144: ...menu 119 MEDIA 130 music mode 21 67 navigation 20 removing from screen 96 stereo monaural 132 utility 133 video mode 67 Intersection enlarged 53 selecting 46 Interstates avoiding 26 98 J JAZZ equalizer icon 70 Journey canceling 54 previewing 55 recording where you ve been 61 starting 35 K Keyboard accept button check mark 43 ...

Page 145: ...dotted red and white on navigation screen 50 Lists scrolling in navigation 42 Location current 15 27 defining current by pointing 55 M Main menu icons 119 Maneuver distance to next 27 Map 129 change perspective 52 colors 101 database 138 destination option 38 enlarging 53 maximizing view of 96 set scale 128 updating database 107 Mass storage screen 80 MEDIA icons 130 Memory 138 MENU button 10 119 ...

Page 146: ...pported video format 66 Music adding to a slide show 77 and video icons 131 button on main menu 14 button reference 131 changing volume 67 controls 69 mode button 67 71 mode icons 21 67 player main screen 21 playing 66 playing while navigating 68 repeat options 73 MUTE button 10 72 119 N N I C E P200 9 back view 11 carrying with lanyard 10 cleaning 103 cradle 12 diagnostics 129 docking 29 ...

Page 147: ...usic 68 buttons 20 120 canceling 54 checking software versions 108 current location 15 declaration 35 defining destination 17 diagnostics reference 129 features 16 reference 120 122 route calculation 19 screen 50 scrolling 42 setup 126 SETUP options 92 Setup reference 126 starting 35 touch screen keyboard 18 NAVMOUNT2 mounting bracket 9 Night view 101 North always up 52 Up direction 127 O ...

Page 148: ...trols 22 viewer main screen 22 PHOTO SLIDE 136 Place finding in an unfamiliar city 39 Point of Interest 38 123 129 serial 11 USB 2 0 10 81 Postal Code 122 Power button 10 configuration options 64 connecting in vehicle 31 cord for home 110v 9 cord for vehicle 9 DC IN connecting 32 does not turn on 113 LED 10 modes 25 off 25 on 13 saving battery charge 64 setup options 135 ...

Page 149: ...B200 remote control 13 Reference 119 Remote optional accessory 13 using optional accessory 24 Reset button 10 118 Route calculating 26 canceling 54 130 changing 50 guidance reference 122 guidance starting 37 planning 26 previewing 55 recording where you ve been 61 S S W UPGRADE 136 Satellite signal strength weak 115 signal verifying 111 Save as HOME current location 126 ...

Page 150: ... Position setup option 128 SETUP navigation options 92 reference 134 Setup menu 92 96 navigation 126 navigation preferences 95 options 92 Signal remedy for weak signal 49 strength 115 Simulation 26 55 126 Sleep mode 25 Slide show adding music 77 changing speed 77 starting 76 SLIDE TIME 137 SMALL FONT 137 Solitaire 78 Songs repeating 131 Sort By Distance 42 Sort By Name 42 Sound equalizer settings ...

Page 151: ... hard drive capacity 10 Street Name 123 Streets list 45 Suction cup on cradle 31 tab on mounting bracket 32 Switch HOLD 10 68 Swivel adjustment knobs 12 T Temperature 138 Text buttons 134 reader options 137 reading mode 85 reading on the screen 28 Text reading mode full screen viewing 87 quick view 88 scrolling text automatically 88 TFT LCD 10 Toll roads 127 avoiding 26 98 Touch screen keyboard 43...

Page 152: ...61 see also route starting 35 Troubleshooting 113 reset button 118 Typeface changing for reading text 87 U cable 9 79 port 10 81 Use as Destination current location 126 User Preferences navigation setup 128 Utilities 79 UTILITY icons 133 V Vehicle connecting power 31 installing in 29 position set 128 power cord 9 Video button reference 131 changing volume 67 ...

Page 153: ...uidance 10 27 49 70 127 on off 101 Volume buttons 10 72 119 changing 67 W WAVE PCM supported audio format 65 Windshield mounting bracket 9 WMA supported audio format 65 WMV supported video format 66 Wrong turn recovering from 50 X XVID supported video format 66 Z Zooming in and out navigation 53 ...

Page 154: ...hase ALL PURCHASES OF CLARION PRODUCTS FROM 1 Limited Warranty Information 1 PROOF OF DATE OF PURCHASE FROM AN AUTHORIZED CLARION DEALER WILL BE REQUIRED FOR WARRANTY SERVICE OF THIS PRODUCT IN THE CASE OF THE TWO 2 YEAR LIMITED WARRANTY FOR THE CLARION PRODUCTS NOTED ABOVE PROOF OF DATE OF PURCHASE AND PROOF OF INSTALLATION BY AN AUTHORIZED CLARION DEALER IS REQUIRED INFORMATION ABOUT CLARION AUT...

Page 155: ...RCUMSTANCES THE APPLICABLE LIMITED WARRANTY PERIOD SHALL BE DEEMED TO BE FIFTEEN 15 DAYS FROM THE DATE OF ORIGINAL PURCHASE STATES DO NOT ALLOW LIMITATIONS ON HOW LONG AN IMPLIED WARRANTY LASTS OR EXCLUSIONS OR LIMITATIONS OF INCIDENTAL OR CONSEQUENTIAL DAMAGES THE ABOVE LIMITATIONS OR EXCLUSIONS MAY NOT APPLY TO YOU 9 THIS LIMITED WARRANTY GIVES YOU SPECIFIC LEGAL RIGHTS AND YOU MAY ALSO HAVE OTH...

Page 156: ...User s Guide 156 ...

Page 157: ...N I C E P200 Guide d utilisateur ...

Page 158: ...outier 22 Pour visionner un trajet 23 Comment définir son emplacement actuel 23 Pour effectuer la mise à jour du carnet d adresses 23 Comment ajouter une adresse 24 Pour ajouter modifier effacer des adresses 24 Pour commencer un trajet 25 Enregistrement du trajet 25 4 Mode de divertissement 26 Pour visionner les endroits visités 26 Déconnexion du N I C E P200 26 Comment économiser la charge de la ...

Page 159: ...du micrologiciel 47 Vérification du signal satellite 47 Dépannage 48 8 Référence 50 Boutons 50 Référence du menu principal 50 Icônes du menu principal 50 Boutons du menu principal 50 Références de navigation 50 Boutons de l écran tactile 50 Commencer le guidage par la voix 51 Modifier le carnet d adresses 52 Journal de pistes 52 Utilisation de l emplacement actuel 53 Réglages 53 Préférences de l u...

Page 160: ...ortie de 3 5 mm pour casque Pour écoute privée USB 2 0 miniport à 5 broches Pour mettre à jour les cartes télécharger des médias et mettre à jour le logiciel d exploitation Prise C C Se branche à un cordon d alimentation 110 V et à un adaptateur pour usage à domicile Poussoir de réinitialisation Redémarre le système Alimentation Poussez et relâcher pour allumer et éteindre en mode veille lorsque a...

Page 161: ...méliorer la réception à bord de la voiture RCB200 Télécommande pour contrôler le N I C E P200 en voiture ou à la maison NAVBATTERY Ensembles de piles additionnelles Comment démarrer 1 Appuyez brièvement sur la touche d alimentation Si vous utilisez le N I C E P200 pour la première fois ou si vous avez coupé l alimentation en appuyant sur la touche d alimentation pendant deux secondes le logo Clari...

Page 162: ...rmet l accès aux jeux voir jouer à des jeux page 33 Icône UTILITAIRES affiche un menu de caractéristiques d applications utilitaires voir Utiliser les utilitaires page 33 Icône NAVIGATION lance le mode navigation voir Navigation page 15 Icône MÉDIA permet l accès aux options de divertissement Pour faire jouer de la musique voir formats audio pris en charge page 27 Pour regarder une vidéo voir mode...

Page 163: ...u une province qui n est pas visible utilisez le clavier tactile Vous pouvez également appuyer sur les boutons Page suivante précédente ou sur les flèches de défilement pour localiser l état ou la province 5 Appuyez sur le bouton Clavier Le N I C E P200 affiche le clavier tactile Se servir du clavier pour définir un état ou une province s effectue de la même manière que pour définir un nom de vill...

Page 164: ...che arrêt Route de la destination surlignée en magenta Zoom avant F1 et zoom arrière F2 Orientation ligne de vue Distance jusqu à la prochaine manœuvre Temps à faire avant la prochaine manœuvre Options de navigation F3 sélection d un détour annuler le trajet modifier le carnet d adresses ou régler les options de navigation Visualisation de la carte F4 alterne parmi les vues en 2D en 3D et en écran...

Page 165: ...pertoire et aléatoire Accès aux répertoires musicaux Temps écoulé Durée totale Lecture Pause Mode musical actuel Éteint la musique pendant la navigation Piste précédente piste suivante Temps de lecture Bouton de répertoire de fichiers musicaux Commandes du lecteur de photos Icône de diaporama s affiche pendant un diaporama Icône de la charge actuelle de la pile Boutons pause et lecture Bouton d ar...

Page 166: ...uel Arrête la vidéo et ferme les commandes d affichages vidéo Vidéo précédent suivant Lecture arrêt Choix de langue Temps écoulé MAIN MAIN CH CH ENTER ENTER CAT VOL OL CH CH MUTE MUTE CAT MENU BAND MEMO F1 F2 F3 F4 FOLDER DISP RPT F5 F6 1 2 3 4 5 6 7 8 0 9 Utiliser la télécommande optionnelle La télécommande sans fil optionnelle RCBP200 permet d actionner la plupart des caractéristiques à distance...

Page 167: ...n sont souvent posées par des gens qui apprennent à se servir du N I C E P200 Pour les cas de pannes voir la section En cas de panne à la page 48 Questions de navigation Puis je réviser la route que je désire emprunter sans avoir à la conduire réellement Oui Dans réglages préférences de navigation appuyez sur Simulation Off ce qui vous mettra en mode Simulation On Lorsque vous définissez votre des...

Page 168: ... la musique en naviguant Oui En mode navigation appuyez sur le bouton MENU appuyez sur l icône MUSIC sur le côté droit du menu principal Le N I C E P200 affiche les contrôles musicaux dans la partie supérieure de l écran tactile Appuyez sur le bouton lecture pour commencer la lecture de musique Le guidage par la voix l emporte sur la musique Combien de fichiers vidéo et musicaux peuvent être emmag...

Page 169: ... être installé dans le socle et branché à l alimentation externe pour permettre la navigation 3 Localisez le bouton de verrouillage à l arrière du socle 4 Réglez le bouton de verrouillage à la position non verrouillée unlock Avertissements 5 Glissez le N I C E P200 dans le socle en vous assurant que les bordures le retiennent solidement Le réceptacle au bas du N I C E P200 entre dans le connecteur...

Page 170: ...e support de montage et le socle ne tombent pas du pare brise tirez doucement la ventouse du pare brise Installation à domicile À domicile le N I C E P200 est alimenté par la pile ou par un cordon d alimentation de 110 V et un adaptateur 1 Branchez le cordon d alimentation de 110 V et l adaptateur dans côté gauche en faisant face au N I C E P200 2 Branchez l autre extrémité du cordon à une prise d...

Page 171: ...ur communiquer avec le satellite GPS Communication sans obstacles Les obstacles empêchent la communication Pour commencer la navigation Si votre voiture est demeurée au soleil le N I C E P200 peut devenir chaud et la lumière du soleil peut rentre la lecture de l écran difficile 1 Appuyez sur le bouton MENU sous l ACL 2 Appuyer sur l icône NAVIGATION sur l écran tactile L écran de déclaration de na...

Page 172: ...éfilé vers le bas et choisi Carte pour déterminer votre destination en touchant la carte allez à la page 20 à Comment pointer une destination Si vous avez choisi une des autres options le N I C E P200 affiche une liste d options supplémentaires Adresse ou intersection Pour plus de renseignements sur cette méthode continuer à lire ce qui suit au prochain sujet Point d intérêt Pour plus de renseigne...

Page 173: ...tile quand vous êtes dans une ville inconnue Elle peut vous faire gagner du temps et vous empêcher d avoir à tourner en rond lorsque vous cherchez par exemple une station service ou une épicerie Retour F6 vous amène à la sélection précédente Options pour Adresse Intersection La base de données du N I C E P200 contient une liste de deux millions de points d intérêts classés par catégories tel que c...

Page 174: ...on à la page 20 Exemple de la liste de catégories Pour défiler dans les listes Il existe deux façons de défiler dans une liste par exemple la liste de noms de villes Défiler les options une à la fois dans le menu à l aide des boutons de défilement vers le haut et vers le bas du menu Visionner jusqu à 4 options à la fois en utilisant les boutons de défilement de l écran tactile F2 et F4 Utilisation...

Page 175: ...ur appuyez sur la touche d effacement Touche d effacement Bouton Accepter Bouton de caractères spéciaux Bouton Annuler Bouton de caractères réguliers Écriture du nom d une ville avec le clavier 3 Après avoir entré un ou plusieurs caractères appuyez sur le bouton Accepter crochet Le système génère une courte liste des options selon les caractères entrés jusqu à présent L image ci dessous est un exe...

Page 176: ... destination Si vous avez commencé en appuyant sur le bouton d options de navigation F3 le N I C E P200 vous demande de confirmer la destination Allez au prochain sujet Si vous avez seulement pointé l emplacement le N I C E P200 vous demande de choisir comment utiliser l emplacement 5 Appuyez sur Utiliser en tant que destination Le N I C E P200 vous demande de confirmer la destination Pour se rend...

Page 177: ...ez un virage ou si vous prenez un chemin différent volontairement pour éviter des travaux routiers ou un accident Lorsque le système de recalcul automatique est en marche le N I C E P200 modifie la carte aussitôt que vous déviez du trajet calculé Les informations du compas et des indicateurs de distance de l écran tactile sont aussi mises à jour Pour effectuer un détour Une fois que le N I C E P20...

Page 178: ...ffre trois différentes vues de la carte Appuyez sur le bouton de la carte F4 pour alterner parmi les vues 2 D 3 D et écran divisé Avec la vue 3 D vous pouvez voir une plus grande portion de la route à venir Zoom avant et arrière En appuyant sur les boutons de Zoom F1 et F2 vous modifiez l échelle de la carte Le zoom le plus près que vous pouvez effectuer est 1 16ème de mille Le zoom le plus loin e...

Page 179: ...puyer jusqu à ce que vous trouviez l emplacement 2 Appuyez sur le bouton de sélection d un emplacement F5 Le N I C E P200 affiche l emplacement sélectionné dans une liste d options 3 Appuyez sur le nom pour confirmer la destination 4 Appuyez sur Déterminer l emplacement du véhicule La flèche rouge se déplace vers cet emplacement Comment déterminer une destination Appuyez sur votre destination comm...

Page 180: ...Le N I C E P200 affiche le nom de la rue dans la boîte Nommer l entrée 4 Appuyez sur Ajouter au carnet d adresses Le N I C E P200 affiche le clavier de l écran tactile 5 Appuyez sur la touche Retour pour enlever les noms de rues et de villes 6 Entrez un nom associé à cette adresse par exemple Salle de concert Marché du fermier etc 7 Appuyez sur le bouton Accepter crochet pour enregistrer le nom Le...

Page 181: ...rner à l écran d entrée de nom L écran de navigation principal apparaît Comment enregistrer un trajet En plus d utiliser le N I C E P200 comme guide vous pouvez l utiliser pour enregistrer les endroits que vous avez visités Le N I C E P200 peut laisser des miettes de pain virtuelles sur votre trajet Plus tard vous pouvez simuler votre trajet L enregistrement de votre trajet implique que vous devez...

Page 182: ...er avec vous Lorsqu il n est pas sur le support le N I C E P200 peut être alimenté par le cordon d alimentation de 110 V et l adaptateur ou par la batterie rechargeable Déconnexion du N I C E P200 1 Mettre hors tension Pour en savoir plus à propos des options de mise hors tension allez à la page 11 Comment mettre sous tension et hors tension 2 Glisser l interrupteur de verrouillage à l arrière du ...

Page 183: ... ACL est éteint Formats audio et vidéo pris en charge Assurez vous que le N I C E P200 supporte les fichiers audio et vidéo que vous voulez écouter et visionner Formats audio pris en charge Formats vidéo pris en charge Les codecs vidéo et audio peuvent être utilisés dans toutes les combinaisons mais seulement avec cette liste de codecs Si vous transférez au N I C E P200 un fichier utilisant un aut...

Page 184: ...puyez sur le bouton de dossier de fichiers pour sélectionner un dossier différent Pour mettre la lecture sur pause appuyez sur le bouton Pause Pour arrêter la lecture appuyez sur le bouton Stop Verrouillage des boutons du panneau avant Une fois que vous avez commencé à faire jouer de la musique vous pouvez verrouiller les boutons à l avant du N I C E P200 et le glisser dans votre poche 1 Déplacer ...

Page 185: ...I C E P200 peut être configuré pour obtenir un son doux basé sur le type de musique que vous écoutez le plus souvent 1 Dans le menu principal appuyez sur l icône RÉGLAGE 2 Appuyez sur le bouton A V sur le côté gauche de l écran Le N I C E P200 affiche les options Audio Vidéo 3 Défilez vers le bas jusqu à ce que vous voyiez l option MODE ÉGALISATION 4 Appuyez sur l option MODE ÉGALISATION Le N I C ...

Page 186: ...ge et joue le vidéo Pour voir tous les sous dossiers appuyez sur le bouton dossier Pour modifier le volume appuyez sur VOL et VOL au bas de l ACL Appuyez sur le bouton SOURDINE pour couper le son Pendant que le vidéo est en lecture appuyez sur l écran pour afficher les commandes de recouvrement vidéo Pour une explication complète des commandes de recou vrement vidéo consultez Commandes de recouvre...

Page 187: ...accessoire Pour copier un fichier vidéo à partir d un DVD Pour copier un fichier vidéo à partir d un DVD voici les deux étapes à suivre 1 Convertissez le fichier vidéo DVD d un format DVD à un format vidéo informatique vob à l aide d un des programmes suivants DVDShrink DVD Ripper DivX 6 1 Converter Les autres programmes de conversion créent un fichier vob qui ne peut être lu par le N I C E P200 U...

Page 188: ...e du diaporama Si la vitesse de défilement du diaporama est trop lente ou trop rapide suivez ces étapes pour ajuster la vitesse 1 Appuyez sur le bouton de configuration Le N I C E P200 affiche les options de configuration AUDIO VIDÉO 2 Défilez vers le bas et appuyez sur l option DIAPORAMA Cette option modifie la durée de défilement du diaporama en secondes 3 Pour retourner au diaporama appuyez sur...

Page 189: ...ires de noms et de numéros de téléphone LECTEUR DE TEXTE convertit le N I C E P200 en lecteur de textes électroniques CALCULATRICE pour l utilisation d une calculatrice numérique CHRONOGRAPHE permet le minutage et est simple à utiliser AGENDA permet la visualisation de l emploi du temps enregistré sur l ordinateur personnel Copie de fichiers depuis l ordinateur Copiez d abord les fichiers depuis l...

Page 190: ... icône du lecteur de mémoire auxiliaire de WindowsMD XP s affiche à la barre du gestionnaire des tâches au bas de la fenêtre de l ordinateur personnel 2 Appuyez sur la touche FERMER du N I C E P200 3 Débranchez le câble de connexion du port USB du N I C E P200 et de l ordinateur Le N I C E P200 affiche le menu principal Pour poursuivre la lecture audio et le visionnement vidéo voir la section lect...

Page 191: ...oordonnées du contact Boutons de défilement de page Liste des contacts Information de contact détaillée 1 Information personnelle Code postal Retour à la page précédente 2 Information professionnelle 3 Information supplémentaire Retour à la liste de contacts Défilement page par page Contact détaillé Appuyez sur la touche i pour retourner à la liste de contacts Appuyez sur RETOUR pour retourner à l...

Page 192: ...0 élimine les touches pour permettre l affi chage du texte plein écran Appuyez sur l écran pour retourner au petit écran Pour défiler vers le bas appuyez sur la touche VOL La touche CANAL vers le haut de la télécommande optionnelle RCB200 permet le défilement du texte vers le bas Pour défiler vers le haut appuyez sur VOL La touche CANAL vers le bas permet le défilement du texte vers le haut Modifi...

Page 193: ...s affiche avec la police L agrandissement de la taille de la police provoque des sauts de lignes fréquents Aperçu rapide du document texte Appuyez sur la touche DIAPOS dès l ouverture du fichier pour afficher le texte page par page et à intervalles réguliers L utilisation des options de réglages de texte permet de déterminer le minutage secondes de feuilletage 1 Lorsque le texte s affiche appuyez ...

Page 194: ...s le répertoire AGENDA du N I C E P200 Voir Copies des fichiers à la page 34 Visualisation de l horaire Depuis le menu principal appuyez sur l icône UTILITAIRES et appuyez ensuite sur l icône AGENDA Le N I C E P200 fait une pause pour télécharger et afficher l information des rendez vous du mois courant Les dates planifiées des rendez vous sont identifiées par une astérie 1 Appuyez sur les dates p...

Page 195: ...ser les options Voir la section Références à la page 50 pour le sommaire de toutes les options Configuration du périphérique 1 Démarrez le N I C E P200 et appuyez sur la touche MENU Le N I C E P200 affiche le menu principal 2 Appuyez sur l icône RÉGLAGE L écran SYSTÈME D INFORMATION du N I C E P200 s af fiche lors de la première utilisation Le système d information documente les mises à jour du mi...

Page 196: ...ctions suivantes s appliquent à toutes les options 1 Si vous n êtes pas déjà sur l écran principal de navigation appuyez sur la touche des options de navigation F3 Le menu de navigation s affiche 2 Appuyez sur RÉGLAGE Le menu de réglage s affiche Boutons de défilement pour les options multiples F2 et F4 3 Appuyez sur une option pour la modifier Utiliser les boutons de défilement des options multip...

Page 197: ... Appuyez sur Préférences de navigation depuis le menu RÉGLAGE 2 Appuyez sur l option Itinéraire court Parcours rapide Le N I C E P200 calcul l itinéraire conformément à la distance la plus courte lorsque cette option est activée Le N I C E P200 calcule l itinéraire conformément au temps de parcours le plus court lorsque cette option est activée Ce temps est évalué selon le type de route à parcouri...

Page 198: ...nce choisie s affichera lors de la prochaine navigation 4 Appuyez ensuite sur la touche QUITTER F1 pour terminer la modification Définir les points d origine par listes Suivez la procédure du prochain sujet pour établir le POINT D ORIGINE lorsque la position de départ du véhicule se situe dans un immeuble de grande hauteur ou sur un site d une grande usine de fabrication et que le N I C E P200 n a...

Page 199: ...eurs de manière permanente 1 Appuyez sur PRÉFÉRENCES DE L UTILISATEUR depuis le menu RÉGLAGE Le N I C E P200 affiche les options de préférences de l utilisateur 2 Appuyez sur SCHÉMA DE COULEUR Le N I C E P200 affiche les options de schémas de couleurs 3 Sélectionnez un schéma de couleur comme suit Auto Modifie automatiquement le schéma de couleur diurne ou nocturne selon l heure actuelle Le schéma...

Page 200: ...sur l icône RÉGLAGE pour visualiser la page d information de la pile 2 Appuyez sur la touche PILE Le N I C E P200 affiche l information de la pile Les explications suivantes renferment l information de la pile Année de fabrication mois L année suivie du mois indique la date de fabrication de la pile Charge restante Capacité de maintien de charge de la pile Capacité décroissante selon l usure et la...

Page 201: ...e Clarion publie continuellement de nouvelles bases de données cartographiques au format DVD Procurez vous les mises à jour des cartes sur le site web de Clarion www clarion com Suivez les instructions contenues sur le DVD dès sa réception Suppression de fichiers Utilisez l ordinateur pour supprimer les fichiers du N I C E P200 1 Le raccordement à l ordinateur s effectue en respectant les étapes d...

Page 202: ...ls reliés à la navigation Mise à jour du micrologiciel Clarion effectue à l occasion des mises à jour du micrologiciel du N I C E P200 Le système d exploitation SE du N I C E P200 est un micrologiciel qui contrôle les caractéristiques du système les fenêtres d affichage et les messages Raccordement à l ordinateur 1 Téléchargez et enregistrez le fichier de mise à jour du micrologiciel du site web c...

Page 203: ...ande APPUYER POUR ACCEPTER pour saisir le mode de navigation 2 Appuyez sur la touche OPTIONS DE NAVIGATION F3 3 Appuyez sur RÉGLAGE 4 Appuyez sur la touche Page Suivante F4 une fois pour faire défiler la page vers le bas 5 Appuyez sur DIAGNOSTICS DU SYSTÈME 6 Appuyez sur DIAGNOSTICS DU GPS Le N I C E P200 affiche la fenêtre de diagnostics du GPS 7 Comparez le signal avec l exemple ci dessus L éten...

Page 204: ...uche OPTIONS DE NAVIGATION F3 et appuyez ensuite sur RÉGLAGE 2 Appuyer sur la touche PAGE SUIVANTE F4 deux fois pour faire défiler la page vers le bas et appuyez sur DIAGNOSTICS DU SYSTÈME 3 Appuyer sur RÉINITIALISATION DE LA PV DU GPS La liste identique des options de diagnostics s affiche 4 Appuyer sur la touche QUITTER F1 pour retourner à la fenêtre de navigation L icône du globe s affiche à la...

Page 205: ...oir la section Visionnement vidéo sur un écran plus grand à la page 77 pour éteindre la sortie vidéo Solution 1 Appuyer sur la touche MENU appuyez sur RÉGLAGE PRÉFÉRENCES DE NAVIGATION 2 Faire défiler jusqu au guidage vocal et appuyez sur la touche pour activer l utilitaire 3 Appuyer sur la touche RETOUR F6 pour retourner aux préférences de navigation ou sur la touche QUITTER F1 pour retourner ver...

Page 206: ...cipal Icône Close Ferme le menu principal Icône USB Branche le N I C E P200 à votre ordinateur Icône Speaker Met le haut parleur interne du N I C E P200 en marche arrêt Icône Music Débute la navigation en jouant de la musique Ce bouton apparaît sur le menu principal seulement après avoir commencé la navigation Références de navigation Boutons de l écran tactile Bouton sortie F1 retourne immédiatem...

Page 207: ...s options appuyez sur le bouton MENU appuyez sur le bouton Appuyer pour accepter appuyez sur le bouton d options de navigation F3 puis appuyez sur Commencer le guidage par la voix Définit une adresse ou une intersection spécifique vers laquelle vous vous dirigez votre destination Nom d état province Sélectionne l état ou la province de l emplacement Utilisez cette option si la destination se trouv...

Page 208: ...ères destinations à partir de laquelle vous choisissez votre destination actuelle Les destinations simulées sont incluses Modifier le carnet d adresses Ajoute et supprime des entrées du carnet d adresses et vous permet d éditer un nom associé à une adresse tel que DMV Pour accéder à ces options à partir de l écran de navigation appuyez sur le bouton d options de navigation F3 puis appuyez sur Édit...

Page 209: ...ment marqué comme position actuelle de votre véhicule Enregistrer comme DOMICILE Règle l emplacement marqué en tant que votre domicile Ceci est le point de départ que le N I C E P200 utilise lorsqu il ne peut localiser le satellite Réglages Pour accéder à ces options à partir de l écran de navigation appuyez sur le bouton d option de navigation F3 puis appuyez sur Réglages Simulation Marche Vous p...

Page 210: ...a carte par défaut Les choix sont 1 32 1 16 1 8 1 4 1 2 1 et 4 Même si le N I C E P200 met à jour immédiatement l icône d échelle la nouvelle échelle prend effet la prochaine fois que vous entrez en mode navigation à partir du menu principal Miles Affiche les distances en miles Kilomètres mètres Affiche les distances en kilomètres et en mètres Miles yards Affiche les distances en miles et en yards...

Page 211: ...ous conduisiez sur l autoroute durant 30 kilomètres et que vous spécifiez un détour de 10 kilomètres le N I C E P200 calcule une route qui vous ramènera sur l autoroute après avoir roulé pendant 10 kilomètres sur des rues normales Calcule une nouvelle route qui exclut une route que vous identifiez Annuler la route Appuyer sur cette option annule immédiatement la route actuelle Aucune confirmation ...

Page 212: ... musique pop Configuration d égalisateur pour la musique jazz Configuration d égalisateur pour la musique classique Icônes stéréo mono Production d un son stéréo Production d un son monaural mono Stéréo mono non détecté apparaît momentanément avant qu une piste musicale commence à jouer Boutons photo Bouton répertoire affiche les répertoires photo Bouton de taille d écran fait disparaître les bout...

Page 213: ...accès aux options de configuration de texte Appuyez à nouveau sur ce bouton pour retourner à l affichage du texte Bouton précédent affiche la page de texte précédente Bouton suivant affiche la page de texte suivante Boutons du calendrier Bouton d information vous emmène à voir le calendrier Bouton précédent affiche le mois précédent Bouton suivant affiche le mois suivant Réglages Chaque applicatio...

Page 214: ...s réglages d égalisa teur prédéfinis FLAT aucune amélioration d égalisateur ROCK POP JAZZ CLSS classique Égalisateur confi guré pour le type de musique Chapitre 8 Référence Autres options MISE À JOUR DU LOGICIEL Met à jour le logiciel RÉGLAGES PAR DÉFAUT DE LA COMPAGNIE Retourne toutes les valeurs de réglages à leurs carac téristiques de la compagnie DEL marche Contrôle automa tiquement les petite...

Page 215: ...ation en toutes conditions Une pile rechargeable permet 3 heures de divertissement à distance du socle GPS Un cordon d alimentation pour véhicule assure la navigation Un adaptateur 110 V sert à l alimentation à domicile Clarion vous invite à vivre une expérience unique Pour découvrir la gamme complète de produits audio et vidéo Clarion veuillez nous rendre visite sur notre site Web www clarion com...

Page 216: ... Le colis doit être entièrement assuré et tous les frais de transport doivent être prépayés Clarion n assumera aucune responsabilité en cas de perte ou de dommages encourus lors du transport 7 LES PRODUITS CLARION ACHETÉS CHEZ UN REVENDEUR AUTRE QU UN REVENDEUR CLARION AUTORISÉ INCLUANT TOUS LES ACHATS EFFECTUÉS SUR INTERNET CHEZ UN REVENDEUR NON AUTORISÉ PAR CLARION NE SONT PAS COUVERTS LES GARAN...

Reviews: