2-11
Cisco SIP IP Phone Administrator Guide
Chapter 2 Getting Started with Your Cisco SIP IP Phone
Installing the Cisco SIP IP Phone
Step 3
Press the Select soft key. The Network Configuration menu is displayed.
Step 4
Highlight DHCP Enabled.
Step 5
Press the No soft key. DHCP is now disabled.
Step 6
Highlight and configure each of the following parameters:
•
IP Address—IP address of the phone.
•
Subnet Mask—IP subnet mask used by the phone.
•
TFTP Server—IP address of the TFTP server from which the phone downloads its configuration
files and firmware images.
•
Default routers 1 through 5—IP address of the default gateway used by the phone. Default routers
2 through 5 are the IP addresses of the gateways that the phone attempts to use as an alternate
gateway if the primary gateway is not available.
•
Domain Name—Name of the DNS domain in which the phone resides.
•
DNS servers 1 through 5—IP address of the DNS server used by the phone to resolve names to
IP addresses. The phone attempts to use DNS servers 2 through 5 if DNS server 1 is unavailable.
Step 7
When done, press the Save soft key. The phone programs the new information into Flash memory and
resets.
Caution
When you have completed your changes, ensure that you lock the phone as described in the
“Locking
Configuration Mode” section on page 3-2
.
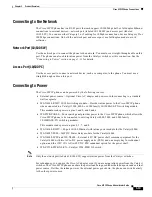
Connecting the Phone
You must connect the phone to the network and to a power source before using it.
Before You Begin
Refer to
Figure 2-1
for a graphical overview of the procedures in this section.


