


10
Configuration Using the Console Interface
WebView Switches
Chapter 4
Chapter 4:
Configuration Using the
Console Interface
Overview
The Switch features a menu-driven console interface for
basic configuration of the Switch and management of your
network. The Switch can be configured using CLI through
the console interface or through a Telnet connection.
This chapter describes console interface configuration.
Configuration can also be performed through the web
utility, which is covered in the next chapter.
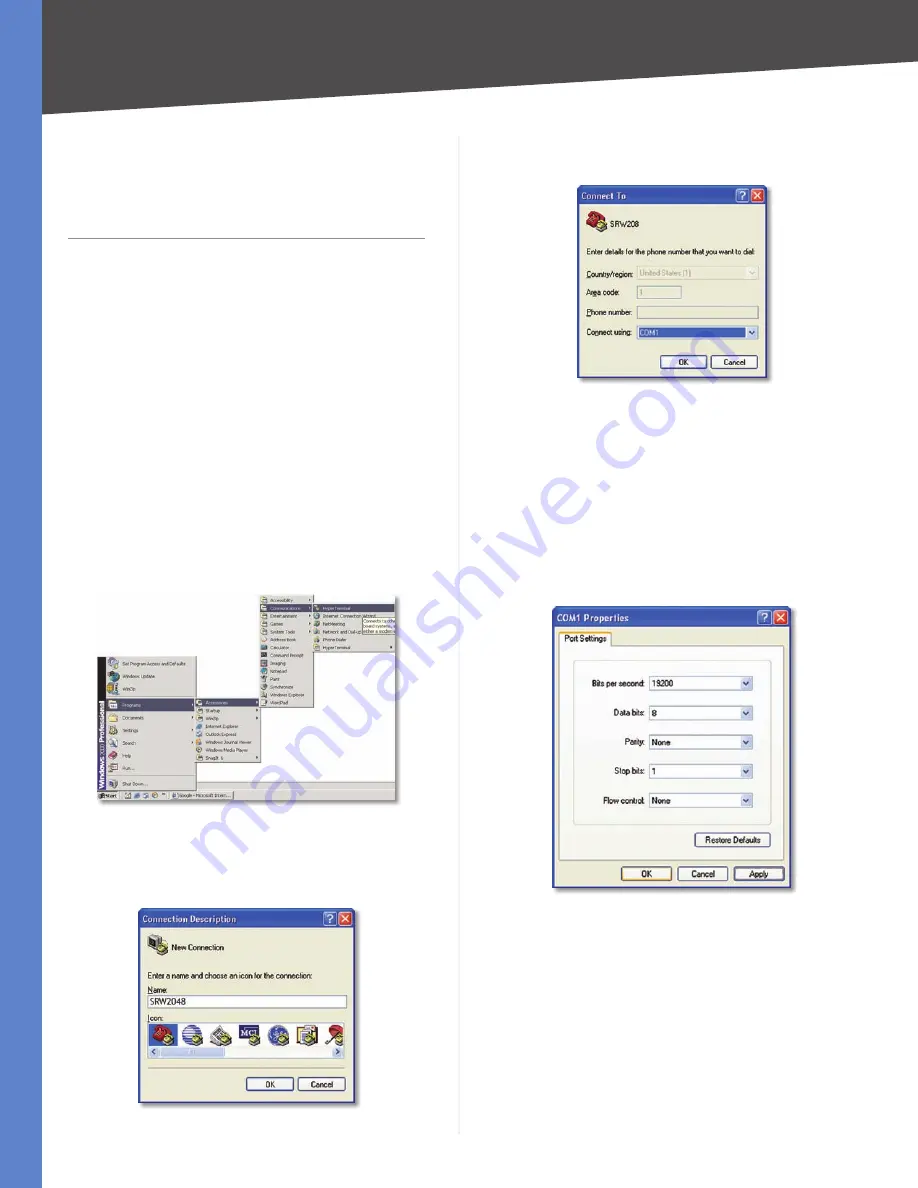
Configuring the HyperTerminal Application
Before using the console interface, configure the
HyperTerminal application on your PC as follows:
Click the
1.
Start
button.
Select
2.
Programs
>
Accessories
>
Communications
>
HyperTerminal
.
Start > Programs > Accessories > Communications > HyperTerminal
Enter a name for this connection. In this example, the
3.
name of connection is SRW2048. Select an icon for the
application, then click
OK
.
HyperTerminal Connection Description Screen
Select a port to communicate with the Switch:
4.
COM1
,
COM2
, or
TCP/IP
.
HyperTerminal Connect To Screen
Set the serial port settings as follows:
5.
Bits per second:
38,400
Data bits:
8
Parity:
None
Stop bits:
1
Flow control:
None
Click
6.
OK
.
HyperTerminal Properties Screen
Connecting to the Switch through a Telnet
Session
Open a command-line editor and enter
telnet
192.168.1.254
. Then, press the
Enter
key.
The
Login
screen appears. The first time you open the
command-line interface (CLI), select
Edit
and press
Enter
.
Enter
admin
in the
User Name
field. Leave the
Password
field blank.


