background image

Connecting

Interface

Cables

Serial

Connections

All

FSIP

ports

support

any

available

interface

type

and

mode

The

serial

adapter

cable

determines

the

electrical

interface

type

and

mode

of the port

to

which

it

is

connected

EIAJTIA-232

EIA/TIA-449

V.35

and X.21

interfaces

are available

in

DTE

mode

with

plug

at

the

network

end

and

in

DCE

mode

with

receptacle

at

the

network

end

EIA-530

is

available

only

in

DTE

mode

with

plug

For

descriptions

and

illustrations

of each

connector

type

refer

to

the section

Serial

Connection

Equipment

in

the chapter

Preparing

for Installation

For

cable

pinouts

refer

to

the

appendix

Cabling

Specifications

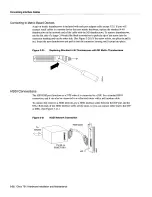
Connecting

DTE

and

DCE

Devices

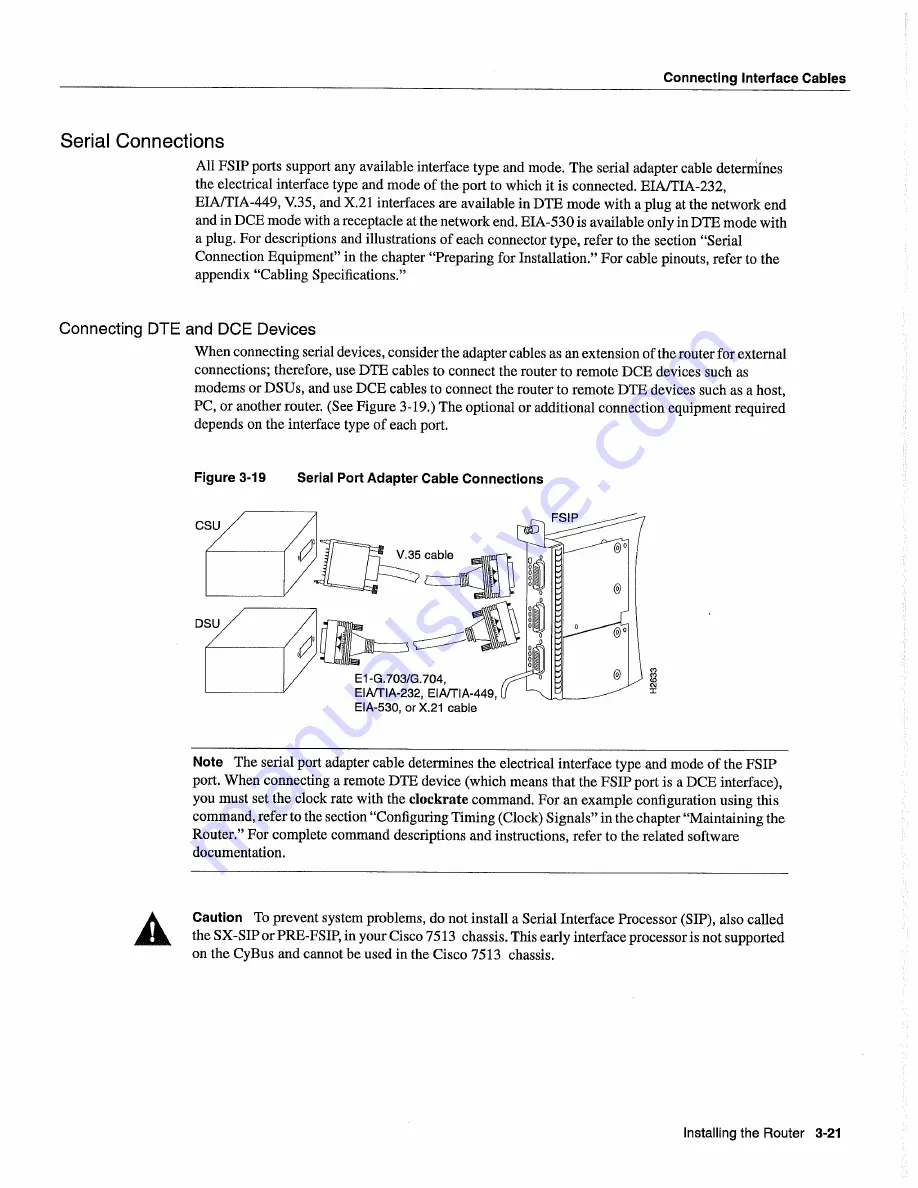
When

connecting

serial

devices

consider

the adapter

cables

as

an

extension

of the router for external

connections

therefore

use

DTE

cables

to

connect

the router

to

remote

DCE

devices

such

as

modems

or

DSUs

and

use

DCE

cables

to

connect

the router

to

remote

DTE

devices

such

as

host

PC

or another

router

See

Figure

3-19

The

optional

or additional

connection

equipment

required

depends on

the interface

type of each

port

Figure

3-19

Serial Port

Adapter Cable

Connections

Co

Note

The

serial

port adapter

cable

determines

the

electrical

interface

type

and

mode

of the

FSIP

port

When

connecting

remote

DTE

device

which

means

that

the

FSIP

port

is

DCE

interface

you must

set

the clock

rate

with

the clockrate

command

For an example

configuration

using

this

command

refer

to

the section

Configuring

Timing

Clock

Signals

in the chapter

Maintaining

the

Router

For

complete

command

descriptions

and

instructions

refer

to

the related

software

documentation

Caution

To

prevent

system

problems do

not

install

Serial

Interface

Processor

SIP

also called

the

SX-SIP

or

PRE-FSIP

in

your

Cisco

7513

chassis

This early interface processor

is

not

supported

on

the

CyBus

and

cannot

be used

in

the Cisco

7513

chassis

El -G.7031G

704

EIArrIA-232

EIA/TIA-449

EIA-530

or X.21

cabe

Installing

the

Router

3-21

Summary of Contents for 7513 Series

Page 1: ......

Page 2: ...o 7513 Hardware Installation and Maintenance Corporate Headquarters 170 Tasman Drive San Jose CA 951 34 1 706 USA 408 526 4000 800 553 NETS Customer Order Number DOC 751 3HIM1 Text Part Number 78 1 71 8 01 ...

Page 3: ...and the television or radio are on Circuits controlled by different circuit breakers or fuses Modifications to this product not authorized by Cisco Systems Inc could void the FCC approval and negate your authority to operate the product The following third party software may be included with your product and will be subject to the software license agreement CiscoWorks software and documentation ar...

Page 4: ...nsent of Cisco Customer agrees to implement reasonable security measures to protect such trade secrets and copyrighted material Title to Software and documentation shall remain solely with Cisco LIMITED WARRANFY Cisco warrants that the Software will substantially conform to the published specifications for such Software if used properly in accordance with the Documentation for period of ninety 90 ...

Page 5: ...roducts listed in Ciscos recommended spares list Replacement parts will be shipped within five working days after receipt of Customers request Cisco or its Sales or Service Partner will bear the cost for shipment of advance replacements to Customer Customer must return all defective boards and assemblies prior to installation of the replacement boards and assemblies to Cisco or the Sales or Servic...

Page 6: ...rts 1 16 Interface Processors 1 17 ATM Interface Processor 1 19 Channel Interface Processor 1 20 Ethernet Interface Processor 1 21 Fast Ethernet Interface Processor 1 22 Fiber Distributed Data Interface Processor 1 23 Fast Serial Interface Processor 1 24 HSSI Interface Processor 1 28 MultiChannel Interface Processor 1 29 Token Ring Interface Processor 1 30 Functional Overview 1 31 Addresses and Po...

Page 7: ...ction Equipment 2 29 Token Ring Connection Equipment 2 30 Token Ring Cables and Connectors 2 30 Token Ring Physical Connections 2 31 Token Ring Fault Management 2 33 FDDI Connection Equipment 2 34 FDDI Media 2 34 FDDI Transceivers and Cable Connectors 2 35 FDDI Physical Connections 2 36 FDDI Fault Management 2 37 MultiChannel Connection Equipment 2 39 Serial Connection Equipment 2 40 Universal Ser...

Page 8: ...ections 3 13 Channel Attachment Connections 3 14 Token Ring Connections 3 14 FDDI Connections 3 15 Single Attachment Connections 3 15 Dual Attachment Connections 3 16 Installing an Optical Bypass Switch 3 19 Serial Connections 3 21 Connecting DTE and DCE Devices 3 21 Connecting to Metric Based Devices 3 22 HSSI Connections 3 22 MultiChannel Connections 3 23 Connecting the Console Terminal 3 24 Con...

Page 9: ...n 5 11 Configuring the RSP2 5 13 Installing and Removing Flash Memory Card 5 13 Making Changes to the Software Configuration Register 5 15 Recovering Lost Password 5 21 Replacing SIMMs 5 22 Configuring the AlP 5 28 Initial AlP Configuration 5 28 Using the Configure Command 5 29 Configuring the Rate Queue 5 30 Changing AlP Default Values 5 31 Virtual Circuits 5 32 Checking the Configuration 5 35 Co...

Page 10: ... Auxiliary Cable Pinouts A 3 Ethernet Connector Signals A 4 Fast Ethernet Connector Signals A S Token Ring Port Signals A 6 FDDI Optical Bypass Switch Signals A 6 Serial Adapter Cable Pinouts A 7 HSSI Connector Signals A 14 HSSI Interface Cable A 14 Null Modem Cable A is MIP Interface Cable Pinouts A 16 Appendix Reading LED Indicators B i Front Panel LEDs B i Power Supply LEDs B 2 RSP2 LEDs and Re...

Page 11: ...Cisco 7513 Hardware Installation and Maintenance ...

Page 12: ...rCombination PCA and ECA Shown 1 20 Ethernet Interface Processor 1 21 Fast Ethernet Interface Processor 1 22 FDDI Interface Processor 1 23 Fast Serial Interface Processor 1 24 Universal Serial Port Adapter 1 26 FSIP E1 G 703 G 704 Port Adapter 1 26 HSSI Interface Processor 1 28 Multichannel Interface ProcessorDual Port Module Shown 1 29 Token Ring Interface Processor 1 30 Slot Port Number Examples...

Page 13: ...re 2 30 El Interface Cable for 120 Ohm Balanced Connections with Twinax Connectors 2 40 Figure 2 31 El Interface Cable for 120 Ohm Balanced Connections with RJ 48 Connector 2 40 Figure 2 32 Serial Port Adapter Cables 2 41 Figure 2 33 El G 703 G 704 Interface Cable for 75 Ohm Unbalanced Connections with BNC Connectors and Coaxial Cables 2 42 Figure 2 34 E1 G 703 G 704 Interface Cable for 120 Ohm Ba...

Page 14: ...ons for the CX FIP MM 3 19 Figure 3 18 Optical Bypass Switch Connection for the CX FIP SS 3 19 Figure 3 19 Serial Port Adapter Cable Connections 3 21 Figure 3 20 Replacing Standard 4 40 Thumbscrews with M3 Metric Thumbscrews 3 22 Figure 3 21 HSSI Network Connection 3 22 Figure 3 22 HSSI Null Modem Connection 3 23 Figure 3 23 MultiChannel Network Connection 3 23 Figure 3 24 Console and Auxiliary Po...

Page 15: ...cle 5 68 Figure 5 19 Power Supply LEDs 5 69 Figure 5 20 Placing Removed Processor Modules in Board Rack 5 70 Figure 5 21 Removing and Replacing the Card Cage and Backplane Assembly 5 71 Figure B i Router Front Panel LEDs B i Figure B 2 Power Supply LEDsAC Input Power Supply Faceplate ShOwn B 2 Figure B 3 RSP2 LEDs Reset Switch and Master Slave Switch B 3 Figure B 4 AlP LEDs B 4 Figure B 5 CIP LEDs...

Page 16: ...2 16 Ethernet Version and IEEE 802 3 Physical Characteristics 2 26 IBM Token Ring and IEEE 802 5 Comparison 2 31 Router Installation Checklist 2 49 Component List 2 52 Site Log Example 2 54 Port and Slot Configuration Worksheet Use with Figure 2 42 2 55 Software Configuration Register Bit Meanings 5 16 Explanation of Boot Field Software Configuration Register Bits 00 to 03 5 16 Default Boot Filena...

Page 17: ... 35 Adapter Cable Signals A il Table A i4 EIA 530 Adapter Cable Signals A 12 Table A i El G 703 G 704 Adapter Cable Connector Pinouts A i Table A l6 HSSI Interface Cable Signals A 14 Table A 17 HSSI Null Modem Cable Signals A is Table A i8 Ti Null Modem Cable Signals A i6 Table A i9 Ti Straight Through Cable Signals A 16 Table A 20 El Interface Cable Pinouts A 16 Table B i FIP LED Descriptions B b...

Page 18: ...crocode firmware that you order from the factory are accompanied by configuration notes that provide product specific installation instructions and up to date product information Audience Setting up and maintaining network requires the knowledge and expertise of people with variety of skills In many cases the people responsible for installing and maintaining hardware and wiring are not the ones wh...

Page 19: ...can use this chapter as reference Chapter Installing the Router provides instructions for rack mounting the router connecting the external power and network interface cables and starting the system After your system successfully initializes you will proceed to the related software documentation to configure the interfaces If the system fails to initialize successfully you will proceed to Chapter t...

Page 20: ...ywords are in boldface font Arguments for which you supply values are in italic font Elements in square brackets are optional Alternative but required keywords are grouped in braces and separated by vertical bars Examples use these conventions Terminal sessions and sample console screen displays are in screen font Information you enter is in boldface screen font Nonprinting characters such as pass...

Page 21: ... Cisco Information Online ClO If you have ClO account you can access the list remotely You can access ClO in the following ways WWW http www cisco com Telnet cio cisco com Modem From North America 408 526 8070 from Europe 33 64 46 40 82 Use the following terminal settings VT100 emulation data bits parity none stop bits and baud rates up to 14 4 kbps For copy of ClOs Frequently Asked Questions FAQs...

Page 22: ...ng to physically access the router for fast reliable upgrades This chapter provides physical and functional overviews to familiarize you with your new router It contains physical descriptions of the system hardware and major components and functional descriptions of hardware related features Descriptions and examples of software commands appear only when they are necessary for installing or mainta...

Page 23: ...RSP2s only The remaining 11 slots are for interface processors and are numbered from the left beginning with slot the far left slot through slot and from slot through slot 12 the far right slot CyBus comprises slots through and CyBus comprises slots through 12 An RSP2 in either slot or slot controls both CyBus and CyBus The dual CyBus backplane in the Cisco 7513 has an aggregate bandwidth of 2 134...

Page 24: ... management bracket Card cage and processor modules Air intake vent Power supplies Chassis grounding receptacle Caution Due to agency compliance and safety issues mixing AC input and DC input power supplies in the same Cisco 7513 is not supported configuration and must not be attempted Captive installation screws one at each end of the processor module faceplate ensure proper seating in the slot a...

Page 25: ...CD CD CD to CDC CD CD CD CD CD CD CD CD CD CD 9 CD CD CD CI 4 UI L CD CD CD CD CD CD CDCD CD CD CD CD0 CD CD CD CD CCD0CD CD CDCD pJ1 CD CD t t CD CD CD CD CDCCD CD CD CD CD ECDCD CD CD CD CD CDcCD CD tCD CDCD CD H3074 CD flo 1 CD Jt Cl CD CD CDCD CD CD CD CD CD CD rt CCD CD CD0 CC ...

Page 26: ...7A maximum Frequency 50 60 Hz AC input cable 12 AWG American Wire Gauge with three leads an IEC 320 receptacle on the power supply end and country dependent plug on the power source end DC input voltage 48 VDC3 nominal at 35 amps in North America and current 60 VDC at 35A in the B C DC input cable AWG recommended minimum with three conductors rated for at least 194F 90C DC voltages supplied 5 2 VD...

Page 27: ...ks is printed circuit board that is mounted to the front noninterface processor side of the system backplane The dual arbiter controls traffic across the CyBuses by prioritizing access requests from interface processors This ensures that each request is processed and prevents any interface processor from jeopardizing the CyBuses and interfering with the ability of the other interface processors to...

Page 28: ...nput power supply operating at 2OVAC requires dedicated 20A service and 20A plug and receptacle Figure 1 4 1200W DC Input Power Supply second redundant power supply is available as an option All power supplies are available as spare parts Redundant power supplies can be removed while power is on Caution Mixing AC input and DC input power supplies in the same Cisco 7513 is not supported configurati...

Page 29: ...ef On the AC input and DC input power supplies the power switch turns the power supply on and starts the system Adjacent to each power supply bay there is threaded M4 7 chassis ground receptacle that provides chassis ground connection for ESD equipment or grounding wire See Figure 1 1 On the AC input and DC input power supplies the green OK LED indicates the status of the power supply and internal...

Page 30: ...ment instructions In addition detailed up to date instructions called configuration notes are included with all spares when they are shipped from the factory The system blower is mounted in self enclosed removable module and draws cooling air through the chassis interior to maintain an acceptable operating temperature for the internal components The blower module comprises the blower printed circu...

Page 31: ...onitor shuts down all internal power to prevent equipment damage from excessive heat If the system detects that the blower has stopped or cannot maintain sufficient blower speed it will display warning message on the console screen If the condition is not corrected the system might shut down the processor modules to avoid an overtemperature condition and potential system damage For specific thresh...

Page 32: ...s and controls communication between high speed interface processors interface processor to interface processor and the system processor interface processor to processor Note An RSP2 in either slot or slot controls both CyBus and CyBus Interface processors connected to one CyBus are unaffected by the traffic generated by the interface processors connected to the other CyBus The two CyBuses are ind...

Page 33: ...tion When installing an RSP2 or interface processor ensure that you are installing it in the appropriate slot to avoid damaging the key guides or the backplane Be sure to install an RSP filler MAS RSPBLANK in the empty RSP slot Interface processor fillers MAS 7KBLANK will not fit in the RSP slots The backplane slots are keyed so that the processor modules can be installed only in the slots designa...

Page 34: ...tes the following management functions that control the system Sending and receiving routing protocol updates Managing tables and caches Monitoring interface and environmental status Providing Simple Network Management Protocol SNMP management and the console Telnet interface Note The RSP2 must be installed in RSP slot or RSP slot both of which are clearly labeled RSP During operation the system w...

Page 35: ...B Contains the Cisco lOS images on the RSP2 Ul Flash Card 16 and 20 MB7 Up to Contains the Cisco lOS images on up to two PCMCIA cards Slot and Slot Boot ROM8 256 KB EPROM for the ROM monitor program U30 Dynamic random access memory MB megabyte NVRAM nonvolatile read only memory KB kilobyte EPROM erasable prorammab1e read only memory system configuration file is contained in NYRAM which allows the ...

Page 36: ... or the TAC refer to the Service and Support card in the Warranty Pack that accompanied your Cisco 7513 VRAM The nonvolatile random access memory NVRAM stores the system configuration and the environmental monitoring logs and is backed up with built in lithium battery that retains the contents for minimum of five years When replacing an RSP2 be sure to back up your configuration to remote server s...

Page 37: ...es direct connection for console terminal Note EIA TIA 232 was known as recommended standard RS 232 before its acceptance as standard by the Electronic Industries Association EIA and Telecommunications Industry Association TIA The adjacent data terminal equipment DTE EIA TIA 232 plug auxiliary port supports flow control and is often used to connect modem channel service unit CSU or other optional ...

Page 38: ...umber 78 1342 xx EIPFor two four or six attachment unit interface AUI ports each of which operates at up to 10Mbps FEIPFor up to two 100BASE T RJ 45 or Media Independent Interface MIT ports The interfaces on an FEIP can both be configured at 100 Mbps half duplex HDX or full duplex FDX for maximum aggregate bandwidth of 200 Mbps FTPFor one high speed 100 Mbps single attachment or dual attachment po...

Page 39: ...at you use the microcode images bundled with the software images Caution To ensure proper operation of the system and to preclude system problems you should use only the microcode images that are bundled with system software Each interface processor has unique bank of status LEDs and all have common enabled LED at the left end of the interface processor faceplate The enabled LED goes on when the R...

Page 40: ... Support for both ATM adaptation layer AAL and AAL3 4 Exception queue which is used for event reporting Events such as CRC errors are reported to the exception queue Raw queue which is used for all raw traffic over the ATM network Raw traffic includes operation and maintenance OAM cells and Interim Local Management Interface ILMI cells ATM signaling cells are not considered raw Following are the p...

Page 41: ...cessor input output architectures for the CIP include ESAI39O for ESCON and SystemI37O 370 Xa and ESA 390 for bus and tag The ESCON interface is capable of data rate up to 17 megabytes per second MBps and the bus and tag interface is capable of data rate up to 4 5 MBps Only the CIP microcode boot image resides on an EPROM in socket U37 See Figure 1 10 The entire CIP microcode image is located in t...

Page 42: ...wo Ethernet Version and IEEE 802 3 Ethernet Version interfaces CX EIP4 four Ethernet Version and IEEE 802 3 Ethernet Version interfaces CX EIP6 six Ethernet Version and IEEE 802 3 Ethernet Version interfaces For descriptions of Ethernet transceivers and AUIs refer to the section Ethernet Connection Equipment in the chapter Preparing for Installation For descriptions of Ethernet network connections...

Page 43: ... full duplex using Category and cabling with four pairs also called 4T Figure 1 12 Fast Ethernet Interface Processor Microcode Flash memory U37 Following are the product numbers associated with the FEIP CX FEIP 1TX interface processor with one 100BASE TX port adapter CXFEIP 2TX interface processor with two 100BASE TX port adapters Ic The interfaces on an FEIP can both be configured at 100 Mbps hal...

Page 44: ...le network interface for both multimode and single mode FDDI networks The two FTP connectors are available in any combination of multimode MIC or single mode FC connectors for matching multimode and single mode fiber in the same FDDI network Following are the product numbers associated with the FTP CX FTP MM FDDI PRY A multimode PHY B multimode interface processor with an optical bypass switch min...

Page 45: ...ur port modules each of which is controlled by dedicated Motorola MC68 040 processor and contains 128 kilobytes KB of static random access memory SRAM Each module can support up to Ti or El interfaces and an aggregate bandwidth of up to Mbps at full duplex operation The type of electrical interface the amount of traffic and the types of external data service units DSUs connected to the ports affec...

Page 46: ...te set You must set the clock rate on all DCE ports with the clockrate command before the port can operate with an external timing signal To use the port as DCE interface you must set the clock rate and connect DCE adapter cable To use the port as DTE interface you need only connect DTE adapter cable to the port If you connect DTE cable to port on which clock rate is set the system will ignore the...

Page 47: ...the section Removing and Replacing Serial Port Adapters in the chapter Maintaining the Router The appendix Cabling Specifications provides adapter cable pinouts However because the FSIP uses special high density port that requires special adapter cables for each electrical interface type we recommend that you obtain serial interface cables from the factory El G 703 G 704 Port Adapter The FSIP El G...

Page 48: ...pter cable for unbalanced connections uses BNC connector The adapter cables for balanced mode are available with several connector types to accommodate connection standards in different countries You must use the proprietary cables to connect the El G 703 G 704 port to your network Cables for balanced and unbalanced mode are available with the following types of network end connectors Balanced 120...

Page 49: ...hysically similar to SCSI il format the HSSI specification is more stringent than that for SCSI il and we cannot guarantee reliable operation if SCSI Il cable is used null modem cable allows you to connect two collocated routers back to back to verify the operation of the HSSI interface or to build larger node by linking the routers directly For description of HSSI network and null modem connectio...

Page 50: ...e resides on an EPROM in socket U4i Figure 1 18 Multichannel Interface ProcessorDual Port Module Shown U41 microcode Following are the product numbers associated with the MIP CX MIP i CTi one port Tiinterface processor CX MIP 2CT1 two port Ti interface processor CX MIP 1CE1 75 one port interface processor with 75 ohm El port adapter CX MIP 2CE1 75 two port interface processor with 75 ohm El port a...

Page 51: ...ur ports Each port requires media access unit MAU to connect the DB 9 TRIP connectors to the external Token Ring networks There are no restrictions on slot locations or sequence you can install TRIP in any available interface processor slot Following are the product numbers associated with the TRIP CX TRIP2 interface processor with two IEEE 802 5 Token Ring interfaces CX TRIP4 interface processor ...

Page 52: ...t used by other devices in the network they are specific to the individual router The Cisco 7513 uses specific method to assign and control the MAC layer addresses of its interfaces The following sections describe how the Cisco 7513 assigns and controls both the slot port numbers and MAClayer addresses for interfaces within the chassis Slot Port Numbers In the Cisco 7513 slot port numbers specify ...

Page 53: ...cause EIPs support up to six Ethernet ports serial interfaces on an eight port FSIP are numbered 0 through 7 and so forth You can identify interface ports by physically checking the slotlport number on the back of the router or by using software commands to display information about specific interface or for all interfaces in the router To display information about every interface use the show int...

Page 54: ...adc2 bia 0000 0c02 adc2 Internet address is 1 1 2 2 subnet mask is 255255 255 0 display text omitted You can also use arguments such as the interface type ethernet tokenring fddi serial hssi and so forth and the port address slotiport to display information about specific interface only The following example shows the display for the first far left Ethernet port on an EIP in slot Router show mt et...

Page 55: ...ddress scheme allows you to remove interface processors and insert them into other routers without causing the MAC addresses to move around the network or be assigned to multiple devices Note that if the MAC addresses were stored on each interface processor OIR would not function because you could never replace one interface with an identical one the MAC addresses would always be different Also ea...

Page 56: ...ace processor the backplane pins send signals to notify the system which then performs as follows Rapidly scans the backplane for configuration changes and does not reset any interfaces Initializes all newly inserted interface processors noting any removed interfaces and placing them in the administratively shutdown state Brings all previously configured interfaces on the interface processor back ...

Page 57: ...ard connectors if they are not aligned properly with the backplane When using the handle rather than the ejectors to seat an interface processor in the backplane you may need to pull the interface processor back out and push it in again to align it properly Even if the connector pins are not damaged the pins mating with and disconnecting from the backplane will cause the system to interpret board ...

Page 58: ...l Overview Figure 1 21 Ejector Levers and Captive Installation Screws Bottom ejector lever Captive Installation screw Processor module carrier guide Processor module slot STOP on contact CU Product Overview 1 37 ...

Page 59: ...interface type flash ifiename configuration command to add the instructions to the configuration file The system option tells the system to load from the system bundle All processors of the same type for example all CIPs will load the same microcode image either from the default source or from the source you specify The show microcode command lists all of the microcode images that are bundled with...

Page 60: ... adverse conditions prior to loss of operation The environmental monitoring functions constantly monitor the internal chassis air temperature and DC supply voltages and currents Each power supply monitors its own voltage and temperature and shuts itself down if it detects critical condition within the power supply If conditions reach shutdown thresholds the system shuts down to avoid equipment dam...

Page 61: ... the source of the shutdown has not been corrected the system will execute hard shutdown Before any shutdown the system logs the status of monitored parameters in NVRAM so that you can retrieve it later to help determine the cause of the problem Power supply shutdownAn out of tolerance voltage current or temperature condition was detected within the power supply and it was shut down or shutdown is...

Page 62: ...own it logs the event as an intermittent power failure The reporting functions display the cumulative number of intermittent power failures logged since the last power up Environmental Reports The system displays warning messages on the console if chassis interface monitored parameters exceed desired threshold or if blower failure occurs You can also retrieve and display environmental status repor...

Page 63: ...38C 100F RSP6 Exhaust previously measured at 31C 87F 12 voltage previously measured at 12 17 voltage previously measured at 5 19 12 Voltage previously measured at 12 17 24 Voltage previously measured at 23 40 The show environment table command displays the temperature and voltage thresholds for each of the three RSP2 temperature sensors for each monitored status level low critical low warning high...

Page 64: ...rip points restart OK temperature warning board shutdown and power supply shutdown There are no active trip points shown in the following example The soft shutdowns refer to the number of times the system will reset itself before it executes complete chassis or hard shutdown The current temperature measurements at the three RSP2 sensors are displayed as inlet hotpoint and exhaust The shutdown temp...

Page 65: ...r of the RSP2 reaches predetermined value In the following example the systemhas detected an out of tolerance blower which it interprets as blower failure ENVM 2 FAN Blower has failed When the temperature reaches critical level the system will display the following message on the console screen and in the show environment command display when the system restarts Queued messages ENVM l SHUTDOWN Env...

Page 66: ...entive site configuration Network connections optional and additional equipment such as connectors cables and media interface devices that you will need for connections to your ATM Ethernet Fast Ethernet Token Ring FDDI serial channel attachment multichannel or HSSI networks Tools required for installation Initial configuration information that you will need Installation Checklist table that lists...

Page 67: ... assist you Ensure that your footing is solid and balance the weight of the object between your feet Lift the chassis slowly never move suddenly or twist your body as you lift Keep your back straight and lift with your legs not your back If you must bend down to lift the chassis bend at the knees not at the waist to reduce the strain on your lower back muscles Lift the chassis from the bottom gras...

Page 68: ...integral components of the carrier Although the carrier helps to protect the module use an antistatic strap whenever handling processor modules Handle the carriers by the handles and the carrier edges only never touch the boards or connector pins Caution Always tighten the captive installation screws on the processor modules See Figure 1 21 These screws prevent accidental removal provide proper gr...

Page 69: ...our site before installation After installation make sure the site maintains an ambient temperature of 32F through 104F 0C through 40C and keep the area around the chassis as free from dust as is practical The following sections address the site environment requirements for the router AC and DC Power The 1200W AC input power supply uses power factor corrector PFC that allows the Cisco 7513 to oper...

Page 70: ...your vicinity The electromagnetic pulse EMP caused by lightning or other high energy phenomena can easily couple enough energy into unshielded conductors to destroy electronic devices If you have had problems of this sort in the past you may want to consult experts in electrical surge suppression and shielding Most data centers cannot resolve the infrequent but potentially catastrophic problems ju...

Page 71: ... 1OBASE 5 1OBASE 2 Cable diameter 0 4 in cm 025 in 0 6 cm Max segment length 1640 ft 500 656 ft 200 Max connections taps per segment 100 30 Mm connection tap spacing 8 2 ft 2 5 1 64 ft 0 5 The unshielded twisted pair UTP cabling used with 1OBASE T is suitable for voice transmission but may incur problems at 10 Mbps transmission rates UTP wiring does not require the fixed spacing between connection...

Page 72: ...repeated segment Table 2 3 summarizes the characteristics of 100BASE T with respect to IEEE 802 3u physical characteristics Table 2 3 IEEE 802 3u Physical Characteristics OQBASE T Data rate Mbps 100 Signaling method Baseband Maximum segment length ineters 100 Media UTP Topology Star UTP unshielded twisted pair Channel Interface Connections The maximum transmission distance for ESCON with LED is 1 ...

Page 73: ... specification Input port specifications see G 703 Section 6 3 ITU T specification Jitter attenuation starting at hertz Hz which meets or exceeds G 823 for El Following are the MIP Tl specifications Transmission bit rate 1 544 kilobits per second kbps 50 parts per million ppm Output pulse amplitude 3 0 volts 0 6V measured at DSX Output pulse width 324 nanoseconds ns 54 ns Compiles with all ATT Acc...

Page 74: ... single mode and multimode Modes can be thought of as bundles of light rays entering the fiber at particular angle Single mode fiber allows only one mode of light to propagate through the fiber while multimode fiber allows multiple modes of light to propagate through the fiber Because multiple modes of light propagating through the fiber travel different distances depending on the entry angles cau...

Page 75: ...modal losses Table 2 9 lists the factors of attenuation and dispersion limit for typical fiber optic cable Table 2 9 Typical Fiber Optic Link Attenuation and Dispersion Limits Single Mode Multimode Attenuation 0 5 dB 1 0 dB km Dispersion Limit No limit 500 MHz km1 The product of bandwidth and distance must be less than 500 Mflzkm Approximating the AlP Power Margin The LED used for multimode transm...

Page 76: ...er to operate the receiver For SONET versions of the AlP module the signal must meet the worst case parameters listed in Table 2 11 Table 2 11 AlP SONET Signal Requirements Multimode 15 Single Mode PT 18 5 PR 30 PB 11 5 28 13 Multimode Power Budget Example with Sufficient Power for Transmission The following is an example calculation for multimode power budget based on the following variables Leng...

Page 77: ...n transmit up to dB The receiver could be overloaded at 14 dB but no damage will result To prevent overloading the receiver connecting short fiber links insert to 10 dB attenuator on the link between any single mode SONET transmitter and the receiver SONET Single Mode Power Budget Example The following example of single mode power budget is of two buildings 11 kilometers apart connected through pa...

Page 78: ...isted pair cabling is most commonly used for rates of 16 Mbps and either shielded or unshielded twisted pair cabling is used for rates of and Mbps When planning your connections remember that twisted pair cabling is more susceptible to interference than other types of cabling so plan the total network length and repeater spacing accordingly Equipment Racks The rack mounting hardware included with ...

Page 79: ...rip or other obstacle ensure that there is sufficient clearance to install and remove processor modules which must be pulled straight out of their slots See Figure 2 1 Figure 2 1 Chassis Footprint and Outer Dimensions When planning your rack installation consider the following guidelines Install the router in an open rack whenever possible If installation in an enclosed rack is unavoidable ensure ...

Page 80: ...ght of the chassis does not make the rack unstable Some Telco type racks are also secured to ceiling brackets if warranted by the weight of the equipment in the rack To properly install the chassis in rack use the instructions in the configuration note Cisco 7513 Rack Mount Kit Installation Instructions Document Number 78 2023 xx where xx indicates the latest document version which accompanies the...

Page 81: ...ot blow into the inlet of the chassis The inlet air is drawn in and exhausted as shown in Figure 1 5 Table 2 12 lists the operating and nonoperating environmental site requirements To maintain normal operation and ensure high system availability maintain an ambient temperature and clean power at your site The following ranges are those within which the router will continue to operate however measu...

Page 82: ...to cool equipment to acceptable operating temperatures Do not place the router directly on the floor or in any area that tends to collect dust Follow ESD prevention procedures to avoid damage to equipment Damage from static discharge can cause immediate or intermittent equipment failure Ensure that the backplane cover interface processors and any blank interface processor fillers are in place and ...

Page 83: ...ice with 20 amp receptacle at the power source The power cable supplied with the chassis uses 20 amp plug Figure 2 2 shows cable features required to connect the 20 amp plug to your AC source Figure 2 2 20 Amp AC Power Cable Connector and Plug and 20 Amp Receptacle 20 amp receptacle Note Wiring codes prevent 20A plugs from being used with most equipment rack power strips The DC powered chassis req...

Page 84: ...ynchronous devices to the console and auxiliary ports and synchronous devices to the FSIP and MIP serial ports For systems with two RSP2s installed one as master and one as slave in RSP slots and you can simultaneously connect to both console or auxiliary ports using special cables CAB RSP2CON for the console connections and CAB RSP2AUX for the auxiliary connections The master slave switch on the ...

Page 85: ...ONET STS l 51 84 Mbps and HSSI interface cable CAB HSIi to connect the DSU with the HIP T3 also luown as DS3 or digital signal level is the U S standard for digital carrier facility used for transmitting data over telephone network at 44 736 Mbps T3 is equivalent to 28 Tl 1 544 Mbps interfaces E3 is the European equivalent of T3 that operates at 34 Mbps SONET Synchronous Optical NETwork is an inte...

Page 86: ...o Network Interface UNI specification defines the required MIB functionality for ATM interfaces Refer to the ATM UNI specification for additional details ATM UNI information is arranged into MIB fashion MIB attributes are readable and writable across the Interim Local Management Interface ILMI using Simple Network Management Protocol SNMP The ILMI uses SNMP without UDP and interface processor addr...

Page 87: ...Class Laser Emission Requirement from CDRH FDDI For E3 and DS3 connections use the 75 ohm RG 59 coaxial cable CAB ATM DS3IE3 which has bayonet style twist lock BNC connectors and ferrite beads See Figure 2 8 The E3 and DS3 PLIMs both require cable CAB ATM DS3 E3 Figure 2 8 CAB ATM DS3 E3 CableRG 59 Coaxial Cable with BNC Connectors White insulator White insulator Caution To ensure compliance with ...

Page 88: ...M For multimode SONET connections connect the multimode cable to the SC connector on the PLIM See Figure 2 10 Figure 2 10 SONET Multimode SC Duplex PLIM The SONET multimode SC duplex connector is shipped with dust plug See Figure 2 11 Remove the plug by pulling on the plug as you squeeze the sides Figure 2 11 SONET ATM Multimode Fiber Optic Transceiver and Dust Plug Co Co Co Preparing for Installa...

Page 89: ...the Router Figure 2 13 E3 and DS3 PLIMRepresentative of Both PLIMs Channel Attachment Connection Equipment The ESCON Channel Adapter ECA and bus and tag Parallel Channel Adapter PCA for the CIP are available as FRUs however they are field replaceable by Cisco certified field service personnel only For more information on the ECA PCA CIP and respective cable requirements refer to the configuration ...

Page 90: ... rates Stations on CSMA CD LAN can access the network at any time Before sending data the station listens to the network to see of it is already in use If it is the station waits until the network is not in use then transmits collision occurs when two stations listen for network traffic hear none and transmit simultaneously When this happens both transmissions are damaged and the stations must ret...

Page 91: ...Ethernet is most similarto IEEE 802 3 1OBASE 5 Both of these protocols specify bus topology network with connecting cable between the end stations and the actual network medium Both protocols require device that acts as an interface between the end stations the EIP and the actual network medium cable The Ethernet specifications call this device transceiver and it is connected to the station with t...

Page 92: ...thernet Version or Version 2 IEEE 802 3 interfaces the EIP automatically supports both types Figure 2 15 Ethernet Transceivers for the EIP To EIP cable Transceiver 15 pin AUI _____ connector BNC connectors to thin wire or thick wire Ethernet network To EIP Transceiver cable _____ 15 pin AUI connector Attaches directly to EIP port or to the transceiver cable UTP cable To lOBaseT Ethernet network 15...

Page 93: ...n the cable is connected to the 15 pin port metal bracket snaps up over two posts on the cable connector to secure it in the port and provide strain relief The jackscrew type lock shown on the right in Figure 2 16 uses two thumbscrews or jackscrews which are usually attached to the cable connector instead of the posts and sliding bracket When the cable is connected to the 15 pin port you secure it...

Page 94: ... MIT connectors Figure 2 17 RJ 45 ConnectionsConnector and Plug RJ 45 connector Category UTP cable Depending on the type of media you use between the MIT connection on the port adapter and your switch or hub the network side of your 100BASE T transceiver should be appropriately equipped with ST type connectors for optical fiber BNC connectors for 1OBASE 2 coaxial cable and so forth Figure 2 18 sho...

Page 95: ... it can bring down the ring TRIP ports operate at either or 16Mbps The default speed for all TRIP ports is Mbps which you can change to 16 Mbps on any port with the configuration command ring speed where is the speed or 16 in Mbps The speed of each Token Ring port must match the speed of the ring to which it is connected Caution Each TRIP port must be configured for the same ring speed as the ring...

Page 96: ...ar configuration with end stations attached to device called media access unit MAU Also IBM Token Ring specifies twisted pair cabling whereas IEEE 802 5 does not specify media type Most Token Ring networks use shielded twisted pair cabling however some networks that operate at Mbps use unshielded twisted pair cable Table 2 14 shows comparison of the two types Table 2 14 IBM Token Ring and IEEE 802...

Page 97: ... busy token appends the information it wants to transmit and then sends this information to the next station on the ring The busy token with the information frame circulates the ring until it reaches the intended destination station which copies the information for further processing and passes the busy token and information frame back out to the ring The information frame continues to circle the ...

Page 98: ...otal bandwidth on the ring but decreases ring reliability The TRIP supports early token release but by default it is not enabled on any TRIP ports Unlike CSMAJCD networks such as Ethernet token passing networks are deterministic Each station can hold the token for maximum period of time so it is possible to calculate the maximum time that will pass before any end station will be able to transmit T...

Page 99: ...oftware configuration documentation FDDI Connection Equipment Fiber optic transceivers on the FTP provide direct interface between the router and the FDDI ring The FTP supports both single mode and multimode transceivers and is available with any combination of the two types Both transceiver types provide Class dual attach interface that can be connected to Class or Class station Class is dual att...

Page 100: ...I Network Interface Connector MIC Type The multimode multimode HP CX FIP MM and the single mode single mode FTP CX HP SS provide control port for an optical bypass switch which allows the light signal to pass directly through the bypass switch and completely bypass the FTP transceivers when the interface has failed or is shut down Most optical bypass switches provide the necessary interface cables...

Page 101: ...ions SAS attach to one ring and are typically attached through concentrator Class or dual attach stations DAS attach to both rings Figure 2 24 shows typical FDDI configuration with both DASs and SASs Figure 2 24 Typical FDDI Configuration with DAS Concentrator and SAS SASs Class typically attach to the primary ring through concentrator which provides connections for multiple SASs The concentrator ...

Page 102: ...on the primary ring station receives the primary signal from its upstream neighbor and transmits the primary signal to its downstream neighbor For example Figure 2 25 shows the primary signal flow being transmitted from PHY on Station to PHY on Station and from PHY on Station to PHY on Station Using Station as reference Station is the upstream neighbor of Station and Station is the downstream neig...

Page 103: ...gure 2 26 Optical Bypass Operation on DAS The bypass switch reroutes the light signal by intercepting it before it reaches the failed Station and sends it back out to the ring This allows the signal to maintain its existing path and direction without wrapping back on itself However stations that are operating normally repeat the signal when sending it back out to the ring Optical bypass switches d...

Page 104: ...he Ti and El cable pinouts Figure 2 28 El Interface Cable for 75 Ohm Unbalanced Connections with BNC Connectors Co r Pin MultiChannel Connection Equipment The MIP Ti interface cable has two 15 pin DB connectors at each end to connect the MIP with the external CSU Figure 2 27 shows the MIP interface cable and connectors Figure 2 27 Ti Interface Cable Pin Pin Pin 11 Pin Pin Co cJ Pin Ii or null mode...

Page 105: ...module In general you should use BIA TIA 232 for speeds of 64kbps and below and use X 21 EIAITIA 449 V 35 or EIA 530 for higher speeds See the section Configuring the FSIP in the chapter Maintaining the Router The universal FSIP ports for all interface types are 60 pin D shell receptacles Each port requires serial port adapter cable to connect to the external network or connection device Universal...

Page 106: ...e to allow connection to devices that use metric hardware Following are the available interface cable options for the mode and network end connectors for each EIA TIA 232 DTE mode with DB 25 plug DCE mode with DB 25 receptacle EIA TIA 449 DTE mode with 37 pin D shell plug DCE mode with 37 pin D shell receptacle V 35 DTE mode or DCE mode with 34 pin Winchester type V 35 plug DTE mode or DCE mode wi...

Page 107: ...e Cable for 120 Ohm Balanced Connections with DB 15 Connectors on Both Ends Figure 2 35 E1 G 703 G 704 Interface Cable for 120 Ohm Balanced Connections with Twinax Connectors and Cables Caution It is requirement of the statutory approval of the E1 G 703 G 704 interface that the jackscrews on the DB 15 connector backshell are securely screwed down while the FSIP is operating Following are the E1 GG...

Page 108: ...er to resend the frame The designators 16 and 32 indicate the number of check digits per frame that are used to calculate the FCS Sixteen bit CRC which transmits streams of 8 bit characters generates 16 bit FCS Thirty two bit CRC which transmits streams of 16 bit characters generates 32 bit FCS Because 32 bit CRC transmits longer streams at faster rates it provides better ongoing error detection w...

Page 109: ...lts at speeds and distances far greater than these For instance the recommended maximum rate for V 35 is Mbps but Mbps is commonly used without any problems If you understand the electrical problems that might arise and can compensate for them you should get good results with rates and distances greater than those shown here However do so at your own risk EINTIA 232 Connections By far the most com...

Page 110: ... 37 plug or DCE DB 37 receptacle For cable pinouts refer to the appendix Cabling Specifications Figure 2 37 EIATflA 449 Adapter Cable Connectors Network End DCE V 35 Connections The V 35 interface is most commonly used in the United States and throughout Europe and is recommended for speeds up to 48 kbps although in practice it is used successfully at Mbps The router FSIP end of all V 35 adapter c...

Page 111: ...B 25 hardware instead of the larger 37 pin connectors used for EIAITIA 449 Like EIAJTIA 449 EIA 530 refers to the electrical specifications of EIAJTIA 422 and EIAITIA 423 Although the specification recommends maximum speed of Mbps EIA 530 is used successfully at Mbps and at even faster speeds over short distances EIA 530 is used primarily in the United States The EIA 530 adapter cable is available...

Page 112: ...cifications Console and Auxiliary Port Connection Equipment The RSP2 contains two EIA TIA 232 ports DCE mode console port DB 25 receptacle and DTE mode auxiliary port DB 25 plug These are asynchronous ports unlike the synchronous FSIP serial ports so be sure that any devices you connect to these ports are asynchronous Asynchronous transmission uses control bits to indicate the beginning and end of...

Page 113: ...r you must remove the backplane cover to remove or replace the power supply or the arbiter and the captive installation screws on the interface processors Number Phillips screwdriver for the power supply blower module and card cage assembly Antistatic mat or antistatic foam pad if you will remove interface processors or replace components on the board Your own ESD grounding strap or the disposable...

Page 114: ...mendations and guidelines reviewed Router Installation Checklist copied Site log established and background information entered Site power voltages verified Site environmental specifications verified Required passwords IP addresses device names and so on available1 Required tools available Network connection equipment available Cable management brackets installed optional but recommended Router mo...

Page 115: ...listed equipment which should include the following One modular power cable included for each AC input power supply One three lead 6 AWG power cable that you provide for each DC input power supply Two nylon cable ties that you provide for strain relief for each DC input power supply cable One rack mount kit One cable management kit cable management bracket and mounting fasteners One serial port ad...

Page 116: ... Port and Slot Configuration Worksheet shown in Table 2 18 Check the interface processors in the rear of the chassis and record the interface type for each populated interface address You may need to refer to this worksheet during installation Step Proceed to the section Site Log in this chapter then to the chapter Installing the Router to begin installation System Components Table 2 16 lists all ...

Page 117: ...red Null modem cable for back to back HSSI connections MIP cables per port required AlP cables and types per AlP port required Optional equipment Ethernet and Fast Ethernet transceiver or 802 3 attachment unit MAU CSU DSU for network connections Documentation1 Router hardware and software document set or UniverCD if ordered System components Processor slots should contain an RSP2 and some combinat...

Page 118: ...pansion history Each time procedure is performed on the system update the site log to reflect the following Interface processors installed removed or replaced Power supply removed or replaced Configuration changed moving interface processors or moving network interface cables between ports Software or microcode firmware upgraded Insert any documentation that accompanies upgrades spares or new comp...

Page 119: ...Site Log Table 2 17 Site Log Example Date Description of Action Performed or Symptom Observed Initials For Page 2 54 Cisco 7513 Hardware Installation and Maintenance ...

Page 120: ...g Use with Table 2 18 Slots and are reserved for the RSP2 Table 2 18 Port and Slot Configuration Worksheet Use with Figure 2 42 Port Slot Slot SIot2 Slot Slot S1ot51 Slot Slot Slot 10 Slot 11 Slot 12 Router Name Location Serial Number Preparing for Installation 2 55 ...

Page 121: ...Site Log 2 56 Cisco 7513 Hardware Installation and Maintenance ...

Page 122: ... the hardware for mounting the chassis in standard 19 inch wide equipment rack or in Telco type rack If you are installing an equipment shelf or using mounting hardware other than that supplied with the chassis review the guidelines in the section Equipment Racks in the chapter Preparing for Installation then proceed to General Installation in this chapter after the router is installed in the rack...

Page 123: ...ning The chassis weighs approximately 160 pounds 72 6 kg fully configured To prevent injury have someone help you lift the chassis Note We recommend that you reduce the weight of the chassis by removing the blower module processor modules and card cage assembly however this is not required When you get ready to place the chassis into rack or onto tabletop you should lift the chassis by grasping th...

Page 124: ...nd have considered the following The location does not block the chassis front and rear where the exhaust and intake vents for cooling air are located allow at least six inches of clearance Multiple chassis can be installed in equipment racks with only an inch or more of vertical clearance Do not place the router on the floor Floors accumulate dust which would be drawn into the chassis interior by...

Page 125: ...tion allows adequate clearance around the chassis for maintenance Step After the router is in place proceed to the next section to connect the interface cables Installing the Cable Management Bracket The cable management bracket attaches to the interface processor end of the chassis just above the card cage and below the blower module Use the bracket to keep network interface cables untangled and ...

Page 126: ...iver to tighten the screws Step When installing the network interface cables route the cables to the cable management bracket as shown in Figure 3 3 If you are using very thin cables that slip through the bracket openings insert cable ties through the holes in the bracket and wrap them around the cables to secure them It might be necessary to bundle longer cables to avoid tangling them Do this at ...

Page 127: ...erminal block cover so the cover can slide free of the terminal block See Figure 3 4 Step Slide the terminal block cover away from the terminal block in the direction shown by the large arrow in Figure 3 4 Caution To maintain agency compliance requirements and meet EMI emissions standards in Cisco 7513 chassis with single power supply the power supply blank must remain in the power supply bay adja...

Page 128: ...n Figure 3 5 These cable ties provide strain relief for the cable Step Check the power supplys wiring and color code to verify that they match the wiring and color code at the DC source Warning Incorrectly wiring the terminal block could create shock hazard and could damage the power supply power source and the Cisco 7513 chassis components Make certain there are no loose strands that could cause ...

Page 129: ...tor at the network end Following are guidelines for connecting serial interface cables label that identifies the electrical interface type and mode is molded into the cable connectors EIAJTJA 232 and EIA 530 are the only interface types that use the same type of connector DB 25 If you are using both EIAITIA 232 DTE mode and EIA 530 check the labels carefully Generally cables for DTE mode use plug ...

Page 130: ...nces and other requirements refer to the section Site Requirements in the chapter Preparing for Installation Check the power cord and power supply for compatibility with your power service Check the labels on the equipment and ensure that the power service at your site is suitable for the chassis you are connecting If you are not sure refer to the section AC and DC Power in the chapter Preparing f...

Page 131: ...tion you can use The AlP can support the following physical layers TAXI 4B 5B 100 Mbps multimode fiber optic SONET SDH 155 Mbps multimode fiber opticSTS 3C or STM 1 SONET SDH 155 Mbps single mode fiber opticSTS 3C or STM 1 E3 34 Mbps coaxial cable DS3 45 Mbps coaxial cable Caution To ensure compliance with EMI standards the E3 PLIM connection requires an EMI filter clip CLIP E3 EMI on the receive ...

Page 132: ...ould attach between receive and transmit ports or transmit and receive ports of the E3 PLIM and your ATM switch respectively Step Hold the EMI filter clip as shown in Figure 3 7b and attach it to the receive cable as shown in Figure 3 7c Step To ensure that the clip is not pulled off when adjacent interface processors are removed position the clip parallel to the orientation of the AlP See Figure ...

Page 133: ...onnect each Ethernet port on the EIP to an Ethernet transceiver with transceiver cable or to an attachment unit with an attachment unit interface AUI Figure 3 8 shows an example of typical connection Some transceivers connect directly to the Ethernet port on the EIP usually the lOB aseT type and do not require an interface cable On each EIP port slide the metal bracket up over two posts on the cab...

Page 134: ...RJ 45 port on the FEIP See Figure 3 9 If you have MIT connections attach an MIT cable directly to the MIT port on the FEIP or attach 100BASE T or 100BASE F transceiver with the media appropriate to your application to the MIT port on the FEW Figure 3 9 Fast Ethernet Connections To transceiver repeater or DTE To repeate or DTE RJ 45 cable Top port adapter Bottom port adapter Attach the network end ...

Page 135: ...Ring Connection Equipment in the chapter Preparing for Installation Figure 3 10 Token Ring Connections The speed of each Token Ring port must match the speed of the ring to which it is connected The default speed for all TRIP ports is Mbps which you can change to 16 Mbps on any port with the configuration command ring speed where is the speed or 16 in Mbps Before you enable the Token Ring interfac...

Page 136: ...s refer to the documentation for your particular bypass switch for conect connection instructions If you are installing an optical bypass switch proceed to Installing an Optical Bypass Switch in this chapter Warning Invisible laser radiation maybe emitted from the aperture ports of the single mode FDDI products CX FIP SS CX FIP SM and CX FIP MS when no fiber cable is connected Avoid exposure and d...

Page 137: ... ring is received on one physical interface PHY or PHY and transmitted from the other The standard connection scheme which is shown in Figure 3 13 for DAS dictates that the primary ring signal comes into the FIP on the PHY receive port and returns to the primary ring from the PHY transmit port The secondary ring signal comes into the HP on the PHY receive port and returns to the secondary ring fro...

Page 138: ... cables attaches to both the primary and secondary ring each one receives the signal from one ring and transmits to the other ring See Figure 3 15 To help avoid confusion use the receive label on the cable MIC as key and connect the cables to the FIP ports as follows Connect the cable coming in from the primary ring to the PHY receive port This also connects the signal going out to the secondary r...

Page 139: ...imary ring to the PHY receive port and connect the signal going out to the secondary ring to the PHY transmit port Connect the cable coming in from the secondary ring to the PHY receive port This also connects the signal going out to the primary ring to the PHY transmit port Figure 3 16 FDDI Dual Attachment Network Connections Single Mode and Multimode Mixed mode configurations Use multimode and T...

Page 140: ...single mode single mode PIP called the CX FIP SS and shown in Figure 3 18 Figure 3 17 Optical Bypass Switch Connections for the CX FIP MM CX FIP MM Figure 3 18 Optical Bypass Switch Connection for the CX FIP SS To primary ring From secondary ring To secondary ring From primary ring iiiiiii Bypass operation The optical bypass control port on the FIP is six pin mini DIN receptacle Some optical bypas...

Page 141: ...ring fromPHY at the preceding station to the PRY receive port on the network ring side of the bypass switch This also connects the signal going out to the primary ring to the PHY transmit port Connect the bypass switch to the FTP Unless the documentation that accompanies the bypass switch instructs otherwise consider the bypass an extension of the FTP ports and connect to and to The network cables...

Page 142: ...nd use DCE cables to connect the router to remote DTE devices such as host PC or another router See Figure 3 19 The optional or additional connection equipment required depends on the interface type of each port Figure 3 19 Serial Port Adapter Cable Connections Co Note The serial port adapter cable determines the electrical interface type and mode of the FSIP port When connecting remote DTE device...

Page 143: ...w thumbscrew and push it into the connector housing until it pops into place The HIP HSSI port functions as DTE when it is connected to DSU for standard HSSI connection and it can also be connected to collocated router with null modem cable To connect the router to HSSI network use HSSI interface cable between the HIP port and the DSU Both ends of the HSSI interface cable are the same so you can c...

Page 144: ...n the MIP end Connect the MIP cables as shown in Figure 3 23 To connect two routers back to back in order to verify the operation of the HSSI port or to build larger node use null modem cable between available HSSI ports in two separate routers See Figure 3 22 The two routers must be in the same location and can be two Cisco 7513s two Cisco 7000s or one of each When you configure the ports you mus...

Page 145: ...00 baud data bits no parity and stop bits 96008N2 Use the console cable provided to connect the terminal to the console port on the RSP2 then follow the steps in the section Starting the Router in this chapter Note Both the console and auxiliary ports are asynchronous serial ports any devices connected to these ports must be capable of asynchronous transmission Asynchronous is the most common type...

Page 146: ...ers by default Figure 3 25 shows the console cable and Figure 3 26 shows the auxiliary cable Note Although the dual RSP2 functionality is not available with the initial release of the RSP2 processor console and auxiliary cables are shipped for future implementations Figure 3 25 Console Cable DB 25 DB 25 male Console connectors to console ports on two RSP2s in lISP slots and DB 25 male DB 25 male D...

Page 147: ...LED indicator goes ON If this indicator is not on after system initialization an error occurred Refer to the chapter Troubleshooting the Installation for troubleshooting procedures Step During the boot process the LED indicators on most of the interfaces go ON and OFF in irregular sequence Some may go ON go OFF and go ON again for short time If an interface is already configured and brought on lin...

Page 148: ...or exiting from setup and using configuration commands to configure global system wide and interface specific parameters You do not have to configure the interfaces immediately however you cannot enable the interfaces or connect them to any networks until you have configured them Many of the interface processor LEDs will not go on until you have configured the interfaces In order to verify correct...

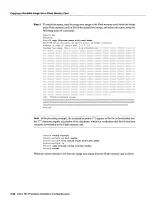
Page 149: ...sing the setup command facility For instructions on using this procedure refer to the Router Products Configuration Guide for Cisco lOS Release 11 0 or Router Products Getting Started Guide for Cisco lOS Release 11 0 publications You know the filename of the image you wantyou want to copy into the Flash memory card Following is the procedure for copying bootable file called new image into the Flas...

Page 150: ...1111111111111111111111111111111111 11111111111111111111 11111 Till 111111111111111111111111111111111111111111111111111111 11111111111111111 111111111111111111111111111111111111111111111111111111111111111 11111111111111111 1111111111111111111111111111111111111111111111111111111111111 1111111111111111111 Ill II II III 1111 III II III IllIll III II 1111111111111111111111111111111111111111111111111111...

Page 151: ... use the delete command to delete files from the Flash memory card to make sufficient room for the new image however do not delete the image old file Then use the squeeze command to remove these deleted files from the Flash memory card If after you have deleted files and used the squeeze command the two files cannot coexist on the Flash memory card in Slot remove this card place it in an anti stat...

Page 152: ...memory card in Slot as the default boot image Router config Routerconfig no boot system Routercontig boot system flash slotOimage new Router config Router copy running config atartup config Router reload When the system reloads it will boot the file image new from the Flash memory card in Slot 3 32 Cisco 7513 Hardware Installation and Maintenance ...

Page 153: ... to the system The system blower is operating The system software boots successfully The RSP2 and all interface processors are properly installed in their slots and each initializes is enabled by the system software without problems When each of these conditions is met the hardware installation is complete and you should proceed to the appropriate software documentation to configure the system and...

Page 154: ...ibed in this chapter Refer to this chart as necessary to follow the steps to isolate problems to specific subsystem and resolve the problem if possible Figure 4 1 Troubleshooting Strategy for Startup Problems 4 2 Cisco 7513 Hardware Installation and Maintenance ...

Page 155: ...er or not the blower is operating in noisy air conditioned rooms If you determine that the blower is not operating contact service representative immediately There are no installation adjustments that you should make if it does not function properly at initial startup Processor subsystemThis subsystem includes the RSP2 and all interface processors The RSP2 contains the system operating software in...

Page 156: ... system will start up but also recognize that the blower is not operating The system will initiate blower failure shutdown sequence display the appropriate warning messages then shut down after two minutes If there is problem with any of the other DC lines the RSP2 will not be able to initialize the system software so the system might attempt to start up and fail during the boot sequence Depending...

Page 157: ...rmal LEDs do not go on or if CPU halt LED goes on and stays on proceed to the section Troubleshooting the Cooling Subsystem in this chapter The enabled LED on each interface processor goes on when the RSP2 has completed initialization of the interface processor for operation This LED indicates that the interface processor is receiving power and has been recognized by the RSP2 it does not indicate ...

Page 158: ...set correctly and the AC or DC OK LED remains off suspect the AC or DC source or the power cable Turn the power switch off connect the power cable to another power source if one is available and turn the switch back on If the LED then goes on the problem is the first power source If the LED fails to go on after you connect the power supply to new power source swap the power cable with replacement ...

Page 159: ... does not recognize the signals from the blower control board and therefore assumes that the cooling subsystem is not operating The following message if displayed indicates that the blower has failed or is operating out of tolerance ENVM 2 FAN Fan has failed shutdown in minutes If the blower or the blower control board fails you must replace the blower module The following message if displayed ind...

Page 160: ...RSP2 LEDs do not go on as expected check the following items to help isolate the problem Do all of the RSP2 LEDs remain off when system power switch is turned on If all RSP2 LEDs stay off first refer to the sections Troubleshooting the Power Subsystem and Troubleshooting the Cooling Subsystem in this chapter to ensure that both the blower and power supplies are functioning properly If the power su...

Page 161: ... is off suspect that the interface processor has pulled away from the backplane You do not have to turn off the system power to remove and replace an interface processor Use the ejector levers to eject and then reseat the interface processor then tighten both of the captive installation screws For description and illustration of the ejector levers refer to the section Online Insertion and Removal ...

Page 162: ...Troubleshooting the Processor Subsystem 4 10 Cisco 7513 Hardware Installation and Maintenance ...

Page 163: ...rts spare parts FRUs or upgrade kits The replaceable system components fall into two categories those that support online insertion and removal OIR and those that do not requiring you to turn off the system power before replacement Because interface processors support OIR you can remove and replace them while the system is operating however you must shut down the system power before removing the R...

Page 164: ... Component Replacement in this chapter Also specific up to date replacement and configuration instructions will be provided with the replacement component in the upgrade kit On the FSIP and MIP interface processors you can replace port adapter if one fails and with software commands you can change specific functions on the individual interfaces Online Insertion and RemovalAn Overview The OIR featu...

Page 165: ...ne only interfaces that match the current configuration and were previously configured as up all other interfaces require that you configure them with the configure command On interface processors with multiple interfaces only the interfaces that have already been configured are brought on line For example if you replace single PCA CIP with dual PCA CIP only the previously configured interface is ...

Page 166: ... interface processor that is only partially connected to the backplane can hang the bus Detailed steps for correctly performing OIR are included in the following procedures for installing and removing interface processors Caution The RSP2 is required system component removing it without first shutting down the system will cause an abrupt system shutdown and can damage or destroy memory files To re...

Page 167: ...ork interface cables to remove the interface processor without straining the cables disconnect any cables attached to the interface ports Step You must pull processor modules straight out of the slot Ensure that there are no obstructions that will prevent you from doing so such as power strip on rack post network connection devices attached to adjacent interface processors or extensive cabling in ...

Page 168: ...require RSP fillers MAS RSPBLANK One RSP filler is shipped with each single RSP2 system Figure 5 2 Ejector Levers and Captive Installation Screws Bottom ejector lever Captive installation screw Processor Processor module module slot carrier guide STOPI on contact 5 6 Cisco 7513 Hardware Installation and Maintenance ...

Page 169: ...during Installation Caution Handle interface processors by the handles and carrier edges only to prevent ESD damage Step Choose slot for the new interface processor and ensure that there is enough clearance to accommodate any interface equipment that you will connect directly to the interface processor ports For example 1OBASE T Ethernet transceivers that connect directly to BIP ports may be wider...

Page 170: ...interfaces are new use the configure command or the setup command facility to configure the new interfaces This does not have to be done immediately but the interfaces will not be available until you configure them Note Always use the ejector levers when installing or removing processor modules module that is partially seated in the backplane will cause the system to hang and subsequently crash Sa...

Page 171: ...loadable microcode feature some images may require EPROM replacement If necessary use the following instructions to replace an interface processor EPROM in case Flash memory is damaged or otherwise not available or to change the default microcode on board for any other reason The replacement procedures are the same for each board with the exception of the FSIP which uses PLCC type package for the ...

Page 172: ...acement close enough to the chassis to avoid straining the interface cables attached to the interface processor if any leave the cables connected Otherwise label the cables before disconnecting them to avoid crossing them later Step Place the removed interface processor on an antistatic mat or foam Step Locate the microcode component refer to the appropriate interface processor illustrations in th...

Page 173: ... running EIP Microcode Version 10 0 Router ehow cont cybue display text omitted EIP hardware version 5 1 microcode version 10 0 Interface Ethernet0 O station addr 0000 0c02 d0ec bia 0000 0c02 d0cc display text omitted If the microcode version in the display is different from the ROM version you just installed use the microcode card type rom configuration command to change the configuration so the ...

Page 174: ...nfig microcode eip rom Routerconfig microcode reload Step Press Ctrl Z AZ to return to the system prompt and save write the new configuration to memory with the copy running config startup config command Router config Router copy running config startup config Router Step Enter the show controller cybus command again The first line of the display for the interface processor and for all interface pr...

Page 175: ...shown in Figure 5 5 The Flash memory card is keyed If it is inserted incorrectly the appropriate ejector button shown in Figure 5 5b will not pop out Following is the procedure for installing and removing Flash memory card Step Connect an ESD preventive strap between you and an unpainted chassis surface Step Face the front panel of the RSP2 which should appear as shown in Figure 5 5a and hold the ...

Page 176: ...ppropriate ejector button See Figure 5 5c Step Remove the card from the slot and place it in an antistatic bag to protect it Note Use only Intel Series Flash memory cards Figure 5 5 Installing and Removing Flash Memory Card 5 14 Cisco 7513 Hardware Installation and Maintenance ...

Page 177: ...t filename Enable or disable the Break function Control broadcast addresses Set the console terminal baud rate Load operating software from Flash memory Enable booting from Trivial File Transfer Protocol TFTP server Recover lost password Manually boot the system using the command at the bootstrap program prompt Force the router to boot automatically from the system bootstrap software boot image or...

Page 178: ...ystem bootstrap prompt 01 Boots the first system image in onboard Flash memory 02 to OF Specifies default netboot filename Enables boot system commands that override the default netboot filename Changing Settings To change the configuration register while running the system software follow these steps Step Enter the enable command and your password to enter privileged level as follows Router enabl...

Page 179: ...me from the Flash memory card in PCMCIA Slot bfilename from server host using TFTP flash the file filename from onboard Flash memory For more information about the flash filename command refer to the set of router products configuration publications If you set the boot field value to 0x2 through OxF and there is valid system boot command stored in the configuration file then the router boots the s...

Page 180: ...s the system to use the secondary bootstrap clearing bit causes the system to ignore the secondary bootstrap The secondary bootstrap program is used for system debugging and diagnostics Bit 10 controls the host portion of the IP broadcast address Setting bit 10 causes the processor to use all zeros clearing bit 10 the factory default causes the processor to use all ones Bit 10 interacts with bit 1...

Page 181: ...g register command with the value shown in the following example Routerconfig config reg 0x2102 Router config Router Copying to Flash Memory Copying new image to Flash memory might be required whenever new image or maintenance release becomes available You cannot copy new image into Flash memory while the system is running from Flash memory Use the command copy tftpfilename bootfiash slotO sloti I...

Page 182: ...config Files that are deleted are simply marked as deleted but still occupy space in Flash memory The squeeze command removes them permanently and pushes all other undeleted files together to eliminate spaces between them Following is the syntax of the squeeze command Router aqueeze slotO All deleted files will be removed proceed Squeeze operation may take while proceed ebESZ To prevent loss of da...

Page 183: ...he enable password Change the configuration register value back to its original setting To recover lost password follow these procedures Step Attach an ASCII terminal to the router console port which is located on the rear panel Step Configure the terminal to operate at 9600 baud data bits no parity stop bits or to the same settings as the router is set Step Enter the show version command to displ...

Page 184: ... value back to its original value noted from Step or change it to value of OxOlOl factory default Step 15 Exit configuration mode by entering Ctrl Z Step 16 Reboot the router and enable it using the recovered password Replacing SIMMs The system DRAM resides on up to four single in line memory modules SIMM5 on the RSP2 The default DRAM configuration is 16 MB This section provides the steps for incr...

Page 185: ...IMM sockets are U33 and U21 for Bank and U12 and U4 for Bank The default DRAM configuration is 16 MB two 8 MB SIMMs in Bank See Figure 5 6 Figure 5 6 RSP2 DRAM SIMMs Note The total number of memory devices per SIMM differs for each manufacturer The SIMMs in the following illustrations are generic representations of the actual DRAM SIMMs for your RSP2 To be assured that you are using the correct SI...

Page 186: ...o you must install either two SIMMs in Bank or four SIMMs in both banks You should not install two SIMMs and Bank with no SIMMs in Bank Bank must always contain two SIMMs Removing SIMMs Place removed SIMMs on an antistatic mat and store them in an antistatic bag You can use the SIMMs that you remove in compatible equipment To prevent ESD damage handle SIMMs by the card edges only Follow these step...

Page 187: ...nds of the SIMM are released from the socket grasp the ends of the SIMM with your thumb and forefinger and pull the SIMM completely out of the socket Handle the edges of the SIMM only avoid touching the memory module or pins and the metal traces or fingers along the socket edge Step Place the SIMM in an antistatic bag to protect it from ESD damage Step 10 Repeat Steps through for the remaining SIM...

Page 188: ...contain no less than two SIMMs of the same type Also you must install either two SIMMs in Bank or four SIMMs in both banks You should not install two SIMMs in Bank with no SIMMs in Bank Bank must always contain two SIMMs Step Hold the SIMM component side up with the connector edge the metal fingers closest to you Step Hold the sides of the SIMM between your thumb and middle finger with your forefi...

Page 189: ...ve the RSP2 Check the SIMMs by looking straight down on them and then at eye level The SIMMs should all be aligned at the same angle and the same height when properly installed If SIMM appears to stick out or rest in the socket at different angle from the others remove the SIMM and reinsert it Then replace the RSP2 and reboot the system for another installation check Each DRAM SIMM bank must conta...

Page 190: ...s the latest version of this document For complete information on AlP related software commands refer to the software documentation appropriate for your lOS software release Initial AlP Configuration On power up new AlP is shut down To enable the AlP you must enter the no shutdown command in the configuration mode See the section Using the Configure Command which follows If you installed new AlP o...

Page 191: ...ystem will prompt you for password if one is set Press the Return key after each configuration step unless otherwise noted Step At the privileged mode prompt enter the configuration mode and specify that the console terminal will be the source of the configuration subcommands as follows Router configure terminal Step At the prompt specify the new ATM interface to configure by entering the interfac...

Page 192: ... low through bank When the rate queues are configured the AlP will service the high priority banks until they are empty and then service the low priority banks VCs get the entire bandwidth of the associated rate queue If oversubscription occurs the other rate queues in bank will miss the service opportunities In the worst case iO Mbps rate queue will take 100 Mbps if there are 10 VCs attached to i...

Page 193: ... where is the slot number and is the interface number Setting the MTU Size To set the MTU size use the following command mtu bytes no mtu where bytes is in the range of 64 through 9188 bytes and the default is 4470 bytes 4470 bytes exactly matches FDDI and HSSI interfaces for autonomous switching The no form of the command restores the default Configuring SONET Framing In STM 1 mode the AlP sends ...

Page 194: ... clock to provide transmit clocking To specify that the AlP generates the transmit clock internally for SONET E3 and DS3 PLIM operation use the following command atm clock internal Virtual Circuits VC is point to point connection between remote hosts and routers VC is established for each ATM end node with which the router communicates The characteristics of the VC are established when the VC is c...

Page 195: ...cify the AAL and encapsulation rate queue is used that matches the peak and average rate selections which are specified in kilobits per second Omitting peak and average value causes the PVC to be connected to the highest bandwidth rate queue available In that case the peak and average values are equal To create PVC on the AlP interface use the atm PVC command To remove PVC use the no form of this ...

Page 196: ...lter The vp filter vp_filter configures the hex value used in the vp filter register in the reassembly operation When cell is received the right half most significant byte of the filter is exclusively NORed with the incoming VPI The result is then ORed with the left half least significant byte of the filter the mask If the result is all ones then reassembly is done using the VCIIMID table Otherwis...

Page 197: ...oup name You can create multiple map lists but only one map list can be associated with an interface Different map lists can be associated with different interfaces The following is an example of mapping list to an interface interface atni4 0 ip address 1111 255 255 255 0 map group atm atm rate queue 100 atm PVC aal5snap atm pVc aal5mux decnet decnet cost map list atm ip 1 1 1 1 atm vc broadcast d...

Page 198: ...t port address and hardware station address of each interface The following example shows an AlP installed in interface processor slot the running AlP microcode is Version 170 46 the PLIM type is 4B15B and the available bandwidth is 100 Mlbps Router show cont cbus AlP hardware version 1 0 microcode version 10 1 Microcode loaded from system Interface 32 ATM4 0 PLIM is 4050100Mbps 15 buffer RX queue...

Page 199: ...TM4 0 AAL enabled A2L5 Maximum VC5 1024 Current VCs Tx buffers 256 Mx buffers 256 Exception Queue 32 Raw Queue 32 VP Filter Ox7B VCIs per VPI 1024 PLIM Type4B5B 100Mbps No Framing TX clocking LINE 4897 input 2900 output IN fast OUT fast Rate Queue set to 100Mbps reg0x4EA Config is ACTIVE Use the show atm map command to display the PVC map as follows Router show atm map Map list atm vines 3004B3100...

Page 200: ...e show protocols command displays the global system wide and interface specific status of any configured Level protocol The write terminal command displays the currently running AlP configuration in RAM as follows Router write term interf ace atrn2 0 ip address 1 1 1 1 255 255 255 0 atm rate queue 100 atm rate queue atm pvc aal5mux ip atm pvc aal5snap atm pvc aalssnap 4000 3000 appletalk address 1...

Page 201: ...rated by the FSIP The default operation on an FSIP DCE interface is for the DCE device FSIP to generate its own clock signal TxC and send it to the remote DTE The remote DTE device returns the clock signal to the DCE FSIP port When using DCE interfaces you must connect DCE mode adapter cable to the port and specify the rate of the internal clock with the clockrate configuration command followed by...

Page 202: ...k Router config if Router Configuring NRZI Format The default for all interface types is for nonretum to zero NRZ format however all types also support nonretum to zero inverted NRZI NRZ encoding is most common NRZI encoding is used primarily with EIA TIA 232 connections in IBM environments To enable NRZI encoding on any interface specify the slot and port address of the interface followed by the ...

Page 203: ...ce followed by the crc4 command In the example that follows the top port on an FSIP in interface processor slot is configured for CRC Router configure terminal Enter configuration commands one per line End with CNTL Z Routerconfig4 interface aerial 3 0 Router config if crc4 Routerconfig if Router44 To disable CRC 4 and return to the default of no CRC error checking specify the slot and port addres...

Page 204: ...g cable with one of the same interface type and mode these steps are not necessary Simply replace the cable without interrupting operation Step Locate and remove the adapter cable to be replaced Step Connect the new cable between the FSIP port and the network connection Tighten the thumbscrews at both ends of the cable to secure it in the ports Step At the privileged level of the EXEC specify the ...

Page 205: ...ares on hand and have failure you can replace interfaces without having to return the FSIP to the factory You cannot however add ports to an FSIP by installing additional port adapters The four port FSIP supports only one four port module To change the electrical interface type or mode of port you need only replace the adapter cable and reset the interface When setting up the DCE port you must als...

Page 206: ...section Removing FSIP Port Adapters Removing FSIP Port Adapters Port adapters are installed on each FSIP at the factory You must remove an existing port adapter in order to replace or install new one Each port adapter is anchored to the FSIP with two double row vertical board to board BTB connectors and two Phillips head screws that extend down into the standoffs See Figure 5 9 The port adapter is...

Page 207: ...e the board stiffener for leverage or you will damage the FSIP board Step When the port adapter BTB connector is completely disconnected from the BTB connector on the FSIP tilt the back of the port adapter up at about 70 degree angle from vertical and slowly pull it upward and outward up and out using the orientation shown in Figure 5 9 away from the faceplate The serial port connectors will pull ...

Page 208: ...Step As shown in Figure 5 10 partially insert the port connectors through the back of the cutouts in the carrier faceplate Do not force the connectors through the cutouts until the standoffs and BTB connectors are aligned Step With the port connectors partially inserted into the faceplate cutouts slowly lower the back opposite side of the port adapter and continue to ease the port connectors throu...

Page 209: ...lips screwdriver to tighten the standoff screws and 3 16 inch nut driver to tighten the four jackscrews Do not overtighten any of the screws Step 12 Proceed to the next section to reinstall the FSIP in the chassis Figure 5 10 Installing FSIP Port Adapters Board stiffener and EMI shield Maintaining the Router 5 47 ...

Page 210: ...ntact with the ejector levers See Figure 5 2 Step Using the thumb and forefinger of each hand simultaneously push the top lever down and the bottom lever up as shown in Figure 5 2 to fully seat the FSIP in the backplane connector Step Use number Phillips or 3 16 inch flat blade screwdriver to tighten the captive installation screws on the top and bottom of the FSIP Step Reconnect the network inter...

Page 211: ...to configure the new MIP controller Be prepared with the information you will need such as the following Ti and or El information for example clock source for Ti line code and framing type Channel group information and timeslot mapping Protocols and encapsulations you plan to use on the new interfaces Internet protocol IP addresses if you will configure the interfaces for IP routing Whether the ne...

Page 212: ...erPartial View El port adapter Cable connector Jumper J6 Table 5 8 Jumper Settings and Functions Jumper Pins and Impedance Function J6 and for 120 ohm Controls capacitive coupling for either 120 ohm or 75 ohm operation an and for 75 ohm installed jumper directly connects the Rx shield to chassis ground Warning To prevent problems with the El interface and to reduce the potential for injury jumper ...

Page 213: ...vileged level password as follows Router enable Password Step Enter the password the password is case sensitive For security purposes the password is not displayed Step When you enter the correct password the system displays the privileged mode system prompt as follows Router Step Proceed to the following section to configure the MIP controller Following are commands used to map the channel group ...

Page 214: ...ce for the controller The clock source command will determine which end of the circuit provides the clocking Routerconfig controller clock source line Note The clock source should only be set to use the internal clocking for testing the network or if the full Ti line is used as the channel group Only one end of the Ti line should be set to internal Step At the prompt specify the framing type Route...

Page 215: ...privileged mode prompt enter the configuration mode and specify that the console terminal will be the source of the configuration subcommands as follows Router conf Enter configuration commands one per line End with CNTL Z Routerconfig Step At the prompt specify the controller to configure by entering the subcommand cont followed by el and slot applique interface processor slot number applique The...

Page 216: ...the configuration is stored Step 11 Exit the privileged level and return to the user level by entering disable at the prompt as follows Router disable Router Checking the Configuration After configuring the new interface use the show commands to display the status of the new interface or all interfaces Command Descriptions and Examples Following are descriptions and examples of the show commands D...

Page 217: ...fer RX queue threshold 37 buffer TX queue limit buffer size 4496 ift 0006 rql 13 tq 0000 O1AO tql 37 text omitted from example MIP hardware version 1 0 microcode version 10 0 Microcode loaded from system Interface 16 Tl 2 0 electrical interface is Channelized Tl 10 buffer RX queue threshold 14 buffer TX queue limit buffer size 1580 ift 0001 rql tq 0000 OSBO tql 14 Transmitter delay is microseconds...

Page 218: ...s Fr Loss Secs Line Err Secs Degraded Mins Errored Sacs Bursty Err Secs Severely Err Sacs Unavail Secs Router The show configuration command displays the contents of the system configuration file stored in NVRAM This file should reflect all new configuration changes you made and wrote to memory with the copy running config startup config command Router show config Using 1708 out of 130048 bytes ve...

Page 219: ... Step Display the Ti and or El alarm condition with the show controller Ti and or show controller El command Step Specify the new interface with the show interfaces serial slot portchannel group command and verify that the first line of the display specifies the serial interface with the correct slot port and channel group number Also verify that the interface and line protocol are in the correct ...

Page 220: ...t driver An ESD preventive wrist strap or other grounding device to prevent ESD damage Removing MIP Port Adapter Port adapters are installed on each MIP at the factory Each port adapter is anchored to the MIP with one plastic double row vertical board to board BTB connector and four Phillips screws that extend through standoffs into the motherboard See Figure 5 12 The port adapter is also anchored...

Page 221: ...xtension behind the BTB connector and gently lift the adapter upward to dislodge it from the MIP connector If the port adapter resists rock it very slightly from side to side until it pulls free of the MIP connector Caution To prevent damage to the MIP do not pry the port adapter out with screwdriver or any other tool In particular do not use the board stiffener for leverage Step When the port ada...

Page 222: ...ort adapter from the MIP Refer to Figure 5 13 while you perform the following steps Step Ensure that the MIP is resting on an antistatic mat or on antistatic foam and position it with the same orientation as that shown in Figure 5 13 You should still be wearing an ESD preventive ground strap Step Handle the port adapter by the board edges only Step Position the port adapter so that it is in the or...

Page 223: ...ble connector through the cutout until the BTB connector and the MIP and port adapter meet and the standoffs on the MIP are aligned with the standoff holes in the port adapter Shift the port adapter until the cable connector is fully inserted through the cutouts and the standoffs are aligned with the standoff holes See Figure 5 13 Figure 5 13 Installing MIP Port Adapter Maintaining the Router 5 61...

Page 224: ...n this chapter Step 12 Reconnect the network interface cables or other connection equipment to the MIP interface ports Caution To prevent potential EMI and overheating problems do not replace the MIP in the chassis unless all port adapters are installed An empty port violates the EMI integrity of the system and also allows cooling air to escape freely through the cutouts in the carrier faceplate w...

Page 225: ...able PWR 7513 ACU with U K cable PWR 75l3 ACA with Australian cable PWR 7513 ACI with Italian cable PWR 7513 ACE with European cable This document does not include replacement instructions for all chassis spares or packing materials However specific replacement instructions called configuration notes accompany all spares In addition to the internal spares the following assemblies are also availabl...

Page 226: ...f the internal spares 1 4 inch flat blade screwdriver to loosen the captive screws on the blower module and power supplies and 3 16 inch flat blade screwdriver to pry off the cover panels Number Phillips screwdriver Number Phillips screwdriver Removing and Replacing the Blower Module The blower provides cooling air to the internal system components When viewing the chassis from the noninterface pr...

Page 227: ...ten the captive installation screws on the front of the blower module This completes the blower module removal and replacement procedure Removing and Replacing Power Supply The power supplies rest on the floor of the chassis under the card cage On the AC receptacle located on the faceplate of the AC input power supply cable retention band wraps around the molded power cable connector to prevent th...

Page 228: ...on Connecting Power in the chapter Installing the Router Then with the power cable leads disconnected proceed to Step which follows Step Use fiat blade screwdriver to loosen the captive screw that secures the power supply to the chassis frame See Figure 5 15 Figure 5 15 Removing Power SupplyAC Input Power Supplies Shown Step Grasp the power supply handle and pull the power supply about halfway out...

Page 229: ... chassis unless you do so to install redundant power supply Note To prevent system problems do not mix AC input and DC input power supplies in the same chassis Warning High current levels on the power supply connections at the rear of the power supply bay are exposed with the power supply or blank removed Do not insert anything conductive into the open power supply bay while power is ON Figure 5 1...

Page 230: ... 5 18 shows the cable connector plug and the 20 amp receptacle required to connect the 20 amp cable to your AC source DC input power supplyTo connect the power cable leads to DC input power supply refer to the section Connecting Power in the chapter Installing the Router Then with the power cable leads connected proceed to Step which follows Figure 5 18 20 Amp AC Power Cable Connector and Plug and...

Page 231: ...power supply by rotating the power switch clockwise to the ON position The AC or DC OK and fan OK LEDs will go ON and stay ON See Figure 5 19 The output fail LED might go ON momentarily but will go off after few seconds Figure 5 19 Power Supply LEDs This completes the power supply replacement procedure Power supply front panel Power switch cj Captive installation screw Maintaining the Router 5 69 ...

Page 232: ...modules in the collapsible black cardboard board racks that were provided with your packing material as shown in Figure 5 20 Figure 5 20 Placing Removed Processor Modules in Board Rack Step Turn the power switch on each power supply to the OFF position Step Disconnect the power cable from each power supply Refer to the section Connecting Power in the chapter Installing the Router Step Remove each ...

Page 233: ...ve second person hold the chassis in place while you pull the card cage and backplane assembly from the chassis in the following step Step With the captive screws loosened carefully grasp the intake grill with both hands and then pull the card cage assembly straight out of the chassis until there is enough clearance at the card cage side flanges to pull the entire assembly clear of the chassis sid...

Page 234: ... chassis opening and slide the assembly into the chassis opening until the left and right flanges on the card cage are flush with the chassis flanges Step 10 Press the card cage and chassis side flanges together and tighten each captive screw See Figure 5 21 Do not overtighten the captive screws Caution The electronic components on the rear of the backplane are completely exposed when the card cag...

Page 235: ...pter cable pinouts V 35 DTE and DCE serial port adapter cable pinouts X 21 DTE and DCE serial port adapter cable pinouts EIA 530 DTE serial port adapter cable pinout E1 G 703 G 704 serial port adapter cable pinouts HSSI cables HSSI interface cable pinout Null modem cable pinout MIP cables Note All FSIP ports use universal high density 60 pin receptacle except for the El G 703 G 704 port adapter wh...

Page 236: ...Ground DCD Data Carrier Detect DCD always on Auxiliary Port Signals The auxiliary port on the RSP2 is an EIA TIA 232 DTE DB 25 plug to which you can attach CSUIDSU or other equipment in order to access the router from the network Table A 2 lists the EIA TIA 232 signals used on this port The asynchronous auxiliary port supports hardware flow control and modem control Table A 2 Auxiliary Port Signal...

Page 237: ...25 Pins P1 1 P1 2 P1 3 P1 4 P1 5 P1 6 P1 7 P1 8 P1 13 P1 19 P1 20 Male3 DB 25 Pins J1 1 and J2 1 J1 2 and J2 2 11 3 and 12 3 J1 4 and 12 4 J1 5 and J2 5 11 6 and 12 6 J1 7 and J2 7 J1 8 and J2 8 J1 13 and 12 13 11 19 and 12 19 J1 20 and 12 20 Signal Description Ground Receive Data RxD Transmit Data TxD Clear To Send CTS looped to Request To Send RTS looped to Data Set Ready DSR Ground Data Carrier...

Page 238: ... in the chapter Preparing for Installation Table A 5 lists the signals for the 15 pin Ethernet connector used on the EIP Table A 5 Ethernet Connector Signals Pin Circuit Description DO A Data Out Circuit 10 DO B Data Out Circuit 11 DO S Data Out Circuit Shield DI A Data In Circuit 12 DI B Data In Circuit DI S Data In Circuit Shield CO A Control Out Circuit not used 15 CO B Control Out Circuit not ...

Page 239: ...te Referring to the RJ 45 pinout in Table A 6 proper common mode line terminations should be used for the unused Category UTP cable pairs 4 5 and 7 8 Common mode termination reduces the contributions to electromagnetic interference EMI and susceptibility to common mode sources Wire pairs 4 5 and 7 8 are actively terminated in the RJ 45 100BASE TX port circuitry in the FEIP port adapter Table A 7 F...

Page 240: ...ignal descriptions for the mini DIN optical bypass switch available on the multimode multimode and single mode single mode FIPs CX FIP MM and CX FIP SS The mini DIN to DIN adapter cable allows connection to an optical bypass switch that uses DIN connector which is larger than the mini DIN on the HP For descriptions of FDDI network configurations and equipment refer to the section FDDI Connection E...

Page 241: ...tors used for the respective interfaces All interface types except EIA 530 are available in DTE or DCE format DTE with plug connector at the network end and DCE with receptacle at the network end V 35 is available in either mode with either gender at the network end EIA 530 is available in DTE only The tables that follow list the signal pinouts for both the DTE and DCE mode serial port adapter cab...

Page 242: ...ed Not used 56 Not used DSR DTR 34 DSR DTRJDSR 43 DSR Notused 56 Notused Notused 56 Notused Circuit ground 45 Circuit ground Circuit ground 45 Circuit ground Not used 56 Not used Not used 56 Not used DCDILL 33 DCD LL DCD 44 DCD Notused 56 Notused Notused 56 Notused TxCINIL 37 15 TxC TxCE TxC 39 15 TxC Notused 56 Notused Notused 56 Notused RxC TxCE 38 17 RxC NIL RxC 40 17 RxC Not used 56 Not used N...

Page 243: ...S RS CTSIRTS RS RTS CTS 10 25 RS CTS RTS 25 RS RxC TxCE 26 RT TxC RxC 24 RT RxC TxCE 25 26 RT TxCIRxC 23 26 RT CTS RTS CS RTS CTS CS CTS RTS 27 CS RTS CTS 10 27 CS LL DCD 44 10 LL NIL LL 29 10 LL Circuit ground 45 37 SC Circuit ground 30 37 SC DSRJDTR 11 DM DTRJDSR i 11 DM DSRJDTR 29 DM DTRIDSR 29 DM DTR DSR i 12 TR DSRIDTR 12 TR DTR DSR 30 TR DSR DTR 30 TR DCD DCD 13 RR i DCD DCD 13 RR DCD DCD 31...

Page 244: ... Control CTS RTS Control RTS CTS 10 10 Control CTS RTS 10 Control RxD TxD 28 Receive TxDIRxD 11 Receive RxD TxD 27 11 Receive TxDIRxD 12 11 Receive CTSIRTS Indication RTS CTS Indication CTS RTS 12 Indication RTS CTS 10 12 Indication RxC TxCE 26 Timing TxCIRxC 24 Timing I RxC TxCE 25 13 Timing TxC RxC 23 13 Timing Circuit ground 15 Circuit ground Circuit ground 15 Circuit ground Ground 48 Shorting ...

Page 245: ...ot used 18 Not used DCDILL 33 RLSD LLIDCD 44 RLSD Not used 16 Not used Not used 18 Not used DTRIDSR 43 DTR DSR DTR 34 DTR Notused 16 Notused Notused 18 Notused LLIDCD 44 LT DCD LL 33 LT Notused 16 Notused Notused 18 Notused TxDIRxD i 18 SD RxD TxD 28 SD TxD RxD 17 SD RxD TxD 27 SD RxDITxD 28 RD TxDIRxD 18 RD RxDITxD 27 RD TxDIRxD 17 RD TxCE TxC 20 SCTB i RxCITxCB 26 SCTE TxCE TxC 19 SCTE RxC TxCE ...

Page 246: ...xCIRxC TxCIRxC RxC TxCE RxC TxCE LLIDCD Circuit Ground DThIDSR DTRJDSR TxCE TxC TxCE TxC Mode_i Ground Mode_2 Ground Mode_DCE Not used Not used Network End DTE Cable DB 25 Plug Pin Pin Signal J2 46 Shield ground 11 TxD 12 14 TxD 28 RxD 27 16 RxD RTS 10 19 RTS CTS 13 CTS DSR 22 DSR DCD 10 DCD 24 15 TxC 23 12 TxC 26 17 RxC 1 25 RxC 44 18 LL 45 Circuit ground 20 DTR 23 DTR 13 24 TxCE 14 11 TxCE 49 48...

Page 247: ...dapter Cable Connector Pinouts FSIP End Network End Null Modem DB 151 DB 15 DB 15 BNC Twinax Pin Signal2 Pin Pin Signal Pin Signal Tx tip Tx tip J2 1 Tx Tx ring 11 Tx shield J2 2 Tx 10 Tx shield J2 shield Tx shield Rx tip Rx tip J3 1 Rx 15 Rx ring 11 Rx shield J3 2 Rx Rx shield J3 shield Rx shield Any pins not described in this table are not connected Tx transmit Rx receive Cabling Specifications ...

Page 248: ...for the connector Caution Although the HIP connector and the HSSI interface cable are similar to SCSI TI format the HSSI cable specification is more stringent than that for SCSI IT We cannot guarantee proper operation if SCSI TI cable is used instead of an HSSI interface cable Table A 16 HSSI Interface Cable Signals Pin Number Side Pin Number Side Signal Name Router End Direction1 DSU End SG Signa...

Page 249: ...ection and configuration instructions refer to the section HSSI Connection Equipment in the chapter Preparing for Installation Table A 17 HSSI Null Modem Cable Signals Signal Name From Pins Direction To Pins Signal Name Receive Timing 27 34 Terminal Timing DCE Available 328 833 DTE Available Received Date 29 11 36 Send Data LoopbackC 530 1035 LoopbackA SendTiming 631 631 SendTiming DTE Available 8...

Page 250: ...l1 Pin Pin Signal Txtip Rxtip Rxtip Txtip Txring 11 Rxtip Rxtip 11 Txring Tx transmit Rx receive Table A 19 Ti Straight Through Cable Signals 15 Pin DB 15 Pin DB Connector Connector Signal1 Pin Pin Signal Txtip Txtip Txring Txring Rxtip Rxtip Rxtip 11 11 Rxtip Tx transmit Rx receive Table A 20 El Interface Cable Pinouts MIP End Network End DB 15 BNC DB 15 Twinax RJ 45 Pin Signal2 Signal Pin Signal...

Page 251: ...in Figure i i the powerAbay is on the left and the power bay is on the right Figure B i Router Front Panel LEDs The power LEDs go out if the power supply in the corresponding bay reaches an out of tolerance temperature or voltage condition For descriptions of thresholds and status levels refer to Environmental Monitoring and Reporting Functions in the chapter Product Overview The front panel norma...

Page 252: ...operator turned off system power or an actual failure in the power supply Power supply shutdown initiated by the power supply because it detected an out of tolerance temperature or voltage condition in the power supply The green fan OK LED is on to indicate the fan in the power supply is operating properly This LED is useful in noisy enviromnents when you are troubleshooting potential power supply...

Page 253: ...e normal LED comes on and stays on however this does not necessarily mean that the system has reached normal operation The Slot and Slot LEDs indicate which PCMCIA slot is in use and blink when either slot is being accessed by the system Figure B 3 RSP2 LEDs Reset Switch and Master Slave Switch Caution The reset switch resets the RSP2 and the entire system To prevent system errors and problems use...

Page 254: ...e Figure B 4 and two additional LEDs which are generic to the interface type indicated by your PLIM Figure B 4 AlP LEDs 00 The three LEDs above the ATM port see Figure B 4 indicate the following EnabledWhen on indicates that the AlP is enabled for operation however the interface ports might not be functional or enabled RX cells When on indicates that the AlP has received an ATM cell This LED will ...

Page 255: ... been detected by the CIP LoadedIndicates that the adapter ECA or PCA firmware has been completely loaded SignalFor the ECA this LED indicates that the Sync signal has been detected For the PCA this LED indicates that the Operational Out signal has been detected Note that even though system reset and selective reset both cause the Operational Out signal to drop the signal LED will still be on duri...

Page 256: ... Present Loaded Signal Online Port Off Off Off Off Port Off Off Off Off On warm boots the LEDs flash briefly On downloads the following three LED sequences apply the first indicates that the systemis downloading volatile programmable logic device VPLD code Present Loaded Signal Online Port On On On On Port On On On Off The following sequence indicates that the CIP is downloading microcode Present ...

Page 257: ... shown in Figure B 6 As with the other interface processors the enabled LED goes on when the EIP is enabled for operation Figure B 6 EIP LEDs fl Three LEDs for each port indicate the following CollisionA frame collision has been detected TransmitFrames are being transmitted ReceiveFrames are being received Reading LED Indicators B 7 ...

Page 258: ...EIP contains valid microcode version that has successfully been downloaded The bus recognizes the FEIP If any of these conditions is not met or if the initialization fails for other reasons the enabled LED does not go on bank of three LEDs indicates the following MITLights when the MIT port is selected as the active port by the controller LinkLights when the FEIP is receiving carrier signal from t...

Page 259: ...P As with the other interface processors the enabled LED goes on when the FTP is enabled for operation Figure B 8 FIP LEDs Co The state of each B A pair of LEDs indicates the status of one type of three possible station connections dual attachment station DAS single attachment station SAS or dual homed The states of the FTP LED combinations and the meanings of each are described and illustrated in...

Page 260: ...le attachment PHY shut down xx xx off and on Single attachment PHY shut down xx Dual Homed Both and off Not connected Single attachment on Dual homed with active not normal plus both and on condition indicates potential problem on Single attachment on Dual homed with active which is normal plus both and on plus condition Single attachment on Single attachment Dual homed failed plus on Single attac...

Page 261: ... DTE Signal DCE Signal RxC Receive clock from DTE TxC Transmit clock to DTE RxD Receive data from DTE TxD Transmit data from DTE TxC Send timing from DCE RxC Receive timing to DTE Conn Connected Coimected The labels on each LED indicate the signal state when the FSIP port is in DTB mode However the direction of the signals is reversed when the FSIP port is in DCE mode For example DCE device usuall...

Page 262: ...he remote DCE On DCE interfaces this LED indicates receive clock RxC During normal DCE operation this LED is on when the DCE port is sending the internal clock signal which the FSIP generates to the remote DTE device which is usually host PC or another router Conn connected or loopbackOn both DTE and DCE interfaces this LED is on to indicate normal operation the FSIP is properly connected to the e...

Page 263: ... internally RD Receive DataWhen on indicates that the HIP has detected and is able to receive packets from the external DSU ST Send TimingWhen on indicates that the HIP is transmitting Transmit Clock signal to the external DSU During normal operation this signal is derived from the Receive Timing RT signal from the external DSU During loopback this signal is generated internally ConnectedWhen on i...

Page 264: ...eceiving power The CyBus recognizes the MIP card If any of these conditions is not met or if the initialization fails for other reasons the enabled LED does not turn on There are three LEDs associated with each MIP port that indicate alarm or loop conditions on that port The three LEDs above each MIP port indicate the following Local alarmIndicates loss of signal loss of frame or unavailability du...

Page 265: ...two or four ports contain the bank of LEDs shown in Figure B 13 As with the other interface processors the enabled LED goes on when the TRIP is enabled for operation Three LEDs for each port indicate the following 16 MbpsOn when the interface is operating at 16 Mbps MbpsOn when the interface is operating at Mbps In ringWhen on indicates that the interface is currently active and inserted into the ...

Page 266: ...Interface Processor LEDs B 16 Cisco 7513 Hardware Installation and Maintenance ...

Page 267: ...25 pairs The colors used for group are white red black yellow and violet The colors used for pair within group are blue orange green brown and slate Each pair must have unique color combination One wire within each pair has solid background of its group color and stripes of the pair within group color and the second wire has the colors reversed Table C i lists the sequences Note that red brown and...

Page 268: ...lack Slate 40 15 Slate Black 15 16 Yellow Blue 41 16 Blue Yellow 16 17 Yellow Orange 42 17 Orange Yellow 17 18 Yellow Green 43 18 Green Yellow 18 19 Yellow Brown 44 19 Brown Yellow 19 20 Yellow Slate 45 20 Slate Yellow 20 21 Violet Blue 46 21 Blue Violet 21 22 Violet Orange 47 22 Orange Violet 22 23 Violet Green 48 23 Green Violet 23 24 Violet Brown 49 24 Brown Violet 24 25 Violet Slate 50 25 Slat...

Page 269: ...l correspondence with the paired wire color code The alternate color code is included because sometimes the station wire uses the first three pairs of the standard color code white blue blue white and so on and other times it uses the six alternate colored wires Table C 2 Second Color Code Scheme for Smaller Numbers of Wires Pair Number Wire Number Solid Color Stripe Color Alternate Color Pin Numb...

Page 270: ...C 4 Cisco 7513 Hardware Installation and Maintenance ...

Page 271: ... 28 procedures 5 285 38 default values changing 5 31 description 1 19 air EMI filter clip installation 2 22 3 11 information commands 5 365 38 LEDs B 4 linkloss 2 11 microcode EPROM location 5 10 MTU size 5 31 multimode and single mode transmission 2 12 network connections 3 10 PLIMs 2 23 2 24 power budget 2 10 power margin 2 10 product numbers and descriptions 1 19 rate queue 5 30 setting framing...

Page 272: ...ypass switch connected LED on HIP B 13 CAB ATM DS3 E3 2 22 CAB FMDD FDDI optical bypass cable 2 35 CAB HNUL HSSI null modem cable 2 20 A iS cable management bracket installing 3 4 tools and equipment 3 4 kit cables hardware 2 50 using 2 15 100BASE T 2 6 4 40 thumbscrews on serial 2 20 AC power 1 5 1 8 AlP 2 20 2 21 3 10 attaching AlP 3 10 CIP 3 14 console and auxiliary 3 24 EIP 3 12 FEIP 3 13 PIP ...

Page 273: ...serial port adapter removal 5 43 SIP SX SIP and PRE FSIP 3 21 surface mount component ESD 5 44 cd command 5 20 channel attachment connection equipment 2 24 connections 3 14 See also CIP Channel Interface Processor See CIP channel group command 5 52 5 53 channel groups M1P 5 52 CHAS 7513 spare chassis with AC input power supply 5 63 CHAS 7513 DC spare chassis with DC input power supply 5 63 chassis...

Page 274: ...ming 5 52 5 53 hssi internal clock 3 23 initialize 5 21 interface atm 5 29 invert transmit clock 5 40 ip address 5 53 5 54 linecode 5 53 loopback MIIP 5 51 microcode card rom 5 11 microcode reload 5 12 nrzi encoding 5 40 5 41 o rreset 5 21 PVC configuration 5 33 pwd 5 20 reload 5 17 5 21 ring speed 2 34 setup 5 8 show 5 54 show atm mt interface 5 35 show atm map 5 3 5 37 show atm traffic 5 3 5 37 ...

Page 275: ... crc32 command 5 41 crc4 command 5 41 Critical status level environmental monitor 1 39 CSA agency approvals 1 5 CSMAICD description 2 25 CSU 2 20 current rating AC and DC 1 5 Customer Response Center See CRC phone numbers and e mail address CxBus description 1 1 CX FIP MM optical bypass switch connections 3 19 CX FIP SS optical bypass switch connections 3 19 CyBus clock 1 6 description 1 1 SIP not...

Page 276: ... 2 40 connecting transceivers 2 28 MIP connections 3 23 connectors 2 28 MIP specifications 2 8 DB 15 connectors 2 25 port adapter description 1 21 removal 5 58 LEDs B 7 replacement 5 60 microcode EPROM location 5 10 speed 539 network connections illustration 3 12 standard 2 20 port signals A 4 E1 G 703 G 704 product numbers and descriptions 1 21 balanced and unbalanced modes 1 27 speed 1 17 cables...

Page 277: ...rd 3 28 invert transmit clock command 5 40 microcode card type ROM Flash file command 5 il multimode power budget AlP 2 11 nrzi encoding command 5 40 OIR messages 5 8 procedure 1 36 port addresses 1 32 recovering lost password 5 21 ring speed command 3 14 show controller cxbus command 5 42 show controller cxbus command output 5 11 show environment all command output 1 43 show environment command o...

Page 278: ...SIP cables 1 26 2 20 clock rate 3 21 5 39 5 42 5 43 configuration 5 385 48 connectors 2 41 description 1 24 DS1 speed 5 39 interface pinouts A 7 LEDs B il microcode EPROM location 5 10 modes and timing 2 43 modules 1 24 network connections illustration 3 21 NRZI format 2 43 PLCC microcode EPROM replacing 5 9 port adapters replacing 5 43 product numbers and descriptions 1 24 speed 1 17 SRAM 1 24 tr...

Page 279: ...iption 1 24 Token Ring network description 2 30 HIP description 1 28 IEEE installation 5 2 802 3 LEDs 1 18B 4 and ElF 1 21 2 19 MIP description 1 29 and Ethernet Version 2 25 OIR procedure 5 2 description 2 25 product numbers and descriptions 1 191 30 physical layers 2 25 replacing 5 2 802 3u 2 6 spares 1 17 802 5 subsystem for troubleshooting 4 9 and TRIP 2 13 2 19 2 30 TRIP description 1 30 spec...

Page 280: ...IP 2 11 loaded LED on CIP B S lobe cables pinouts A 6 Token Ring 2 32 Type and Type 2 31 local alarm LED B 14 M3 metric thumbscrews for serial connectors 1 26 2 41 MAC address allocator 1 34 MAS 7S13 spare chassis 5 63 MAS 75 13FAN blower module 5 63 MAS7K BLANK interface processor filler S S MAU EIP interface to 1 21 2 25 TRIP interface to 1 30 2 30 A 6 MC68040 processor on FSIP 5 39 media interf...

Page 281: ...on 2 43 FSIP configuration 5 40 nrzi encoding command 5 40 5 41 null modem cable connecting 3 23 description 2 47 pinouts A is numbers port 1 31 VRAM description 1 15 log 1 40 o r command reset 5 21 OIR functional description 1 35 interface processor support 1 17 onscreen messages during 5 8 overview 5 2 screen displays during 5 8 OK LEDs power supply 1 8 online insertion and removal See OIR onlin...

Page 282: ...2 failures 1 41 1 43 internal DC voltage 1 8 4 4 LED 4 4 loss B 2 OKLED 1 8 output fail LED 1 8 service 3 9 site 2 4 specifications 1 5 status 1 8 4 4 subsystem for troubleshooting 4 3 surge suppression 2 5 troubleshooting with the fan OK LED B 2 ungrounded 2 3 power factor corrector See PFC power margin AlP 2 10 power supply and environmental monitor 1 39 description 1 7 LED 1 7 3 26 4 4 LEDs B 2...

Page 283: ...l 2 37 in FDDI networks 2 34 in Token Ring networks 2 30 recovery 2 37 speed 2 30 ring speed command 2 34 RJ 45 cable attachment 3 13 cable specifications 2 7 connections FEIP 2 29 LED B 8 pinouts FEIP A S ROM loading microcode from 5 11 microcode 1 18 Route Switch Processor See RSP2 RSP2 and CyBus access 1 6 configuration 5 13 description 1 13 LEDs 4 5 B 3 memory 1 14 normal LED 1 16 normal start...

Page 284: ...e cabling 2 5 power 2 4 requirements 2 4 slide type locks on EIP ports 2 28 slot locations 1 2 numbers 1 31 slot port numbers for interfaces 1 31 SMDS networks and CRCs 2 43 SNMP management 1 13 software commands 1 1 minimum system requirements 1 5 upgrades 5 2 software configuration register functions 5 155 2 SONET connections 2 9 description 2 20 HSSI support 2 47 signal requirements 2 11 STM 1 ...

Page 285: ...RSP2 1 16 network description 5 39 system 1 16 standard 2 20 STS 1 SONET T3 See SONET HSSI support 2 47 subsystems for troubleshooting 4 3 standard 2 20 cooling 4 7 TAC phone numbers and e mail address xx interface processors 49 TAXI transmission rate AlP power 4 6 Technical Assistance Center R5P2 4 8 See TAC phone numbers and e mail address switch Telco type equipment racks 2 13 emergency power 2...

Page 286: ...obe cables Token Ring 2 31 UL agency approvals 1 5 unbalanced mode E1 G 703 G 704 1 27 2 42 MW 2 39 universal cable unattached message 5 42 universal serial port adapter description 1 25 universal serial port adapters cable pinouts A 7 cable unattached message 5 42 connectors 2 41 replacing 5 43 upgrades microcode 1 18 5 2 5 9 system software 5 1 upstream neighbors 2 37 V 35 cable pinouts A il des...

Page 287: ...X 21 cable pinouts A b description 2 46 port adapter 1 26 serial port adapter cable 2 41 standard 2 46 transmission distances 2 9 cable description 3 25 pinout A 3 Index 17 ...

Page 288: ...18 Cisco 7513 Hardware Installation and Maintenance ...

Page 289: ...0 800 553 NETS 6387 Fax 408 526 4100 Cisco Systems has over 120 sales offices worldwide Call the companys corporate headquarters California USA at 408 526 4000 to contact your local account representative or in North America call 800 553 NETS 6387 Clf eUSYSTEMS I Printed in the iSA on recycled paper containIng 10 post consumer waste 78 1718 01 ...

Reviews: