11
Run Batch Scanning
After completing all necessary settings of batch scanning, you can enter
“
BATCH”
from the main menu of Desktop to perform batch scanning.
Under this mode, all input data will be stored until
the memory storage is full. If the “Auto Save” is
enabled, all data will be saved automatically after
the inputs of each record are completed. You can
continue to the next record input immediately.
Navigation Key
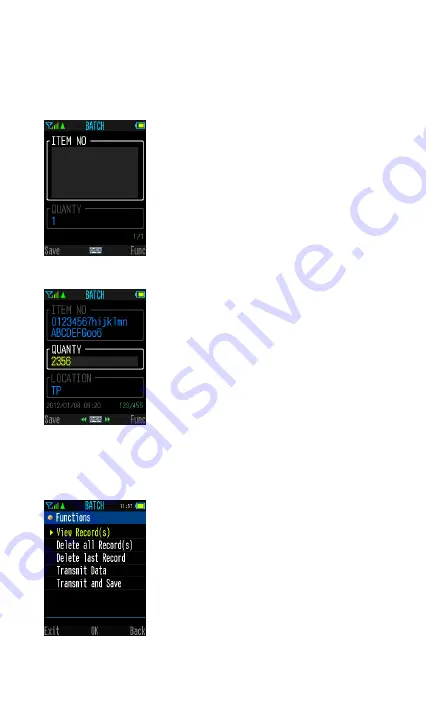
For manual inputs, you can use the Navigation
Key to activate virtual keyboard for manual data
entry. Moreover, you can use the navigation key
to browse previous input records as well.
Press “
Func
” (R key) to enter the function menu
of batch scanning. Then select your desired
function to perform the data transmission or to
manipulate the stored records.
Transmit Data
The scanner is preset to transmit the stored data
through Wi-Fi. During the transmission process,
the scanner will give continuous short clicks and
blue blinks. Then the scanner will give two short
beeps after data transmission is completed.
If you want to transmit the stored data through
USB interface, please make sure a cradle has
been properly connected to the host with a USB
cable. You have to place the scanner onto the
cradle right after you press “Transmit Data”. All
stored data will be transmitted via your specified
interface (USB COM or USB HID).
Transmit and Save
To work with Cino WaveCentre, all transmitted
data can be saved as a “
TXT
” or “
CSV
” file into
your desired destination (folder) of the remote
host. Please note that this function is only
available for transmission via Wi-Fi interface.
Delete all Record(s)
If “Auto Delete” function is disabled, the scanner
still keeps all stored data after transmission. You
have to manually delete all stored records by
executing this function.
Default Screen
Input screen with all
available input fields
Function Menu


