


2
RPMX-100U Installation Manual
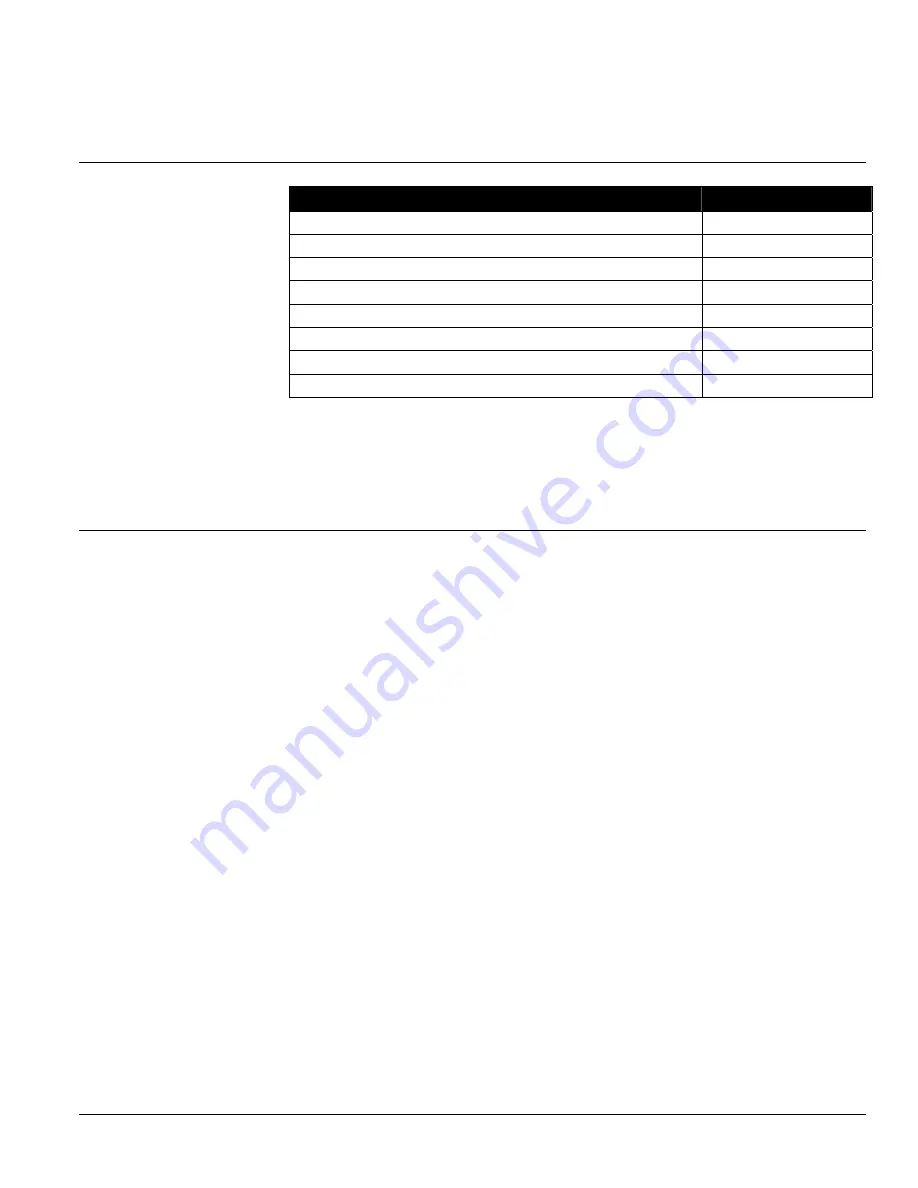
Installation and Setup Process
STEP
Refer to Page
STEP 1 – Unpack the projector
4
STEP 2 – Modify Projector Configuration
4
STEP 3 – Projector Position and Mounting
7
STEP 4 – Connect Sources
9
STEP 5 – Power Projectors On/Off
9
STEP 6 – Adjust Projection Lens
10
STEP 7 – Adjust Image Geometry
12
STEP 8 – Software Setup
13
Please read the following safety / warning guidelines and general
installation instructions before you begin.
Pre-Installation Considerations
When designing a projection room, various factors need to be considered such as, are
you operating single or multiple units, room size, lighting and audience seating. All
these factors must be taken into account in order to achieve the best possible
projector output.
The most important factor to consider is the human factor – the audience. Data
gathered by answering questions like, “How far is the audience sitting from the
display?” and “From which angle will the display be viewed?” are important first
questions to ask yourself when deciding where to place the display, what type and
size of screen to use.
Choose a screen size most appropriate for your lens and application. Keep in mind if
the intended use of the projector is to display text information, the image size must be
large enough to allow the audience to view all text clearly. The eye usually sees a
letter clearly if eye-to-text distance is less than 150 times the height of the letter.
Small text located too far from the eye may be illegible at a distance no matter how
sharply and clearly it is displayed.
To fill a screen with an image, the aspect ratio of the screen should be equal to the
aspect ratio of the image. The aspect ratio of an image is expressed as the ratio of its
width to its height.
It is best to choose a screen with a screen aspect ratio most appropriate for your
intended application. Screens with an aspect ratio of 5:4 are recommended for use
with these projectors.
There are two types of screens that are best suited for rear screen installations:
diffused and optical. A diffused screen has a surface, which spreads the light striking
it. Purely diffused screens have a gain of less than 1. Optical screens take light from
the projector and redirect it to increase the light intensity at the front of the screen.
Screen Size and Type
'