13
RPMX-100U Installation Manual
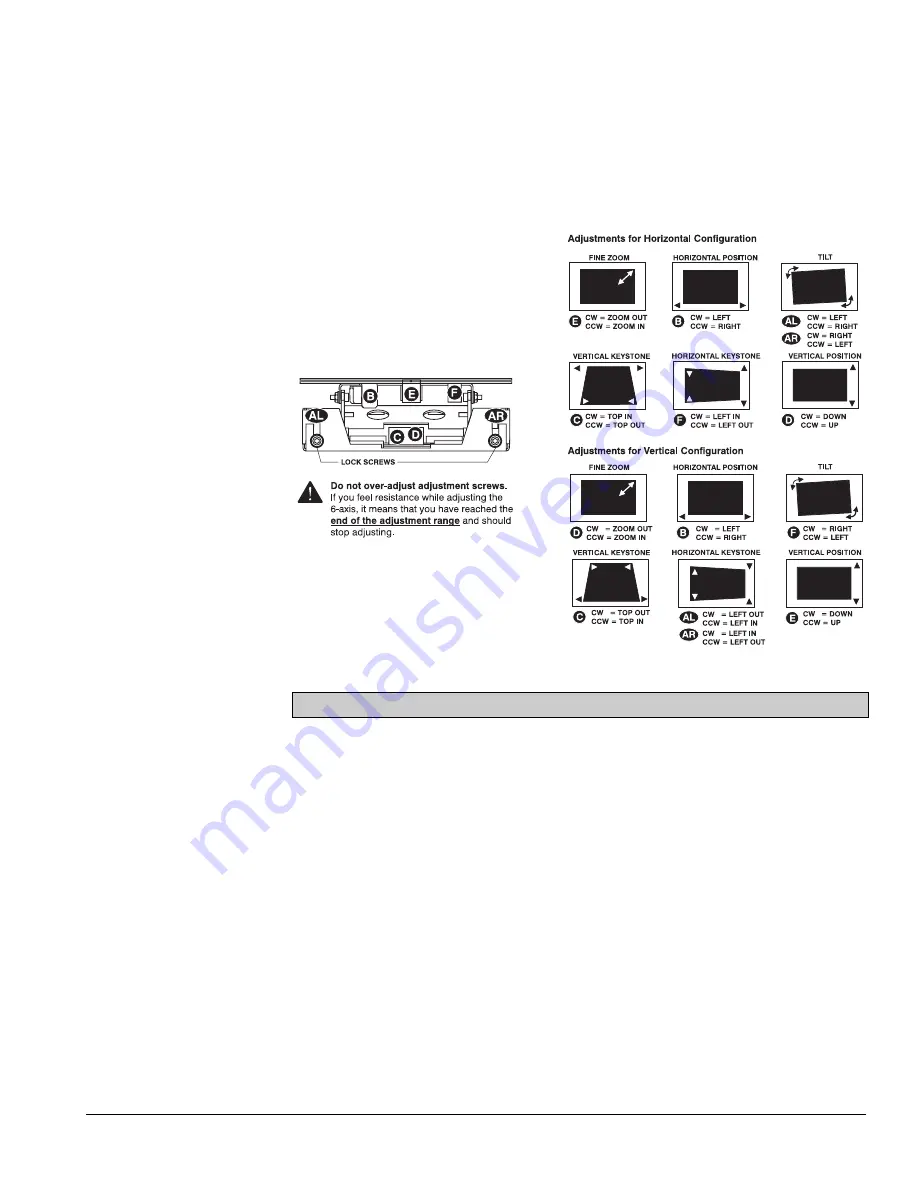
3. Zoom the image out (make smaller) until it fits within the borders of the screen.
4. Adjust keystone and tilt.
5. Zoom the image in (make larger) to fill the screen.
6. Repeat any adjustments if necessary, until the image appears correct.
7. Lock adjustments.
Figure 12.
Step 8 - Software Setup
Most installations require some kind of software setup to optimize settings so the
projector displays the brightest and sharpest image(s).
Use the following step-by-step guide and the User’s Manual for first time software
setup. The User’s Manual describes in detail how to access and change projector
software settings.
1. Unless otherwise indicated, instructions apply to both stand-alone and multi-
projector installations Display an external signal.
2. Setup projector ID number(s).
3. Select
Image Orientation in the Configuration menu to change the orientation of
the displayed image to suit the installation. For example in rear screen
installations select Rear from the pull down list for the image to display
correctly.
4. Modify
Language and any other settings in the Configuration menu to suit your
needs.
5. If working with multiple projectors, enable broadcast control by selecting and
toggling the option All Projectors to YES.


