


12 ................................................................................................................................................................
Operation of Multimedia LCD Display
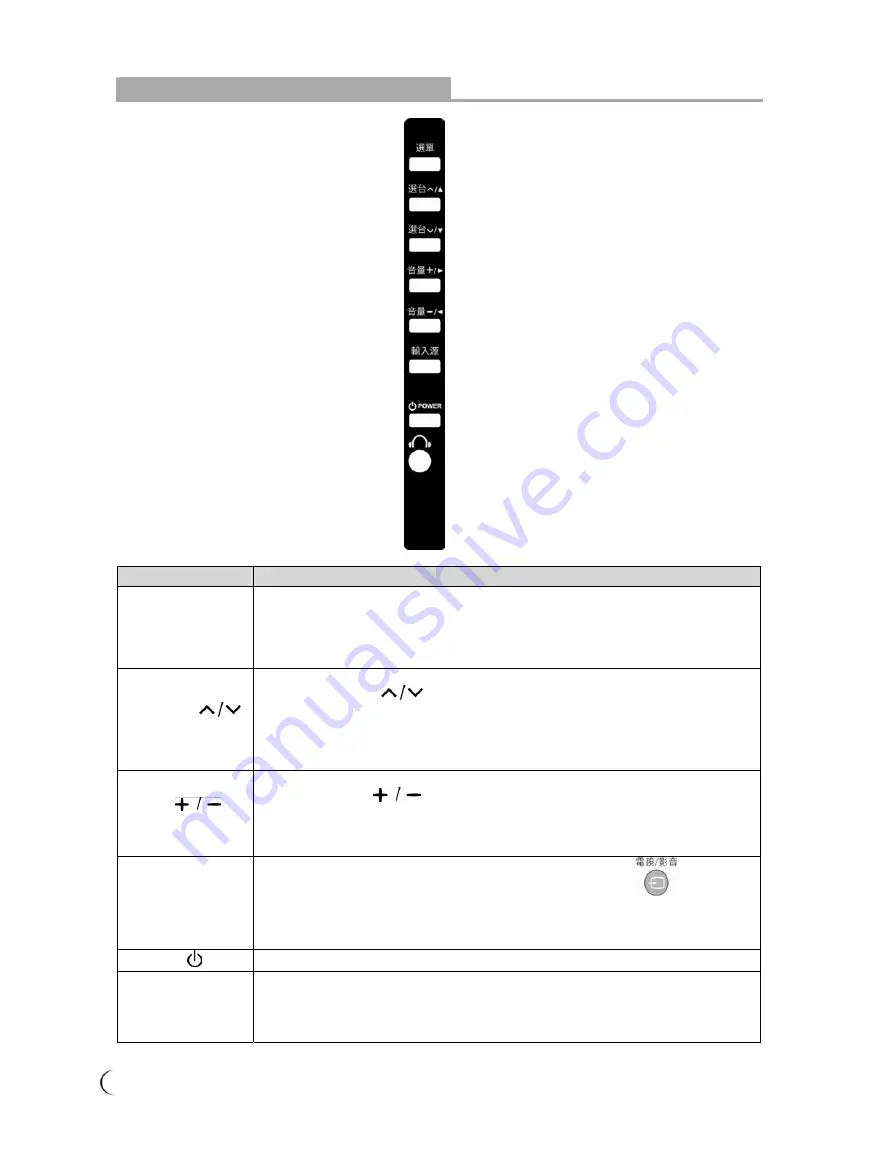
Control panel
Button
Functions
MENU
Adjustment Menu
Press the MENU button on the LCD panel to show the menu to adjust the settings
of the Multimedia LCD Display. To show the screen control window of the
Multimedia LCD Display, please press the MENU button. Press the Adjust
STWX
buttons to adjust the content of each quick menu item.
CH
(FUNCTION
S
/
T
)
Channel Selection (Only under the TV mode)
Use the CHANNEL
button on the LCD panel to select a channel.
(Only under the TV mode. This product requires an optional LCD TV box to
enable the TV function.)
※
Under the MENU mode, the function works as Up and Down buttons of the
selection function.
VOL
(
ADJUST
W
/
X
)
Volume Adjustment
Use the VOLUME
button to adjust the volume of the Multimedia LCD
Display.
※
Under the MENU mode, the function works as Left and Right buttons of the
adjustment function.
SOURCE
Signal Input Source Selection
Press the SOURCE button on the top of the LCD Display or the button on
the remote control to select one of the following modes in order of: TV/Video/Video
S/Component/HDMI Computer Mode.
※
Under the MENU mode, you can use this button for the function of ENTER button.
POWER
Power on/off the TV.
Earphone Output
This connection port connects to earphones (16
Ω
or 32
Ω
) for the audio
output signal.
Once the earphone is connected, the speaker of the Multimedia LCD Display
will stop sound output.
Summary of Contents for TL-24L6000T
Page 1: ......


