background image


8

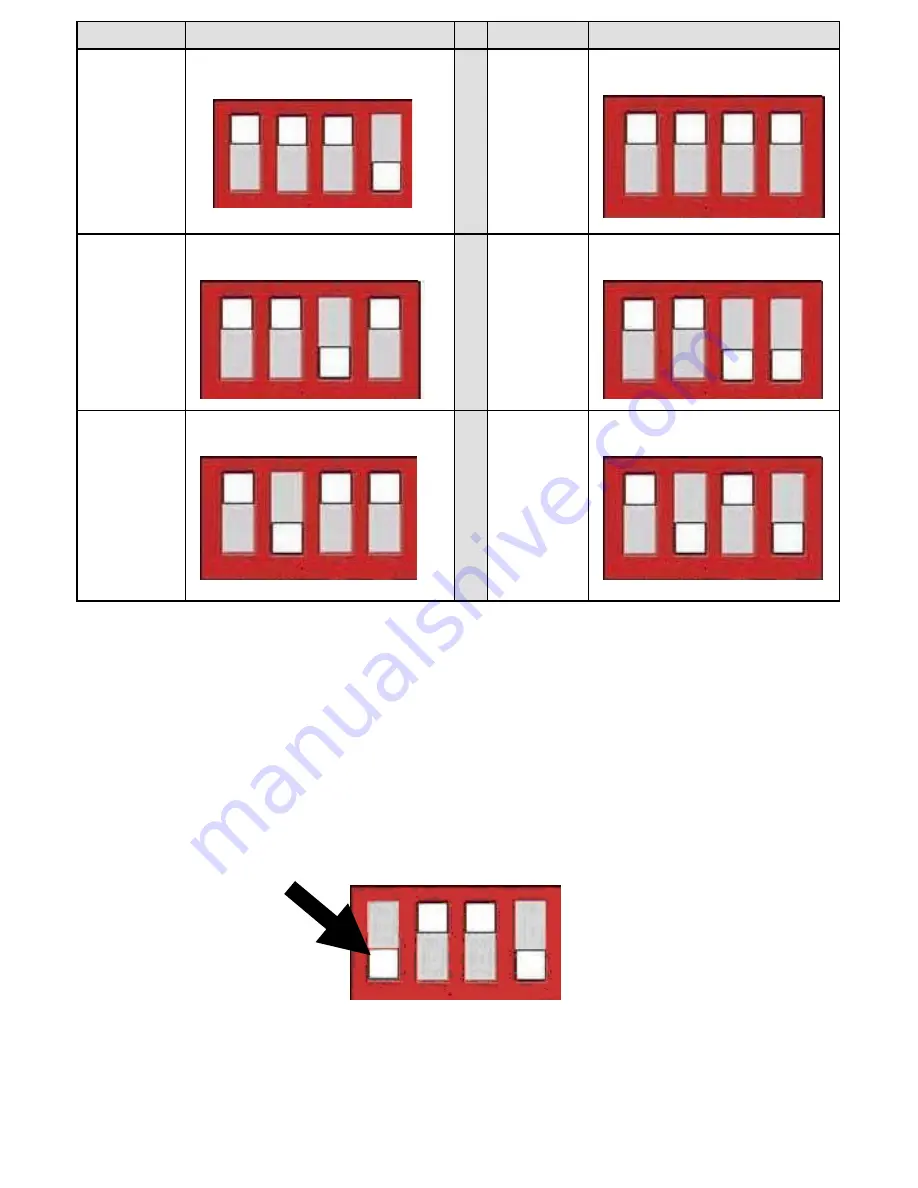
MODE 

SWITCH 


MODE 

SWITCH 

DUAL 


JBOD 


RAID 0 


RAID 1 


SAFE 33 


SAFE 50 


Attention


1

  The RESET button will not work when button no. 4 is pressed 

down. Therefore select your desired mode first before you press 
down button no. 4 to prevent an error function 


2

  Please follow the illustrations and select your desired mode by 

adjusting the switch. Press 

RESET

 once the mode is selected.   

4 3  2 1

4


3  2  1 

4 3 2 1

4 3 2 1

4 3 2 1

4 3 2 1

4 3 2 1

Summary of Contents for CEB-2355S

Page 1: ......

Page 2: ...HDD The advantage of this mode is the data transfer speed but the disadvantage is data might be damaged if one of the HDDs is defect z Raid 1 Mode mirroring One HDD has its data duplicated on another...

Page 3: ...apping 6 OS support Windows 2000 XP Vista Windows7 Mac OS 10 4 8 above Linux SPECIFICATIONS Material Aluminum HDD Type 3 5 and 2 5 SATA HDD Interface Transfer Rate USB2 0 up to 480 Mbps eSATA up to 3...

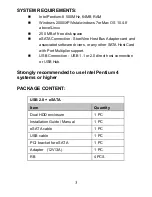
Page 4: ...ociated software drivers or any other SATA Host Card with Port Multiplier support USB Connection USB 1 1 or 2 0 direct host connection or USB Hub Strongly recommended to use Intel Pentium 4 systems or...

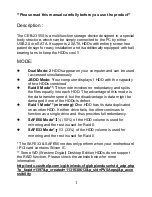
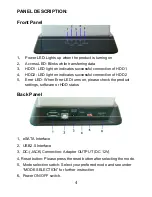
Page 5: ...ates successful connection of HDD2 5 Error LED When Error LED turns on please check the product settings software or HDD status Back Panel 1 eSATA Interface 2 USB2 0 Interface 3 DC JACK Connection Ada...

Page 6: ...5 INSTALLATION GUIDE 1 Press the side button to open the cover 2 Plug in the HDDs and ensure that everything is well connected 3 Close the cover...

Page 7: ...6 4 Connect the DC adapter into with the enclosure and the socket 5 Plug USB or eSATA cable into the enclosure and PC USB eSATA interface can not be used at the same time...

Page 8: ...1 2 minutes when CEB 2355S is connected to the PC for the first time Recognition time varies with different OS 8 Installation of 2 5 HDDs 9 Plug the HDDs into the enclosure and ensure everything is we...

Page 9: ...button no 4 is pressed down Therefore select your desired mode first before you press down button no 4 to prevent an error function 2 Please follow the illustrations and select your desired mode by a...

Page 10: ...now that there is only JBOD mode can be used 7 If you would like to switch from Raid 0 Raid 1 Safe 33 Safe 50 to the other mode please make sure to remove the old partition first and create a new part...

Page 11: ...from the pop up window 2 Select Disk Management under Storage to open the Windows Disk Manager This example below illustrates the JBOD mode which concatenates the capacity of all hard drives connected...

Page 12: ...k should be marked as a Basic disk now If a disk appears as Dynamic right click the disk icon and select Rever to Basic disk Within a few seconds the disk should be marked as a Basic disk If a disk is...

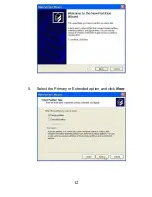
Page 13: ...12 5 Select the Primary or Extended option and click Next...

Page 14: ...13 6 Specify the partition size By default the partition occupies the entire volume Click Next 7 Assign a drive letter or mount path and click Next 8 Name and format the partition and click Next...
Page 15: ...14 9 Review the file system settings and click Finish to create the logical Partition 10 Repeat steps I through 9 to partition any remaining disks...

Page 16: ...elVine Processer disk 8 0GB Config Disk Media will appear Do not remove or modify that partition After you configure and partition the new volumes restore the back up data to the new configuration 1 L...

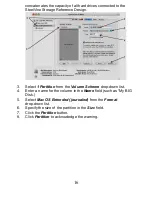
Page 17: ...Partition from the Volume Scheme drop down list 4 Enter a name for the volume in the Name field such as My BIG Disk 5 Select Mac OS Extended journaled from the Format drop down list 6 Specify the siz...

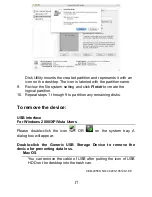
Page 18: ...at steps 1 through 9 to partition any remaining disks To remove the device USB interface For Windows 2000 XP Vista Users Please double click the icon OR on the system tray A dialog box will appear Dou...

Reviews: