Installation Instructions
WM210-220-230-240S/SI
13
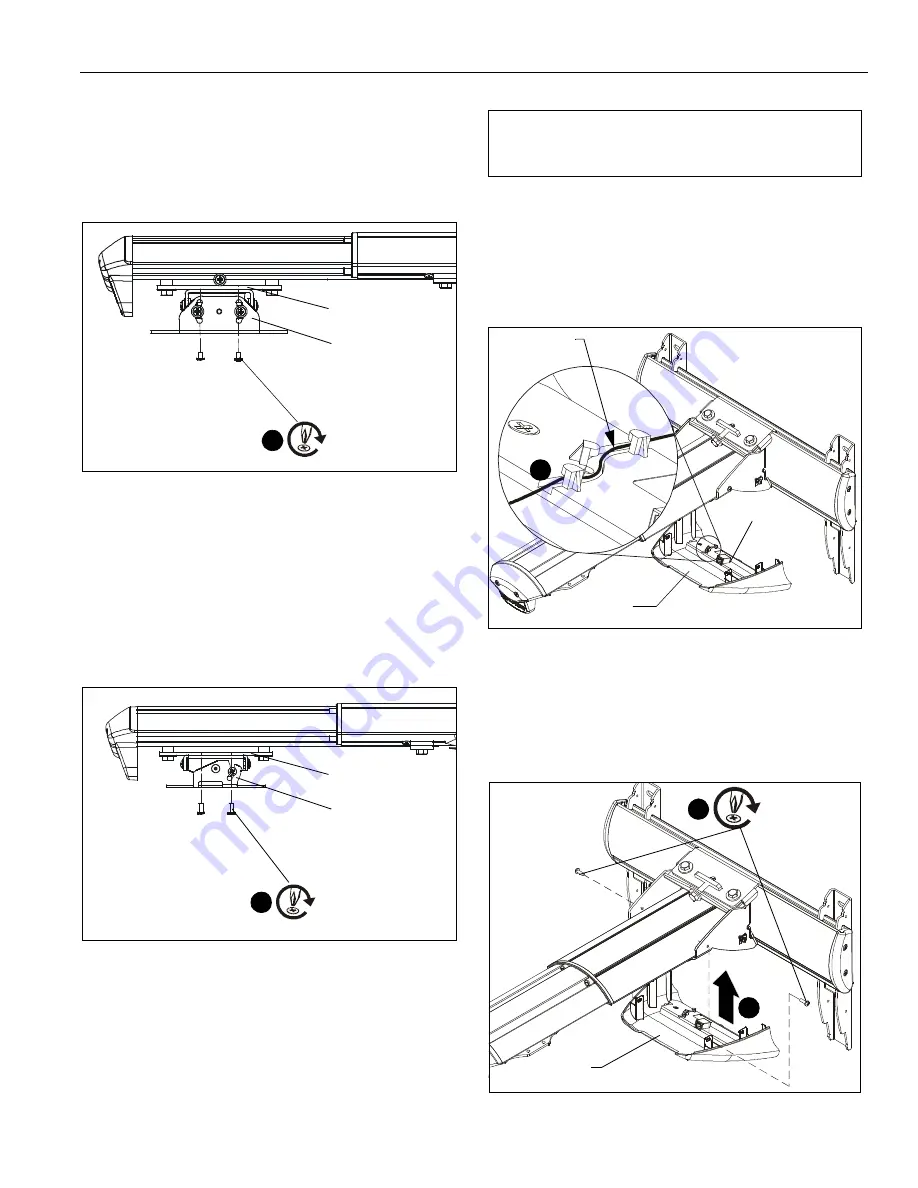
RPA Installation
1.
Line up mounting holes on RPA mount with corresponding
holes on projector mounting plate. (See Figure 17)
2.
Install four 1/4-20 x 3/8" Phillips pan machine screws (G)
through RPA holes and into projector mounting plate. (See
Figure 20)
Figure 20
3.
Install interface and projector to RPA according to RPA
installation instructions.
RSA Installation
1.
Line up mounting holes on RSA mount with corresponding
holes on projector mounting plate. (See Figure 17)
2.
Install four #10-24 x 3/8" Phillips pan machine screws (S)
through RSA holes and into projector mounting plate. (See
Figure 21)
Figure 21
3.
Install interface and projector to RSA according to RSA
installation instructions.
WM2XXS
I
INTERACTIVE MOUNT
Installing Mount Covers
1.
Route cables from projector through cartridge in interactive
cover (Y). (See Figure 22)
Figure 22
2.
Connect USB cable (AH) to cartridge through bottom of
lower cover.
3.
Raise the lower cover containing cartridge and attach to
wall mount using two 8-32 x 3/8" Phillips pan head screws
(AB). (See Figure 23)
Figure 23
RPA
Mounting plate
(G) x 4
2
RSA
Mounting plate
(S) x 4
2
IMPORTANT ! :
Complete the installation by
proceeding to
WM2XXSI Interactive Mount
section or
WM2XXS Standard Mount
section, as appropriate.
Route cables
Cartridge
1
Cartridge
(Y)
3
(AB) x 2
(Y)
3


