background image

Black plate (10,1)

Chevrolet Equinox and GMC Terrain Navigation System (Include Mex) - 2012

10

Infotainment System

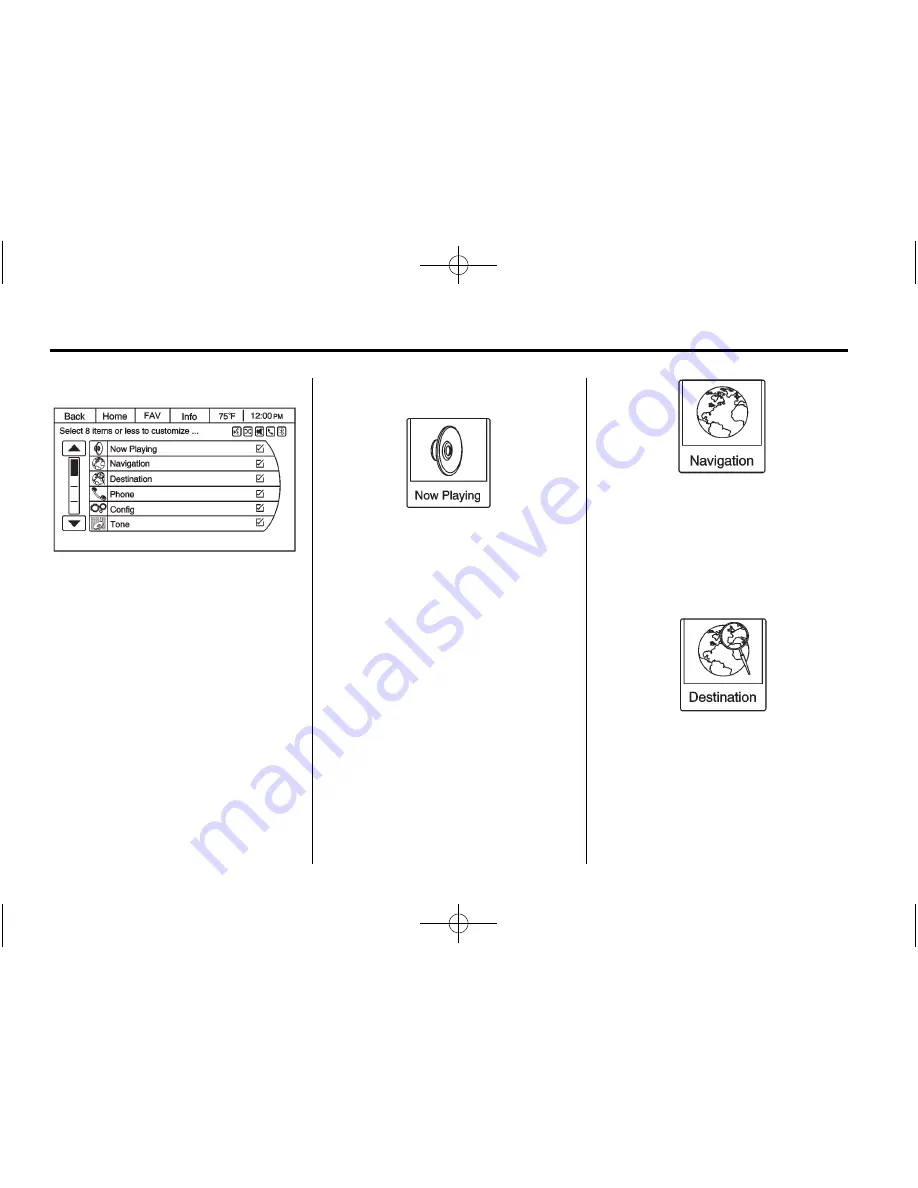
Out of all available Home Page
icons, up to eight icons can be
selected and sorted for the first
Home Page screen.

Home Page Features

Press the Now Playing screen
button to display the active source
page. The sources available are
AM, FM, XM (if equipped), CD,
USB/iPod, and AUX.

See

AM-FM Radio on page 14

,

Satellite Radio on page 20

,

CD

Player on page 21

,

Auxiliary

Devices on page 26

, and

Configure

Menu on page 49

.

Press the Navigation screen button
to display a map of your current
vehicle position. See

Using the

Navigation System on page 30

,

Maps on page 34

,

Navigation

Symbols on page 35

, and

Configure

Menu on page 49

.

Press the Destination screen button
to display the Destination Entry
Home Page or the Destination
Menu. The available screen buttons
provide easy access to a variety
of ways to enter a destination.
See

Destination on page 37

.

Summary of Contents for 2011GMC Terrain Navigation System

Page 1: ...vices 26 Navigation 30 Using the Navigation System 30 Maps 34 Navigation Symbols 35 Destination 37 OnStar Destination Download 48 Configure Menu 49 Global Positioning System GPS 61 Vehicle Positioning 62 Problems with Route Guidance 62 If the System Needs Service 63 Map Data Updates 63 Database Coverage Explanations 64 Voice Recognition 64 Phone 65 Bluetooth 65 Using Voice Recognition 66 Pairing a...

Page 2: ...Black plate 2 1 Chevrolet Equinox and GMC Terrain Navigation System Include Mex 2012 ...

Page 3: ...r manual Please refer to the purchase documentation relating to your specific vehicle to confirm each of the features found on your vehicle For vehicles first sold in Canada substitute the name General Motors of Canada Limited for Chevrolet and GMC Motor Divisions wherever it appears in this manual Keep this manual with the owner manual in the vehicle so it will be there if it is needed If the veh...

Page 4: ...ked Do the following before driving Become familiar with the navigation system operation buttons on the faceplate and touch sensitive screen buttons Set up the audio by presetting favorite stations setting the tone and adjusting the speakers Set up the navigation features such as entering an address or a preset destination Set up phone numbers in advance so they can be called easily by pressing a ...

Page 5: ...ohibited by signs at the intersection Always evaluate whether following the system s directions is safe and legal for the current conditions When the navigation system is turned on a screen may appear with information that must be read and acknowledged before accessing some navigation features After acknowledging the start up information the NAV Navigation and DEST Destination functions are access...

Page 6: ...vigation System Include Mex 2012 6 Infotainment System Navigation System Overview The navigation system is controlled by using the buttons on the faceplate and the touch screen buttons See Infotainment Control Buttons in this section for more information ...

Page 7: ...ume SOURCE Press to change the audio sources such as AM FM Radio XM if equipped CD and AUX TONE Press to access the sound menu screen to adjust bass midrange and treble See AM FM Radio on page 14 for more information INFO Information Press to toggle through an audio or navigation information screen CONFIG Configure Press to adjust features for radio navigation display phone vehicle and time See Co...

Page 8: ...rn to playing speed See CD Player on page 21 and MP3 on page 24 for more information 4 For AM FM or XM if equipped press to seek to the next strong station g SEEK 1 Press to seek to the beginning of the current or previous track If the track has been playing for less than five seconds it seeks the previous track If longer than five seconds the current track starts from the beginning 2 Press and ho...

Page 9: ...nus press to go back to the Home Page to start a different feature FAV Press to display a page of stored favorite AM FM or XM if equipped stations Keep pressing FAV to scroll through the favorite pages Info Press to toggle through an audio or a navigation information screen More Press to cycle through available Home Pages Menu Press to go to the Home Page Menu The Home Page Menu lists the options ...

Page 10: ...d and AUX See AM FM Radio on page 14 Satellite Radio on page 20 CD Player on page 21 Auxiliary Devices on page 26 and Configure Menu on page 49 Press the Navigation screen button to display a map of your current vehicle position See Using the Navigation System on page 30 Maps on page 34 Navigation Symbols on page 35 and Configure Menu on page 49 Press the Destination screen button to display the D...

Page 11: ...nu on page 49 Press the Viewer screen button to view pictures on your USB stick or SD card Pictures on the SD card can only be viewed through a USB adapter Press the FM screen button to display the FM main page and play the current or last tuned FM station See AM FM Radio on page 14 Press the AM screen button to display the AM main page and play the current or last tuned AM station See AM FM Radio...

Page 12: ...tton to display the USB main page and play the current or last track selected See Auxiliary Devices on page 26 Press the AUX screen button to access any connected auxiliary device See Auxiliary Devices on page 26 Press the XM Traffic screen button if equipped to display the Traffic main page Select other traffic related options from that list See XM NavTraffic If Equipped under Configure Menu on p...

Page 13: ...onversion To change the display units between English and metric units see Driver Information Center DIC in the Index of the vehicle owner manual Deleting Personal Information The navigation system can store destinations and personal information such as names and addresses At times such as when selling or disposing of your vehicle you may want to delete this information Address Book Previous Desti...

Page 14: ...st the volume See Steering Wheel Controls in the vehicle owner manual for more information To access the radio main page press the SOURCE button on the faceplate the Now Playing screen button or one of the audio screen buttons on the Home Page While on the audio main page press the Source button repeatedly to display and cycle through the available sources AM FM and XM if equipped CD USB iPod and ...

Page 15: ...g the tone Adjusting the speakers Setting the Tone To adjust the tone Treble Press or to change the level Middle Midrange Press or to change the level Bass Press or to change the level Adjusting the Speakers To adjust the speaker balance Press the left arrow on the bottom for more sound from the left speakers or the right arrow on the bottom for more sound from the right speakers The middle positi...

Page 16: ...dio station To select a preset station press the corresponding preset button Seeking a Station Press g SEEK or l SEEK to search for a station AM 1 Press the AM screen button on the Home Page or select AM from the source pop up to display the AM main page 2 From the AM screen press the Menu screen button to display the menu options 3 Press to select the desired option Favorites List Press to displa...

Page 17: ...ed option Favorites List Press to display a list of favorite preset stations FM Stations List Press to display the FM station list FM Categories Press to display the FM categories e g sports news pop music Update FM Stations List Press to start a search for the strongest stations in your area to populate the FM Stations List XM If Equipped 1 Press the XM screen button on the Home Page or select XM...

Page 18: ...ton on the faceplate or the Source screen button to display a pop up of available audio sources Touch tap or press the SOURCE button on the faceplate repeatedly to change the desired source Storing Radio Station Presets There are a few ways to store presets Up to 36 preset stations can be stored AM FM and XM if equipped can be mixed 1 From the AM FM or XM main page press and hold one of the preset...

Page 19: ... the page Press one of the preset screen buttons to go to the selected preset station In the AM FM or XM if equipped main page press one of the preset screen buttons to go to the selected preset station Mixed Band Presets Each page can store six preset stations The presets within a page can be from different radio bands To scroll through the pages press the FAV button on the faceplate or the FAV s...

Page 20: ...to work improperly If this happens contact the radio station The RDS system can be turned on or off When information is broadcast from the current FM station the station name or call letters display on the audio screen RDS can provide a program type PTY for current programming and the name of the program being broadcasted Satellite Radio XM Satellite Radio Service Vehicles with an XM satellite rad...

Page 21: ...on insert a disc into the slot label side up The player pulls it in and begins playing While playing the navigation system is available The system is capable of playing Most audio CDs CD R CD RW MP3 or unprotected WMA formats When playing any compatible recordable disc the sound quality can be reduced due to disc quality the method of recording the quality of the music that has been recorded or th...

Page 22: ...tomatically plays once loaded Press X to eject a disc from the CD player If the disc is not removed within a short period of time it is automatically pulled back into the player Playing an Audio CD 1 Press the CD screen button on the Home Page or select CD from the source pop up to display the CD main page 2 From the CD screen press the Menu screen button to display the menu options 3 Press to sel...

Page 23: ...g speed Elapsed time displays MENU SEL Knob Turn to the right or left to select the next or previous track Press this knob to select the menu If a track is selected from the menu the system plays the track and returns to the CD screen Error Messages If Disc Error displays and or the disc comes out it could be for one of the following reasons The disc has an invalid or unknown format The disc is ve...

Page 24: ...d 8 16 24 32 40 48 56 64 80 96 112 128 144 160 192 224 256 and 320 kbps Maximum number of folders eight folders with 255 files per folder Maximum of 1 000 files on a disc Recorded on a CD R or CD RW with a maximum capacity of 700 MB The Artist Album Song Titles Genre information requires a CD to be fully scanned before the music navigator works with these menus MP3 Music Menu Press the Menu screen...

Page 25: ...iew the genres Select a genre to view a list of all songs of that genre Select a song from the list to begin playback Folders Press to open a folder list to access the files within the folder structure Root Directory The root directory is treated as a folder All files contained directly under the root directory are accessed prior to any root directory folders Empty Folders If a root directory or f...

Page 26: ...ferent source is currently active press the Now Playing screen button on the Home Page then press Source repeatedly to cycle through all of the available audio source screens until the AUX source screen is selected Playing from a USB A USB mass storage device can be connected to the USB port The USB port is in the center console The USB icon displays when the USB device is connected USB MP3 Player...

Page 27: ...ource screen is selected While the USB source is active use the following to operate USB function l SEEK 1 Press to seek to the next track 2 Press and hold to advance quickly through playback Release the button to return to playing speed Elapsed time displays g SEEK 1 Press to seek to the beginning of the current or previous track If the track has been playing for less than five seconds the previo...

Page 28: ...ect a song from the list to begin playback Folders Press to open a folder list to access the files within the folder structure File System and Naming The song titles artists albums and genres are taken from the file s ID3 tag and are only displayed if present in the tag If a song title is not present in the ID3 tag the radio displays the file name as the track name Playing from an iPod iPod nano 1...

Page 29: ...ary input jack using a standard 3 5 mm 1 8 in stereo cable iPod Menu Press any of the following buttons on the iPod Menu Shuffle Songs Press to play the tracks randomly Press again to stop shuffle Playlists 1 Press to view the playlists stored on the iPod 2 Select a playlist name to view a list of all songs in the playlist 3 Select the desired song from the list to begin playback Artists 1 Press t...

Page 30: ...iew the composers stored on the iPod 2 Select a composer name to view a list of all songs by that composer 3 Select the desired song from the list to begin playback Audio Books 1 Press to view the audio books stored on the iPod 2 Select an audio book name to view a list of all audio books 3 Select the desired audio book from the list to begin playback Playing from an iPhone This feature supports t...

Page 31: ...rth Up Displays North at the top of the map screen regardless of the direction the vehicle is traveling 2D Heading Up Displays the direction the vehicle is traveling The shaded triangle icon points North 3D Heading Up Displays the same as 2D Heading Up but the map is in 3D Map Modes Press to change the view of the maps while using the navigation function The system offers a variety of full and spl...

Page 32: ... on a planned route Traffic Settings Press to customize traffic options This feature can also be accessed by pressing the traffic light screen button displayed at the left lower side of the map screen See Configure Menu on page 49 in this section POIs Nearby Press to display a search list of nearby POIs Select the desired POI Show POIs on Map Press to customize which major POI categories are displ...

Page 33: ...nation Map Adjustments The system lets you adjust the scale of view on the map Also as you drive the map scrolls automatically based on the direction of travel Map Scales There are two methods to change the map scale Turn the MENU SEL knob clockwise or counterclockwise to zoom out or in Press the Map Scale button on the left bottom corner of the map screen to change the zoom level The map scale ba...

Page 34: ...nd return to the current vehicle location on the map Press the cycling arrows located at the top of the map screen to toggle from the normal top bar Home FAV and Info to the audio information bar Maps This section includes basic information that you need to know about the map database The maps are stored on a Secured Digital SD card that is used in the navigation system Detailed Areas Road network...

Page 35: ...e completed after the production of the compact flash drive The navigation system provides full route guidance in the detailed map areas Navigation Symbols Following are the most common symbols that appear on a map screen The vehicle symbol indicates the current position and heading direction of the vehicle on the map The destination symbol marks the final destination after a route has been planne...

Page 36: ...egardless of the direction the vehicle is traveling Select this screen symbol to change the view to Heading up or 3D This symbol indicates that the map view is Heading up Heading up view displays the direction the vehicle is traveling at the top of the map screen The shaded triangle indicates North Press this screen symbol to change to 3D mode The 3D symbol is the same as the Heading up symbol but...

Page 37: ...ighway Driving on a Residential Road Destination If route guidance is not active press the Destination Entry screen button on the Home Page or the DEST button on the faceplate to access the Destination screen Several options can be selected to plan a route by entering destinations Some destination entry items such as Previous Destinations Address Book and My Home may be grayed out if no destinatio...

Page 38: ...haracter layouts Symbols Use to select symbols Space Use to enter a space between characters or the words of a name Delete Press to delete an incorrect character that has been selected Address Entry Press the Address screen button to display the Enter Address screen Set a route by entering the state name city name street name house number and intersection To make name selection easier the system h...

Page 39: ...cally selected 4 Press the Done screen button at any time and the system tries to resolve a destination based on the entered information then displays it on the Destination Confirmation screen 5 Press the Start Guidance screen button and the route calculates Entering the street name first 1 Make sure the state has been entered before selecting the street name field Enter the street name Do not ent...

Page 40: ... options can be selected to plan a route The POI entry list allows selection of a destination Entering by POI name 1 Select the State 2 Select Search by Name 3 Enter the POI name 4 Select a few of the characters or spell the name in full by pressing on the alpha keyboard 5 Press the List screen button or if the list has six or fewer items a list of POIs will immediately display 6 Press on the desi...

Page 41: ...15 points that have been previously entered can be recalled If the list is full the oldest destinations are automatically deleted once the newest destinations are added Address Book If no destination is saved to the address book save a destination by doing the following 1 Press Destination on the Home Page or the DEST faceplate button 2 Enter an address using any of the destination methods Address...

Page 42: ...ce screen button and the route calculates To edit Address Book entries 1 Select an item from the address book 2 On the Destination Confirmation screen select Edit 3 The system displays the options Name Number Icon and Delete Press Delete to delete the destination from the address book 4 To customize the address book entry select Name Number or Icon Latitude Longitude Coordinates Choose a destinati...

Page 43: ...rite Routes screen button 2 Press the Favorite Routes screen button to display a list of available favorite routes 3 Scroll and select a favorite route 4 Press the Start Guidance screen button The route calculates To delete a favorite route 1 Press Destination on the Home Page or the DEST button on the faceplate to display the Favorite Routes screen button Press this button to display the list of ...

Page 44: ...e Page or the DEST button on the faceplate to display the Pick from Map screen button Press this button to display the map screen with a scroll symbol centered on the map Press the Zoom in out button on the screen and press the map to locate the destination to select Press and hold a finger on the map to activate fast scrolling Press the Go button on the bottom of the screen to display the Destina...

Page 45: ...tions in the address book Save Edit Press to save the displayed destination into the address book If the displayed destination is already stored in the address book Edit will show as the menu item Destination Menu with Route Guidance Active Several functions can be performed after a destination has been entered Press Destination on the Home Page or the DEST on the faceplate to access the Destinati...

Page 46: ...n Settings Button later in this section Avoid List Select Avoid List to display a list of avoided road segments with the option to remove the avoided items from the list Detour Press Detour to display the route detour options Select to detour the whole route or by a specific distance Route Options This feature can be accessed from the Destination Confirmation Menu Navigation Settings Menu and Dest...

Page 47: ...ired on the route To delete a waypoint 1 From the Destination menu press Waypoint List 2 Press Delete Waypoints 3 Select the waypoint to be deleted Press the Delete screen button The Sort Waypoints feature allows reorganization of the waypoint list To sort a waypoint 1 From the Destination menu press Waypoint List 2 Press Sort Waypoints 3 Select the waypoint to move 4 Select the location to move t...

Page 48: ... the map database If the address is not found within the map database the system may use latitude and longitude coordinates to locate the destination If the system is unable to locate the address the Destination Not Found screen displays Route Guidance Not Active If an OnStar destination is downloaded while route guidance is not active the navigation system displays a pop up screen with the follow...

Page 49: ...nt vehicle position All other buttons on the pop up screen operate as described under Route Guidance Not Active Previous Destinations Previously downloaded OnStar destinations are saved under Previous Destinations in the navigation system where they can be accessed or saved to the Address Book Configure Menu The Configuration Menu is used to adjust features and preferences such as Sound Radio Nav ...

Page 50: ...ngs From the Time Date Settings screen button press to display the Time Date Settings menu Press the desired option to adjust Set Time Press the up or down arrows to increase or decrease the Hours and Minutes displayed on the clock Set Date Press the up or down arrows to increase or decrease the day Set Time Format Press the 12 Hours screen button for standard time press the 24 Hours screen button...

Page 51: ... from changing road surfaces driving speeds or open windows This feature works best at lower volume settings where background noise is typically louder than the sound system volume Startup Volume Press to set the maximum volume level for startup that will be used even if a higher volume had been set when the radio was turned off Radio Favorites Press to select the number of FAV pages to be used in...

Page 52: ...ions are only available after a route is planned Press Navigation Settings to access the navigation system settings Voice Prompt The Voice Prompt Menu allows changes to the voice prompt features Navigation Voice Volume Select Navigation Voice Volume to change the volume of the navigation prompts Navigation Voice Guidance Select the On or Off button to turn the voice instructions on or off while tr...

Page 53: ...ture Traffic Events Sort Method Press to display a submenu of sort options Sort by Distance Press to display traffic events in order of distance with the closest event shown first Sort by Name Press to display traffic events in alphabetical order Show Traffic Icons Press to display traffic icons on the map All Traffic Events On Press to enable display of all traffic icons on the map All Traffic Ev...

Page 54: ...een 40 km and 73 km 25 and 45 mph Green indicates normal traffic flow with average speed above 73 km 45 mph Closed Road Traffic Delays Roadworks and Advisories Select the traffic event group for display on the map screen Some events may cover more than one traffic condition See the following traffic conditions Traffic Conditions The following traffic condition icons may display Stopped Traffic Tra...

Page 55: ...enabled the system will provide a pop up if a possible guidance route is available to detour around traffic events on the route Select Yes from the pop up and the new route will be calculated XM NavTraffic information might not be provided for the alternate route depending on what type of road the vehicle is traveling Avoid Freeways Press to avoid major roads A checkmark appears to indicate the Av...

Page 56: ...deletion Guidance Alert Press to enable the guidance alert pop up to be viewed on the map or on the main screens such as audio weather phone etc A checkmark appears to indicate the guidance alert mode is on Vehicle Settings See Vehicle Personalization in the Index of the vehicle owner manual for more information Display Settings Press the Config button on the Home Page or the CONFIG button on the ...

Page 57: ...M NavTraffic service Real time traffic information is provided to fully integrate the navigation system to display current traffic conditions for the chosen route See Traffic Settings in this section for more information A screen displays if the XM NavTraffic subscription is not activated If activated traffic information displays Unscheduled traffic incident data such as accidents and disabled veh...

Page 58: ...hicle s current position Traffic Events on Route Press to display a list of reported traffic conditions on the current route The button is toned down if no route is active Traffic Settings Press to customize traffic options XM Weather If Equipped From the Home Page press the XM Weather screen button The system displays the current weather page Current Condition The current weather page shows the c...

Page 59: ...rent weather condition of the destination city Weather Alerts From the XM Weather Menu press the Weather Alerts screen button to display any current weather advisory warnings in effect near the current position Weather Around Other Cities Select this option to view weather conditions around or in a specific city entered by name or selected from the map Restore to Current Location Press the Restore...

Page 60: ... approximately six mega pixels may not show Only jpeg files are supported 1 Press the Viewer screen button on the Home Page 2 The system does a search to find the picture folders A Please wait message displays until the search is finished 3 A list displays Select a picture to view 4 Once a picture displays the following options are available Info Press to turn file name information on or off S Pre...

Page 61: ...ignals and map data At times other interference such as the satellite condition road configuration condition of the vehicle and or other circumstances can interfere with the navigation system s ability to determine the accurate position of the vehicle The GPS shows the current position of the vehicle using signals sent by the GPS Satellites of the United States Department of Defense When the vehic...

Page 62: ...ering and or exiting a parking lot garage or a lot with a roof The GPS signal is not received A roof carrier is installed on the vehicle Tire chains have been installed The tires are replaced or worn The tire pressure for the tires is incorrect This is the first navigation use after the map data is updated The 12 volt battery is disconnected for several days The vehicle is driving in heavy traffic...

Page 63: ... the vehicle position updates If the System Needs Service If the navigation system needs service and the steps listed here have been followed but there are still problems see your dealer for assistance Map Data Updates The map data in the vehicle is the most up to date information available when the vehicle was produced The map data is updated periodically provided that the map information has cha...

Page 64: ...d voice recognition for features such as Hands Free Calling See Bluetooth on page 65 for more information Voice recognition can be used when the vehicle is on or when Retained Accessory Power RAP is active See Retained Accessory Power RAP in the vehicle owner manual for more information Using Voice Recognition 1 Press and hold the b g steering wheel button for less than two seconds The audio syste...

Page 65: ...ols and operation of the infotainment and navigation system Pair cell phone s to the vehicle The system may not work with all cell phones See Using Voice Recognition on page 66 and Pairing a Phone Using the Infotainment System on page 72 for more information If the cell phone has voice dialing capability learn to use that feature to access the address book or contact list See Using Voice Recogniti...

Page 66: ...phone Follow the instructions on the cell phone to enter the PIN provided in Step 3 After the PIN is successfully entered the system prompts you to provide a name for the paired cell phone This name will be used to indicate which phones are paired and connected to the vehicle See Listing All Paired and Connected Phones later in this section for more information 6 Repeat Steps 1 through 5 to pair a...

Page 67: ... Numbers The system can store up to 30 phone numbers as name tags in the Hands Free Directory that is shared between the Bluetooth and OnStar systems The following commands are used to delete and store phone numbers Store This command will store a phone number or a group of numbers as a name tag Digit Store This command allows a phone number to be stored as a name tag by entering the digits one at...

Page 68: ...Delete Command 1 Press b g 2 Say Delete 3 Say the name tag you want to delete Using the Delete All Name Tags Command This command deletes all stored name tags in the Hands Free Calling Directory and the OnStar Turn by Turn Destinations Directory To delete all name tags 1 Press b g 2 Say Delete all name tags Listing Stored Numbers The list command will list all stored numbers and name tags Using th...

Page 69: ...digit one at a time that you want to dial After each digit is entered the system repeats back the digit it heard followed by a tone After the last digit has been entered say Dial Once connected the person called will be heard through the audio speakers Using the Re dial Command 1 Press b g 2 After the tone say Re dial Once connected the person called will be heard through the audio speakers Receiv...

Page 70: ... call press b g and then say Mute Call To cancel mute press b g and then say Un mute Call Transferring a Call Audio can be transferred between the Bluetooth system and the cell phone The cell phone must be paired and connected with the Bluetooth system before a call can be transferred The connection process can take up to two minutes after the vehicle is started To Transfer Audio from the Bluetoot...

Page 71: ...ding to the phone s operating instructions Dual Tone Multi Frequency DTMF Tones The Bluetooth system can send numbers and numbers stored as name tags during a call Use this feature when calling a menu driven phone system Account numbers can also be stored for use Sending a Number or Name Tag During a Call 1 Press b g The system responds Ready followed by a tone 2 Say Dial 3 Say the number or name ...

Page 72: ...to display the Phone screen 2 Press the 4 screen button to display more options 3 Select the Pair Device Phone screen button The pairing process will begin searching for Bluetooth devices on the cell phone See the cell phone manufacturer s user guide for information on this process On the cell phone locate the device named General Motors or Your Vehicle Follow the instructions given on the cell ph...

Page 73: ...provided for confirmation say Yes 5 The system responds with phone name has been successfully paired after the pairing process is complete Listing All Paired and Connected Phones 1 Press the Phone screen button on the Home Page or 5 0 on the faceplate to display the Phone screen 2 Press the 4 screen button to display more options 3 Turn the MENU SEL knob until Device List displays Press the MENU S...

Page 74: ...ere is a currently connected phone it will be marked on the screen Deleting a Paired Phone 1 Press the Phone screen button on the Home Page or faceplate to display the Phone screen 2 Press the 4 screen button to display more options 3 Turn the MENU SEL knob until Device List displays Press the MENU SEL knob or press the Device List screen button to display other options ...

Page 75: ... system 5 Once a phone has been deleted the only way to connect back to that phone is to pair the phone again Linking to a Different Phone To link to a different phone the new phone must be in the vehicle and available to be connected to the Bluetooth system before the process is started 1 Press the Phone screen button on the Home Page or 5 0 on the faceplate to display the Phone screen 2 Press th...

Page 76: ...ainment System 3 Turn the MENU SEL knob until Device List displays Press the MENU SEL knob or press the Device List screen button to display other options 4 Select the phone to be linked and then follow the on screen prompts 5 The Phone screen will be displayed with the name of the phone linked ...

Page 77: ...r 5 0 on the faceplate to display the Phone screen 2 Press the Menu button on the screen to access the Phone Menu Enter Number Use this option to enter a phone number and make a call 1 Turn the MENU SEL knob then press it to select Enter Number A dial pad displays 2 Enter the phone number by pressing the numbers on the keypad 3 Press the Dial screen button to make the call ...

Page 78: ...e phone book can be accessed by pressing the Phone Book selection on the Dial Number screen 1 Turn the MENU SEL knob to select the letter group associated with the person or place to call 2 Press the MENU SEL knob to select the letter group 3 Select the person or place to call 4 Press the MENU SEL knob or number on the screen to make the call Call Lists The Call List selection from the Phone Menu ...

Page 79: ...nfotainment System 79 1 Press the Phone screen button on the Home Page or 5 0 on the faceplate to display the Phone screen 2 Press the Menu screen button 3 Select the Call Lists screen button 4 Turn the MENU SEL knob or press to select either Incoming Calls Outgoing Calls or Missed Calls ...

Page 80: ...r that person Accepting or Declining an Incoming Call When an incoming call is received the audio is muted and a ring tone sounds Accepting a Call Press the Answer option on the screen to answer the call Declining a Call Select the Decline option on the screen Call Waiting Call waiting must be supported on the Bluetooth phone and enabled by the wireless service carrier to work Switching Calls Only...

Page 81: ...nt call 1 Press the Phone screen button on the Home Page or 5 0 on the faceplate until the Phone main screen is shown with the current active call 2 Press the Menu button 3 Press Enter Number on the screen 4 Make another call The first call will be placed on hold while the second call is dialing and connected 5 To make a conference call select the Merge Calls screen button in the Phone Menu and bo...

Page 82: ...isplay the Phone screen 2 Press the Phone screen button to access the Phone Menu 3 Press the Mute Call screen button 4 Press Mute Call again to unmute the call Dual Tone Multi Frequency DTMF Tones The in vehicle Bluetooth system can send numbers during a call This is used when calling a menu driven phone system 1 Press the Phone screen button on the Home Page or 5 0 on the faceplate to display the...

Page 83: ...ment available at www xmradio com XM service only available in the 48 contiguous United States and Canada In Canada Some deterioration of service may occur in extreme northern latitudes This is beyond the control of XM Satellite Radio Explicit Language Notice Channels with frequent explicit language are indicated with an XL preceding the channel name Channel blocking is available for XM Satellite ...

Page 84: ...and NAVTEQ North America LLC NT and its licensors including their licensors and suppliers on the other hand The Data for areas of Canada includes information taken with permission from Canadian authorities including Her Majesty the Queen in Right of Canada Queen s Printer for Ontario Canada Post Corporation GeoBase NT holds a nonexclusive license from the United States Postal Service to publish an...

Page 85: ...circumstances sources used and the nature of collecting comprehensive geographic data any of which may lead to incorrect results No Warranty This Data is provided to you as is and you agree to use it at your own risk NT and its licensors and their licensors and suppliers make no guarantees representations or warranties of any kind express or implied arising by law or otherwise including but not li...

Page 86: ...ntries do not allow certain liability exclusions or damages limitations so to that extent the above may not apply to you Export Control You agree not to export from anywhere any part of the Data provided to you or any direct product thereof except in compliance with and with all licenses and approvals required under applicable export laws rules and regulations Entire Agreement These terms and cond...

Page 87: ...ICE OF USE CONTRACTOR MANUFACTURER SUPPLIER NAME NAVTEQ CONTRACTOR MANUFACTURER SUPPLIER ADDRESS 425 West Randolph Street Chicago IL 60606 This Data is a commercial item as defined in FAR 2 101 and is subject to the End User License Agreement under which this Data was provided 2011 NAVTEQ All rights reserved If the Contracting Officer federal government agency or any federal official refuses to us...

Page 88: ...Black plate 88 1 Chevrolet Equinox and GMC Terrain Navigation System Include Mex 2012 88 Infotainment System 2 NOTES ...

Page 89: ...cules Canadiens 3 Canceling Voice Recognition 64 CD Player 21 Cleaning the Display 13 Clearing the System 71 Conference Calling 81 Configure Menu 49 D Database Coverage Explanations 64 Deleting Personal Information 13 Destination Download OnStar 48 Destination Menu with Route Guidance Active 45 Destination Navigation 37 Detailed Areas 34 Devices Auxiliary 26 Display Settings 56 Driving on a Route ...

Page 90: ...g Stored Numbers 68 Loading and Ejecting Discs 22 M Making a Call 68 77 Map Adjustments 33 Map Data Updates 63 Map End User License Agreement 84 Map Scales 33 Maps 34 Menu Configure 49 Mixed Band Presets 19 MP3 24 Mute or UnMute a Call 82 Muting a Call 70 N Navigation Destination 37 Symbols 35 Using the System 30 Navigation Audio System 15 Navigation Settings 51 Navigation Settings Button 52 Navig...

Page 91: ...he Radio 14 Problems with Route Guidance 62 R Radio Data System RDS 20 Radio Settings 51 Radios AM FM Radio 14 Satellite 20 Receiving a Call 69 S Satellite Radio 20 Scroll Features 34 Storing and Deleting Phone Numbers 67 Storing Radio Station Presets 18 Symbols Navigation 35 System Needs Service If 63 T Three Way Calling 70 Time and Date Settings 50 Touch Screen Buttons 8 Transferring a Call 70 U...

Page 92: ... Terrain Navigation System Include Mex 2012 i 4 INDEX V Vehicle Positioning 62 Vehicle Settings 56 Voice Pass Thru 71 Voice Recognition 64 X XM Categories 21 XM NavTraffic If Equipped 57 XM Satellite Radio Service 20 XM Weather If Equipped 58 ...

Reviews: