background image

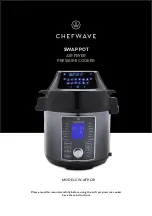
SWAP POT

AIR FRYER

PRESSURE COOKER

MODEL CW-AFPC01

Please read this manual carefully before using the air fryer pressure cooker.

Save these instructions.

Summary of Contents for Swap Pot CW-AFPC01

Page 1: ...SWAP POT AIR FRYER PRESSURE COOKER MODEL CW AFPC01 Please read this manual carefully before using the air fryer pressure cooker Save these instructions...

Page 2: ...ouble free operation please read this manual carefully before using this appliance and keep it in a safe place for future reference We hope you enjoy your new ChefWave Swap Pot Air Fryer Pressure Cook...

Page 3: ...Instructions for Air Fryer Cooking Instructions for Pressure Cooking Pressure Cooking Settings Pressure Release Instructions for Non Pressure Cooking Settings Function Settings for Pressure Cooker Fun...

Page 4: ...inches of space on all sides of the appliance Never place the appliance on or near stoves or burners or in an oven Ensure that the voltage of the appliance is compatible with the voltage in your home...

Page 5: ...become hot during use The rotating mesh basket WILL be hot Wear oven mitts or use the fetch tool when handling hot components or surfaces Should the unit emit black smoke unplug immediately and wait f...

Page 6: ...Main Unit 2 Air Fryer Unit 3 Pressure Lid 4 Fry Basket 5 Roast Rack 6 6 Quart Removable Cooking Pot 7 Spoon 8 Measuring Cup 9 Condensation Collector 10 Power Cable 2 6 3 4 5 1 7 10 PARTS ACCESSORIES...

Page 7: ...ING THE ACCESSORIES The Swap Pot comes with two lids the pressure lid and the air fryer unit Attach the lid you wish to use to the main unit MAIN UNIT PRESSURE LID AIR FRYER UNIT PRESSURE COOKER AIR F...

Page 8: ...t to roast and fry foods using the air fryer unit When the air fryer unit is attached the pressure cooker functionality will be disabled When the pressure cooker lid is attached the front LCD control...

Page 9: ...o be used to turn off the machine canceling the cooking process Use the Menu button to cycle through the 12 presets If desired use the Temperature button thermometer icon on the top right corner to ma...

Page 10: ...t time See the Instructions for Pressure Cooking section on page 14 for instructions Use the Keep Warm Cancel button to end the selected cooking function or to keep your food warm after cooking Pressi...

Page 11: ...ograms are selected Ready to use and you can choose a program Your cooker is ready to use and it is preheating Timer indicating how much time is still left Used for Cook Time Delay Start or Keep Warm...

Page 12: ...is lined up with the metal pin in the center of the lid Press down firmly until the Y ring is secured onto the lid 3 Remove the inner pot and make sure that all parts are included 4 For the first use...

Page 13: ...ons section on page 2 for more information on safety precautions to observe How to Use Liquids in the Pressure Cooker Always add a minimum of 1 cup of water or other liquid to produce sufficient steam...

Page 14: ...ows The countdown timer can be set in 1 minute increments between 1 minute and 24 hours 3 To select a preset press the Menu button Doing so will cycle through the 12 options Fromthere ifyouchoose youc...

Page 15: ...elease handle to the sealing position Be sure that the float valve on the inside of the lid has dropped down The float valve is what prevents the lid from being opened before it is safe to do so 4 Plu...

Page 16: ...oatmeal 8 Afterselectingacookingfunction youwillhearthreebeeps Thedisplaywill show preheating while the pot warms up Depending on your selections preheating can take anywhere from a few minutes to mor...

Page 17: ...inute to 24 hours The temperature can be set in 10 degree increments from 90 F to 400 F Delay Start The Delay Start button will start the cooking at a designated time in the future This setting must b...

Page 18: ...produce foam such as soup pasta oatmeal and beans to prevent liquid from splattering out When cooking is complete do not turn the steam release handle Rather let the pressure release on its own This c...

Page 19: ...or blackening meat 4 Press the Start button and you will hear three beeps The display will show on while the pot warms up When the desired temperature has been reached the display will show hot 5 Add...

Page 20: ...the inner pot and the heating plate are all dry Place the inner pot inside the cooker base NOTE Keep the power turned off 2 Plug the appliance into an outlet It will enter standby mode 3 Add milk to...

Page 21: ...g times specified in this chart do not include the amount of time it takes for the cooker to reach the optimal temperature and pressure nor the amount of time that it takes for pressure to release aft...

Page 22: ...min Normal 5 min More 6 min Meat Stew 1 minute to 4 hours Less 20 min Normal 35 min More 45 min Bean Chili 1 minute to 4 hours Less 25 min Normal 30 min More 40 min Poultry 1 minute to 4 hours Less 10...

Page 23: ...minute to 6 hours Less 12 min Normal 30 min More 35 min Porridge Oats 1 to 99 minutes Less 4 min Normal 5 min More 6 min Pork Ribs 1 minute to 4 hours Less 20 min Normal 35 min More 45 min Cake 1 minu...

Page 24: ...s Less 8 min Normal 15 min More 18 min Yogurt 1 minute to 6 hours Less 12 min Normal 30 min More 35 min Slow Cook 1 to 99 minutes Less 4 min Normal 5 min More 6 min Saut 1 minute to 4 hours Less 20 mi...

Page 25: ...o 400 F Fish 15 minutes 1 to 60 minutes 320 F 160 F to 400 F Hamburger 13 minutes 1 to 60 minutes 360 F 160 F to 400 F Pizza 15 minutes 1 to 60 minutes 360 F 160 F to 400 F Beef Steak 25 minutes 1 to...

Page 26: ...3 cups 18 to 22 minutes 360 F Add Tbsp oil Homemade Potato Cubes 1 cup 12 to 18 minutes 360 F Add Tbsp oil Hash Browns 2 cups 15 to 18 minutes 400 F N A Potato Gratin 1 1 lb 15 to 18 minutes 400 F N A...

Page 27: ...zen Fish Sticks 1 1 lb 6 to 10 minutes 400 F N A Mozzarella Sticks 1 1 lb 8 to 10 minutes 360 F N A Stuffed Vegetables 1 1 lb 10 minutes 320 F N A Cake 1 cups 20 to 25 minutes 320 F N A Quiche 1 cups...

Page 28: ...es on the steam release valve and handle should be cleaned regularly Wash with warm water and mild dishwashing liquid Air Fryer Unit Cooker Base and Heating Plate Use a dry or damp soft cloth never we...

Page 29: ...ntinue use and unplug the appliance Properly position the inner pot E3 The temperature is too high or the inner pot does not contain liquid Display shows a blinking 00 XX Unplug the power cord Careful...

Page 30: ...ryer lid is correctly placed the body display will show AIRF and the air fryer will resume its previous function Water is dripping from the unit Condensation collector is not installed Install the con...

Page 31: ...aling ring Sealing ring has food debris attached Wash the sealing ring Lid is not locked Reposition and lock the lid The float valve is leaking steam for longer than 2 minutes Float valve and its seal...

Page 32: ...Y AC 120V 60 HZ POWER RATING Air Fryer 1500W Pressure Cooker 1000W OPERATING TEMPERATURE Air Fryer 120 F 400 F Pressure Cooker 230 F 244 F DISPLAY LED Touchscreen INNER POT VOLUME 6 qt INNER POT CALIB...

Page 33: ...instructions and if it has not been modified repaired or interfered with by any unauthorized person or damaged through misuse This guarantee does not cover wear and tear nor breakables such as glass a...

Page 34: ...32 NOTES...

Page 35: ...33 NOTES...

Page 36: ......

Reviews: