5
Installing The CheckBox HSv625 Controller
Locating the equipment
The CheckBox HSv625 must be located indoors in a clean, dry area and should be
located close to power and the Internet connection(s)
Connecting the equipment
The CheckBox HSv625 will connect to your modem using an Ethernet network cable.
Depending upon your particular modem the jack may be marked “Internet”, “LAN”, “PC”,
“Host” or something else.
The CheckBox HSv625 can connect three different Internet connections and provides
automatic load balancing and automatic failover switching.
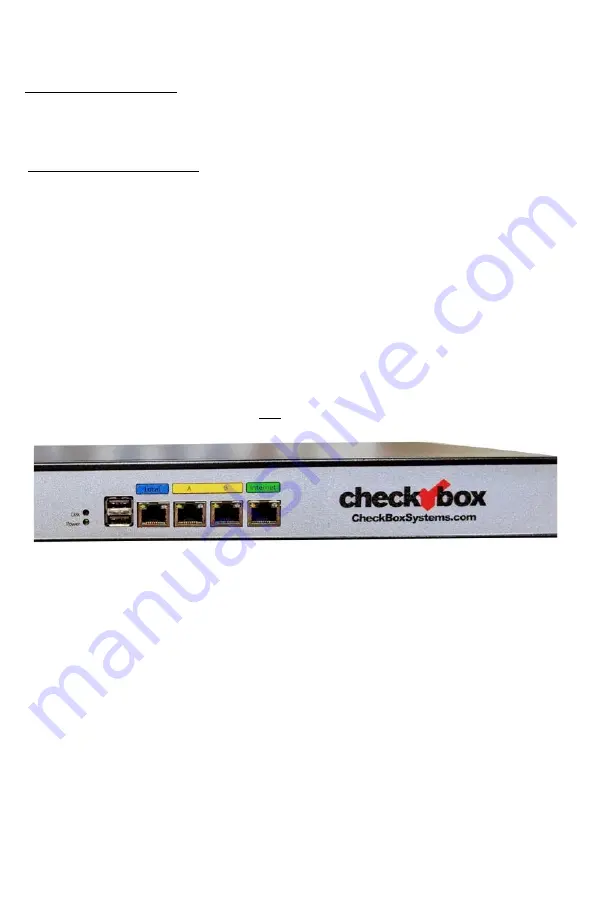
Connect your CheckBox HSv625 as follows:
•
The Local Port connects to your access points or networks switches connecting your
access points.
•
Ports A and B are flexible ports that can be connected to either Internet connections
or to your access points or networks switches connecting your access points.
•
The Internet Port connects to your first Internet connection.
Ports A and B are flexible and can be used for either additional Internet connections or
as local ports. However before they can be used you need to select what role they will
be used in.
It is O.K. to connect the cables first, but by default the ports are deactivated and you
will need to set their role before the system will recognize them. See page 7.
Your CheckBox HSv625 is equipped with 2.5Gigabit Ethernet ports. Many
Ethernet switches and computers are equipped with Gigabit ports—they are
only capable of one gigabit of throughput.
Your HSv625 will work with the slower ports, however to get the best
performance from your HSv625 use Ethernet devices (switches, modems etc.)
that have 2.5 Gigabit or 5 Gigabit ports.
Summary of Contents for HSv625
Page 12: ...12...


