21
04 Getting started
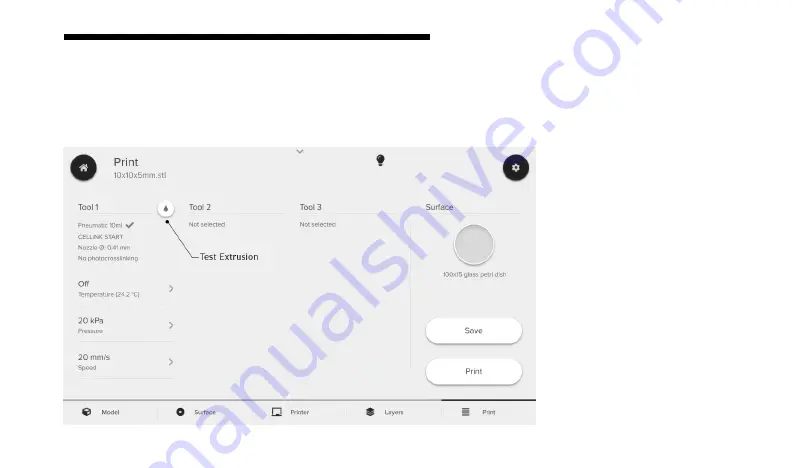
8. Prime the nozzle/needle and test bioink flow by using the Drop button next to the pressure
setting (Figure 11). Press Print to proceed to the calibration page.
Figure 11:
The Print menu is where you can
preview your print parameters and test the
extrusion rate. You can adjust the param-
eters on this menu. Press Print to proceed
to the Calibration menu. Press Save to save
your configuration as a protocol.
Summary of Contents for 000000020356
Page 1: ...BIO X 10 mL Pneumatic Printhead User Manual ...
Page 2: ......
Page 4: ......
Page 5: ...1 Package contents 01 ...
Page 7: ...3 Technical specifications 02 ...
Page 12: ...8 ...
Page 13: ...9 Safety information 03 ...
Page 15: ...11 Getting started 04 ...
Page 28: ...24 04 Getting started Figure 13 Removing the Pneumatic Printhead from the BIO X A B ...
Page 31: ...27 Relevant G code commands 05 ...
Page 34: ...30 ...
Page 35: ...31 Frequently asked questions 06 ...
Page 38: ...34 ...
Page 39: ...35 Maintenance 07 ...
Page 41: ...37 Appendix A Consumables needles and nozzles ...
Page 48: ...www cellink com ...


