


24
5.2.4 Camera settings
After a connection to the camera has been established, it is time to adjust camera settings. To
do this, select “Camera…” from “Settings” menu. This will open the window shown in Fig.
5.11 (the window shown in Fig. 5.12 can be opened by clicking “Image” tab).
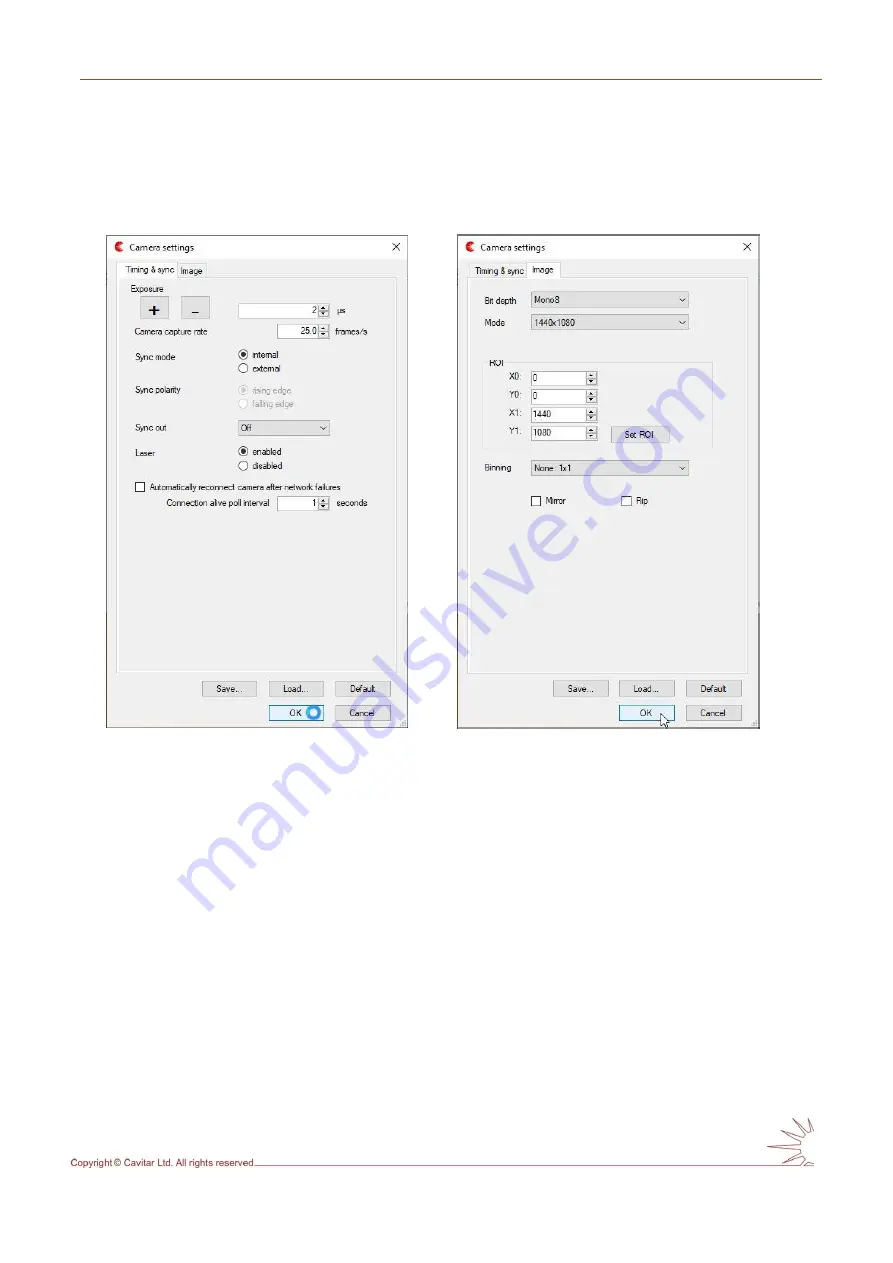
Fig. 5.11. Camera settings (Timing & sync).
Fig. 5.12. Camera settings (Image).
For optimal results, make the following adjustments on the “Timing & sync” tab:
set “Exposure” to “2
s” or “3
s”, depending on which value gives better results
o
to make the arc brighter, it is possible to increase the exposure time further
set “Camera capture rate” e.g. to “25 fps” (or your preferred frame rate, up to 60 fps)
set “Sync mode” to “internal”
o
the use of external sync mode (e.g. synchronization to arc) requires a special
power&sync cable instead of the standard power cable
o
if external sync mode is used, select correct “Sync polarity”
o
external sync signal: 0…4,5V low, 11…24V high, input impedance ~680 ohm
set “Sync out” to “Off
o
the use of “Sync out” feature (e.g. to synchronize welding cameras together)
requires a special power&sync cable instead of the standard power cable
the receiving camera must be set for external sync mode
set “Laser” to “enabled” in order to have laser illumination in the images
automatic reconnect feature can be used in case there are connection problems
between camera and PC