background image

INTRODUCTION

E-9

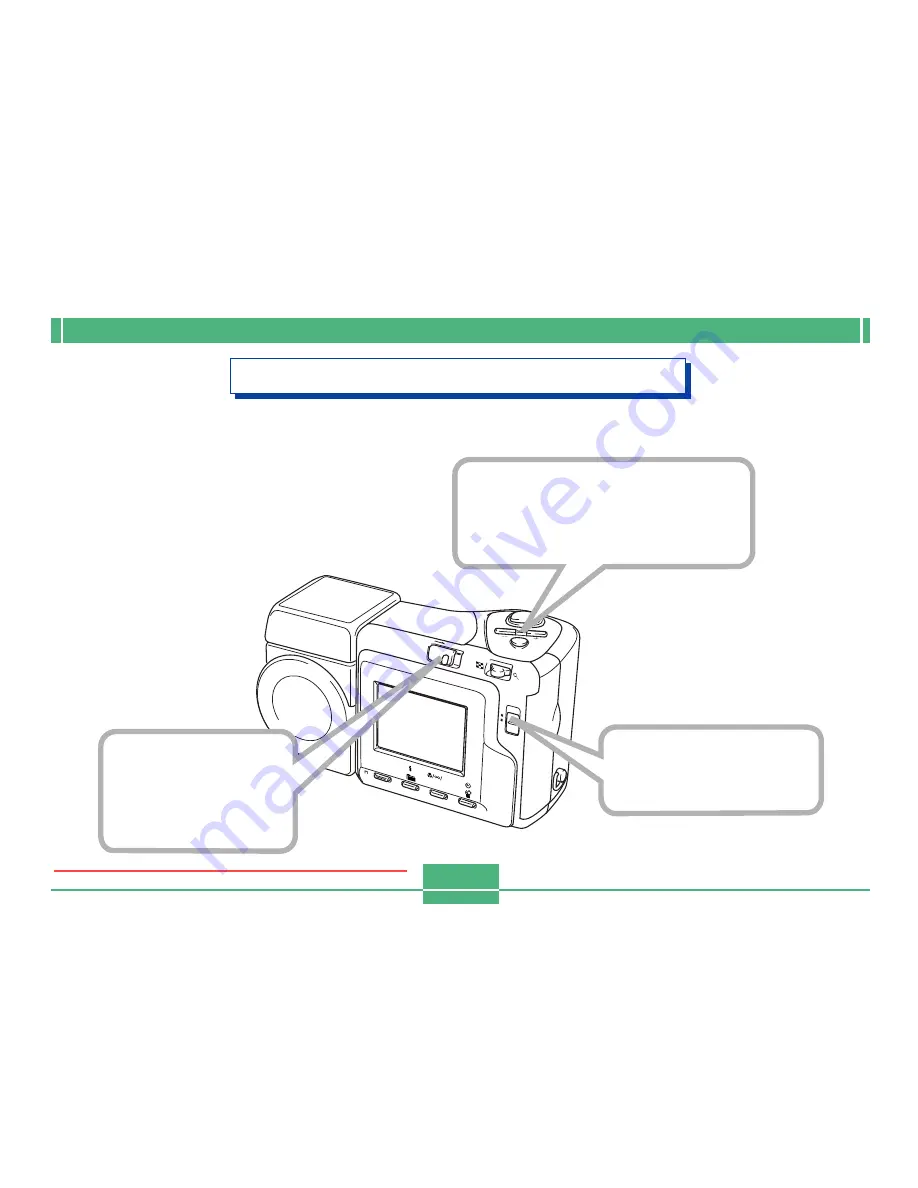
Playback (page E-99)

CARD

POWER

ON/OFF

W

T

MENU

PLA

Y

REC

SHIFT

INFO

MF

RESIZE

2

3

Slide the REC/PLAY 
selector to “PLAY”.

Use [+] (forward) and [–] (back) 
to scroll through stored images 
on the monitor screen.

Slide the POWER 
ON/OFF switch to 
the right to turn on 
the camera.

1

Downloaded from ManualsCamera.com Manuals

Summary of Contents for QV-2400UX

Page 1: ...cedures in this User s Guide are based on the QV 2400UX The same procedures also apply to the QV 2900UX unless specifically noted otherwise Certain camera models may not be available in some geographi...

Page 2: ...acking Check to make sure that all of the items shown below are included with your camera If something is missing contact your dealer as soon as possible Camera Soft case Lens cap cap holder The lens...

Page 3: ...ns E 24 Monitor Screen Indicators E 25 REC mode E 25 PLAY mode E 26 Changing the Contents of the Monitor Screen E 27 Operation Indicator Lamp E 28 REC mode E 28 PLAY mode E 29 Using the Bundled Access...

Page 4: ...82 Quick Exposure Mode Selection E 83 Selecting the Metering Mode E 84 Quick Metering Mode Selection E 85 Setting the Sensitivity Level E 85 Using the Filter Function E 86 Downloaded from ManualsCame...

Page 5: ...N Menu Settings E 98 E 99 PLAYBACK Basic Playback Operation E 99 Playing a Movie E 100 Playing a Panorama E 101 Enlarging the Playback Image E 102 Displaying the 9 image View E 103 Selecting a Specifi...

Page 6: ...82 Quick Exposure Mode Selection E 83 Selecting the Metering Mode E 84 Quick Metering Mode Selection E 85 Setting the Sensitivity Level E 85 Using the Filter Function E 86 Downloaded from ManualsCame...

Page 7: ...DUCTION E 7 Quick Reference Getting Ready 1 2 Load batteries Set the current time and date page E 32 3 PUSH 1 2 Insert the memory card page E 39 page E 45 3 1 2 3 Downloaded from ManualsCamera com Man...

Page 8: ...de the REC PLAY selector to REC Point the camera at the subject compose the image on the monitor screen and press the shutter release button half way to focus the image Slide the POWER ON OFF switch t...

Page 9: ...MENU PLAY REC SHIFT INFO MF RESIZE 2 3 Slide the REC PLAY selector to PLAY Use forward and back to scroll through stored images on the monitor screen Slide the POWER ON OFF switch to the right to turn...

Page 10: ...delete 5 Slide the REC PLAY selector to PLAY Double check to make sure you really want to delete the image you selected You can exit the image delete operation by pressing MENU 6 Use and to move the...

Page 11: ...back up all important data on other media to protect against its loss Windows and Internet Explorer are registered trademarks of Microsoft Corporation Macintosh is a registered trademark of Apple Com...

Page 12: ...82 Quick Exposure Mode Selection E 83 Selecting the Metering Mode E 84 Quick Metering Mode Selection E 85 Setting the Sensitivity Level E 85 Using the Filter Function E 86 Downloaded from ManualsCame...

Page 13: ...E 13 Recording Features page E 64 Portrait Mode Best Shot Mode page E 67 page E 65 Landscape Mode Movie Mode page E 73 page E 66 Night Scene Mode Panorama Mode page E 75 Downloaded from ManualsCamera...

Page 14: ...ture priority AE shutter speed priority AE manual exposure pages E 78 to E 83 Three metering modes Multi pattern center weighted spot pages E 84 Four focus modes Auto focus macro infinity manual pages...

Page 15: ...ns E 24 Monitor Screen Indicators E 25 REC mode E 25 PLAY mode E 26 Changing the Contents of the Monitor Screen E 27 Operation Indicator Lamp E 28 REC mode E 28 PLAY mode E 29 Using the Bundled Access...

Page 16: ...82 Quick Exposure Mode Selection E 83 Selecting the Metering Mode E 84 Quick Metering Mode Selection E 85 Setting the Sensitivity Level E 85 Using the Filter Function E 86 Downloaded from ManualsCame...

Page 17: ...ns E 24 Monitor Screen Indicators E 25 REC mode E 25 PLAY mode E 26 Changing the Contents of the Monitor Screen E 27 Operation Indicator Lamp E 28 REC mode E 28 PLAY mode E 29 Using the Bundled Access...

Page 18: ...he following illustrations show the names of each component button and switch on the camera Front GETTING ACQUAINTED Shutter release button page E 44 48 Terminal panel cover page E 20 Flash page E 53...

Page 19: ...lete button pages E 61 111 SHIFT INFO Shift Information button pages E 26 95 Memory card slot cover page E 39 REC PLAY selector page E 48 Zoom slider pages E 51 102 103 Monitor screen page E 25 Operat...

Page 20: ...urface of the lens with a soft lens cloth The lens of the QV 2400UX extends from its body when you turn on power and retracts when you turn off power Take care not to subject the lens to undue force o...

Page 21: ...with it installed Make sure that Macro Mode is selected as the focus mode whenever you are using the Wide Conver sion Lens Note that optical zoom is restricted as shown below in the Macro Mode QV 240...

Page 22: ...2400UX extends from its body when you turn on power and retracts when you turn off power Take care not to subject the lens to undue force or impact and never set the camera face down so the lens is i...

Page 23: ...talled Make sure that Macro Mode is selected as the focus mode whenever you are using the Wide Conver sion Lens Note that optical zoom is restricted as shown below in the Macro Mode QV 2400UX 1X fixed...

Page 24: ...urface of the lens with a soft lens cloth The lens of the QV 2400UX extends from its body when you turn on power and retracts when you turn off power Take care not to subject the lens to undue force o...

Page 25: ...peed causes the corresponding monitor screen value to turn yellow Aperture value Recording Mode indicator NORMAL PORTRAIT LANDSCAPE NIGHT SCENE BEST SHOT MOVIE MOVIE PAST PANORAMA INTERVAL Self timer...

Page 26: ...2400UX extends from its body when you turn on power and retracts when you turn off power Take care not to subject the lens to undue force or impact and never set the camera face down so the lens is i...

Page 27: ...V 2400UX 1X fixed QV 2400UX QV 2900UX 1X to 1 6X QV 2900UX Using a Filter The lenses of both camera models are threaded With the QV 2400UX you can screw on an optionally avail able Conversion Lens Ada...

Page 28: ...2400UX extends from its body when you turn on power and retracts when you turn off power Take care not to subject the lens to undue force or impact and never set the camera face down so the lens is i...

Page 29: ...talled Make sure that Macro Mode is selected as the focus mode whenever you are using the Wide Conver sion Lens Note that optical zoom is restricted as shown below in the Macro Mode QV 2400UX 1X fixed...

Page 30: ...of the following conditions While a slideshow is playing When you are performing operations on a com puter printer or other external device connected to the camera s DIGITAL terminal or USB port While...

Page 31: ...ect button Side marked with arrow Memory Cards This camera supports use of a CompactFlash memory card CF TYPE I II or IBM microdrive for image storage Note that all mentions of memory card in this man...

Page 32: ...of the following conditions While a slideshow is playing When you are performing operations on a com puter printer or other external device connected to the camera s DIGITAL terminal or USB port While...

Page 33: ...r image storage Note that all mentions of memory card in this manual refer both to a CompactFlash memory card and IBM microdrive unless specifically noted otherwise IMPORTANT Make sure that the power...

Page 34: ...the following conditions While a slideshow is playing When you are performing operations on a com puter printer or other external device connected to the camera s DIGITAL terminal or USB port While t...

Page 35: ...r image storage Note that all mentions of memory card in this manual refer both to a CompactFlash memory card and IBM microdrive unless specifically noted otherwise IMPORTANT Make sure that the power...

Page 36: ...of the following conditions While a slideshow is playing When you are performing operations on a com puter printer or other external device connected to the camera s DIGITAL terminal or USB port While...

Page 37: ...ect button Side marked with arrow Memory Cards This camera supports use of a CompactFlash memory card CF TYPE I II or IBM microdrive for image storage Note that all mentions of memory card in this man...

Page 38: ...the following conditions While a slideshow is playing When you are performing operations on a com puter printer or other external device connected to the camera s DIGITAL terminal or USB port While t...

Page 39: ...ect button Side marked with arrow Memory Cards This camera supports use of a CompactFlash memory card CF TYPE I II or IBM microdrive for image storage Note that all mentions of memory card in this man...

Page 40: ...of the following conditions While a slideshow is playing When you are performing operations on a com puter printer or other external device connected to the camera s DIGITAL terminal or USB port While...

Page 41: ...r image storage Note that all mentions of memory card in this manual refer both to a CompactFlash memory card and IBM microdrive unless specifically noted otherwise IMPORTANT Make sure that the power...

Page 42: ...the following conditions While a slideshow is playing When you are performing operations on a com puter printer or other external device connected to the camera s DIGITAL terminal or USB port While t...

Page 43: ...r image storage Note that all mentions of memory card in this manual refer both to a CompactFlash memory card and IBM microdrive unless specifically noted otherwise IMPORTANT Make sure that the power...

Page 44: ...of the following conditions While a slideshow is playing When you are performing operations on a com puter printer or other external device connected to the camera s DIGITAL terminal or USB port While...

Page 45: ...r image storage Note that all mentions of memory card in this manual refer both to a CompactFlash memory card and IBM microdrive unless specifically noted otherwise IMPORTANT Make sure that the power...

Page 46: ...of the following conditions While a slideshow is playing When you are performing operations on a com puter printer or other external device connected to the camera s DIGITAL terminal or USB port While...

Page 47: ...r image storage Note that all mentions of memory card in this manual refer both to a CompactFlash memory card and IBM microdrive unless specifically noted otherwise IMPORTANT Make sure that the power...

Reviews: