background image

4

d. New or additional wires may be needed to accommo-

date added humidity outputs.

e. Discard or recycle old control.

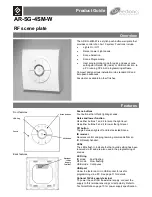
3. Remove mounting plate from back of thermostat display

module by pressing the two tabs on the bottom edge and
pulling away. See Fig. 1. Figure 2 shows the mounting
plate removed from the module.

4. Route wires through large hole in mounting base. Level

mounting base against wall (for aesthetic purposes only
— the display module does not need be leveled for
proper operation) and mark wall through 2 mounting
holes. See Fig. 3.

5. Drill two 3/16-in. mounting holes in wall where marked.

Control may be mounted to a standard junction box, if
desired. Hole pattern on control mounting base matches
junction box mounting holes.

!

CAUTION

UNIT DAMAGE AND SAFETY HAZARD

Failure to follow this caution may damage equipment.

Improper wiring or installation may damage the thermo-
stat. Check to make sure wiring is correct before
proceeding with installation or turning on unit.

6. Secure rear plastic mounting base to wall with 2 screws

and anchors provided. Additional mounting holes are
available for more secure mounting if needed. Make sure
all wires extend through hole in mounting base.

7. Adjust length and routing of each wire to reach proper

connector block and terminal on mounting base with 1/4-
in. extra wire.

8. Connect two wires from the equipment control module to

the display module mounting base, being careful not to
over-tighten the screws. Correct polarity must be
observed when connecting the two wires. If wires are
connected incorrectly, the display module will not
operate.
See Fig. 4 and 5.

9. Connect red wire of the pigtail to V+ RED terminal.

Connect black wire of the pigtail to Vg BLACK terminal.

NOTE: The 2-wire pigtail is not intended to support the
weight of the thermostat. Do not hang the thermostat
from the equipment control module screw terminals.

10. Push any excess wire into wall and against mounting

base. Seal hole in wall to prevent air leaks. Leaks can
affect operation and cause incorrect temperature and/or
humidity measurement.

11. Attach 2-wire pigtail to display module. Pigtail is packed

loose in the box from the factory. Pigtail is attached to
the back of the display module via 2-pin, keyed connec-
tor.

12. Reattach display module body to mounting base by first

setting the module on at top of mounting base and then
snapping the bottom corners of display module into
place. See Fig. 6.

Summary of Contents for ComfortChoice EDGE

Page 1: ...EMPERATURE SET POINTS 5 HEATING AND COOLING COMFORT SET POINTS 5 Step 6 System Configuration 5 CONFIGURATION 6 To Enter and Exit Configuration Mode 6 While in Configuration Mode 6 Configuration Options Option 1 Equipment Type 6 Option 2 Replace Filter Reminder 6 Option 4 Fan G On With W W1 Selection 6 Option 6 Cooling Lockout 7 Option 8 Auxiliary Heat Lockout Temperature 7 Option 11 Adjustable Set...

Page 2: ...This is a Class A product In a domestic environment this product may cause radio interference in which case the user may be required to take adequate measure ...

Page 3: ...ent not supplied by Carrier to facilitate utility auxiliary curtailment or optionally control a residential device remotely through combined wireless internet capabil ity Device is wired to the Utility I O board INSTALLATION CONSIDERATIONS These instructions cover the physical installation and start up of the ComfortChoice system 1 Install thermostat in non condensing areas with ambients between 3...

Page 4: ...ape any unneeded conductors Plan the routing of wiring early to avoid possible problems later on Remember all wires converge at the Utility I O board so its location is important Step 3 Install Components INSTALL UTILITY I O BOARD The Utility I O board is designed so that wires can enter it from behind above or below Plan wire routing before mounting Utility I O Board 1 Remove cover to access moun...

Page 5: ... mounting if needed Make sure all wires extend through hole in mounting base 7 Adjust length and routing of each wire to reach proper connector block and terminal on mounting base with 1 4 in extra wire 8 Connect two wires from the equipment control module to the display module mounting base being careful not to over tighten the screws Correct polarity must be observed when connecting the two wire...

Page 6: ...e and equipment control module These two wires V and Vg do not provide ordinary 24 Vac They carry a combination of power and communications data that is unique to these products Step 5 Understanding Sequence of Operations TEMPERATURE SET POINTS The ComfortChoice System uses 2 temperature set points the higher for cooling and the lower for heating A minimum difference of 2 F is normally enforced be...

Page 7: ...on options Each option is described below Configuration Options OPTION 01 EQUIPMENT TYPE Determines the control method of the thermostat It should match the type of equipment used Equipment Types are as follows H2 Two speed Heat Pump with a fan coil HP Single speed Heat Pump with a fan coil A2 Two speed AC with a furnace AC Single speed AC with a furnacel H Heat only system Furnace or fan coil onl...

Page 8: ...ammed period that recovery starts Recovery takes place smoothly during the selected recovery time ending at the recovery time and temperature which is programmed Allowable selections are OF off 30 60 and 90 The default is 90 OPTION 13 ROOM AIR TEMPERATURE OFFSET ADJUSTMENT OFFSET Selects the number of degrees to be added to the displayed temperature to calibrate or deliberately miscalibrate the me...

Page 9: ...within the set point limits of OPTION 26 and OPTION 27 and time of day and the calendar The occupied button is functional When set to 2 the user has access to change the set points only The occupied button is functional When set to 3 the entire keypad is locked When a button is pressed the backlight will turn on but none of the operating parameters will be changed When the keypad lock selection is...

Page 10: ...n the triangle icon next to HOLD This will maintain set points not allowing them to change with programmed schedule Use the FAN button to select between AUTO fan on only with equipment and On fan on continuously fan modes OPERATIONAL INFORMATION Five minute Compressor Timeguard This timer prevents the compressor from starting unless it has been off for at least 5 minutes It can be defeated for 1 c...

Page 11: ...he communication network In the event of loss of network communication you can manually set the time and date by following the instructions below To set the clock Press and release the SET button until clock is displayed in the left center of the display along with the time at the bottom center of the screen Use the softkeys to move the box around the digits to be set and use the UP or DOWN button...

Page 12: ...ary programming mode is active the display will show the icon AUXILIARY and the current program period wake day eve sleep will be displayed in place of the room temperature display 3 Press and release the soft key below the days of the week until the weekday icons Mo Tu Wed Thur Fri are displayed 4 Press and release the soft key below the period wake day eve sleep until the wake period is displaye...

Page 13: ...chedule settings and user settings will be factory default values Replace the thermostat I O Board Error Codes Error codes for the I O board are indicated by the flash rate of the on board LED The slow flash rate is the first digit and the fast flash rate is the second During normal operation the flash rate of the LED will be 1 second on 1 second off 23 Flash Memory Error Replace the I O Board 25 ...

Page 14: ...13 Table 5 Temperature Ohm Relationship ...

Page 15: ...ioner Figure 12 1 Stage Furnace with 2 Stage Air Conditioner Figure 13 2 Stage Furnace with 1 Stage Air Conditioner Figure 14 Typical fan Coil with 1 Stage Air Conditioner Figure 10 1 Stage Furnace Figure 11 1 Stage Furnace with 1 Stage Air Conditioner ...

Page 16: ...15 Figure 16 Typical Fan Coil with 2 Stage Air Conditioner Figure 17 Typical Fan Coil with 2 Stage Heat Pump with Reversing Value Active in Cooling Figure 15 2 Stage Furnace with 2 Stage Air Conditioner ...

Page 17: ...16 Figure 18 Typical Fan Coil with 1 Stage Heat Pump with Reversing Valve Active in Cooling ...

Reviews: